Adding a powerpoint or socket

Electrical equipment is now used more and more in the home. You should never overload an existing socket, but fit an extra one instead.

electrical testing

There’s nothing really difficult about installing a new power point. It’s easier than putting in a new light as you don’t have to worry about a switch cable. Ever since the early 1950s, the power supply to the sockets has almost always been wired as a ring circuit, where the cable starts and ends at the consumer unit. Houses rewired since then will almost certainly have had this system installed. This means that once you’ve decided where you want the new outlet point – by a shelf in the living room for a hi-fi system, dvd, computer, or over a worktop in the kitchen, for example – all you then have to do is to run a ‘branch’ or ‘spur’ to it from a convenient point on a nearby ring circuit. The connection could be made at any socket on the ring (unless it already has a spur coming from it), or by using a threeterminal junction box inserted into the cable run.

Each spur can have either two singles or one double socket fitted to it, or else a fused connection unit. But new regulations will come into force from the beginning of 1983 and then you’ll only be able to install one single or one double socket on the spur.

Checking your circuits

Although it’s very likely that your house has ring circuits for the power supply, it’s important to make sure. A ring circuit serves a number of 13A power outlets, and the sockets themselves take the familiar three-pin plugs with flat pins. But having this type of socket doesn’t necessarily mean you’ve got a ring circuit – a new radial circuit may have been installed with these fittings, or an old radial circuit may simply have been modernised with new socket outlets. If in doubt, get an electrician to check the circuit.

First you’ve got to check whether you’ve got a modern consumer unit or separate fuse boxes for each of the circuits. Having a consumer unit is a fair indication that you’ve got ring circuit wiring, and if two cables are connected to each individual 30Afuseway in the unit this will confirm it. Normally each floor of the house will have a separate ring circuit, protected by a 30A fuse or MCB.

If you have separate fuse boxes, look for the ones with 30A fuses. If they have one supply cable going into them and two circuit cables coming out, this indicates a ring circuit. It’s easy to identify the sockets on any particular circuit simply by plugging in electrical appliances, such as table lamps, turning off the power and then removing a 30A fuse from the fuse box or consumer unit, or switching off a 30A MCB. When you restore the supply, the equipment that remains off will indicate which sockets are on the circuit.

Dealing with radial circuits

Where a house hasn’t got ring circuits, then the power sockets will be supplied by some form of radial circuit. Because there are different types of radial circuit, each governed by separate regulations controlling the number and location of sockets on the circuit, the size of cable to be used and the size of fuse protecting it, it’s not possible to connect a spur to a nearby radial circuit. In all probability you’ll have to install a new circuit starting at a new, separate fuse box or else at a spare fuseway in a consumer unit.

If you’ve still got unfused 15A, 5A and 2A round-pin plugs, then this is a sure sign of very old radial circuits, which were installed more than 30 years ago. Rather than extending the system you should seriously consider taking these circuits out and replacing them with ring circuits,-as the wiring will almost certainly be nearing the end of its life-. You’ll then be able to position the new sockets exactly where you want them. If you’re in any doubt about the circuitry in your house you should contact your local electricity authority or a qualified electrician before carrying out any work.

Ceiling lights and switches

Most ceiling lights are positioned centrally in a room to give general lighting. But by adding another light, or changing the position of an existing fitting, you can highlight particular areas and enhance the decoration.

Putting in a new pendant ceiling light and switch, or changing the position of an existing one, usually presents few problems – even if you have little or no experience of electrical work. A pendant is the most common ceiling light and consists of a lampholder wired to a length of flexible cord which hangs from a ceiling rose. Another type can be plugged into the ceiling rose – in this case the flexible cord has to have a special fitting which slots into a batten holder. Know your system Installing a new ceiling light requires making a simple connection into a nearby lighting circuit either by inserting a junction box or at an existing loop-in rose and then running a cable to a switch. In order to connect into the circuit you’ll first need to know how the lights in your house are wired and which lights belong to which circuit.

Then you’ll be able to work out whether you can actually add another light to the circuit that is nearest to the new light’s position. There are two principal methods of wiring a lighting circuit. In the loop-in method the cable runs from ceiling rose to ceiling rose, stopping at the last one on the circuit, and the switches are wired into the roses. With the junction box system the cable runs to a number of junction boxes each serving a switch and a light. You may well find that both methods have been used in the same circuit to simplify and reduce the cable runs. It’s possible to connect into a nearby rose provided it’s a loop-in type. You can check this simply by turning off the power and unscrewing the rose cover.

A loop-in rose will have more than one red insulated wire going into the central terminal bank of the three in-line terminal banks. However, it can be quite fiddly to fit another cable, given that the terminal banks are very small, so you might find it easier to insert a junction box in the main circuit. And if there isn’t a loop-in rose you’ll have to use this method anyway.

Earthing for lighting circuits

Modern lighting circuits are protected by an earth. But if you’ve got a fairly old system (it’s likely to be based on junction boxes), you might find that it doesn’t have one. So when you’re extending such a circuit, you’re now required to protect the new wiring, light fitting and switch by installing an earth. Consequently, you have to use two-core and earth cable for the extension, which will most probably connect into the existing circuit at a junction box. You then have to run a 1.5mm2 earth cable from this point to the main earthing point.

Circuit additions

Usually there’s a lighting circuit for each floor of a house and in a single storey dwelling there are likely to be two or more. But it’s easy to identify the individual circuits simply by switching on all the lights, turning off the power and taking out a 5A fuse from the consumer unit or switching off an MCB. When you restore the power you’ll know that the lights that remain off all belong to the same circuit. Generally speaking, a lighting circuit serves six to eight fixed lighting points. In fact it can serve up to 12 lampholders provided the total wattage of the bulbs on the circuit doesn’t exceed 1,200 watts. This means that unless other lights have previously been added – wall lights for example – there shouldn’t be a problem of connecting in another light.

Remember, when adding up the bulb wattages, a bulb of less than 100 watts counts as 100 watts and not its face value. The place for lights Apart from bathrooms, where special regulations apply, you can position lights and switches in any place you like inside the house. But bear in mind they are there to fulfil a function, so switches, for example, should be conveniently located – by a door is often the most satisfactory position. Usually they are set on the wall 1.4 metres (4ft 6in) above floor level.

But they can be higher or lower to suit your needs. You mustn’t install pendant lights, especially plain pendants with exposed flexible cords, in a bathroom. This is for your safety. Flexes can become frayed, and if, say, you tried to change a bulb while standing in the bath and touched an exposed conductor you could electrocute yourself. Consequently, all light fittings here must be of the close-mounted type and preferably totally enclosed to keep off condensation. If instead you use an open batten lampholder it must be fitted with a protective shield or skirt which makes it impossible for anyone changing the bulb to touch the metal clamp.

A wall-mounted switch must also be out of reach of a person using the bath or shower. In modern small bathrooms, however, this is often impossible. The alternative is to place the switch just outside the room by the door, or to fit a special ceiling switch operated by an insulating cord which doesn’t have to be out of reach of the bath or the shower.

Putting in switches

There is a great variety of switches available, but all perform the same function of breaking or completing an electrical circuit so you can turn the light off or on. Modern switches are of the rocker type; a one-gang switch has a single switch on the face plate; a two-gang switch has two switches on the same faceplate, and so on. Dimmer switches are slightly different in that you can vary the power flowing to the bulb (so reducing or increasing its brightness) by rotating a control knob. With a new light, you can either connect it into an existing switch position (fitting a two gang switch in place of a one-gang one, for example) or a new switch.

Depending on how you connect into the existing circuit, you’ll have to run the switch cable above the ceiling from a rose or a junction box down the wall to where you are going to locate it. If you want to conceal the cable on the down drop you’ll have to cut a shallow channel – which will damage the existing decoration.

Making the connection

Once you’ve decided where you want to put the light fitting and switch, you then have to decide where it’s best to make the connection into the existing circuit. Wiring runs may require some detective work to find out what each cable is doing – you don’t want to connect into a switch cable by mistake. This may mean climbing into the roof space or raising a few floorboards. You’ll need to do this anyway to run in the new cables to the required positions. As cable is expensive, it’s best to plan your runs to use as little as possible. But when you measure along the proposed route, don’t forget to allow about 200mm extra at the switch, rose and junction box for stripping back the conductors and joining in.

Changing the position of a ceiling light is even easier than adding a new one. If after you’ve turned off the power you undo the existing rose you’ll see immediately the type of lighting circuit you are dealing with. If there is only a black, a red and an earth wire going into it on the fixed wiring side then you have a junction box system. All you have to do is to disconnect the wires from the rose and reconnect them to the respective terminals of a new three-terminal junction box that you’ll have to put in directly above the old fitting. You can then lead off another cable from this junction box to the repositioned ceiling rose. The switch remains unaffected. If the rose is a loop-in type, you have to carry out a similar modification, but this time the switch wires have to be incorporated in the new junction box, which must be a fourterminal type.

Safety with electricity

• never work on a circuit with current on.

Turn off at mains and isolate circuit by removing relevant fuse. Keep this with you until you restore supply

• never touch plugs and sockets with wet hands
• remove plugs from socket when working on appliance
• always use the correct fuse wire when mending a fuse

The importance of earthing

Earthing is an essential safety feature of all wiring systems. To complete a circuit, electricity either flows down the neutral conductor of the supply cable or it flows to earth. That is why you get a shock if you touch a live wire.
The idea of earthing is to connect all metal fittings and appliances in the house with a good conductor – the ‘earth wire’ in cables and flexes. If a fault occurs that makes this metal live,the presence of the earth wire prevents the voltage from rising much above earth voltage.
At the same time, the fault greatly ; increases the current being drawn to the metal via the supply conductor, and this current surge is detected by the circuit fuse, which ‘blows’ and cuts off the current flow. The earth conductor links socket outlets and appliances (via their plugs) and is connected to a main earthing terminal at the house fuse box or consumer unit. This is usually connected to the outer metal sheath of the underground supply cable. All metal pipework in the house is also earthed by being connected to the earth terminal – this is called ‘cross bonding’.

Old wiring

Some old installations may still be using lead-sheathed or tough rubber-sheathed (TRS) wiring, with the conducting wires insulated in vulcanized rubber, or vulcanized rubber insulated, taped and braided

The right connection

The plug is the vital link between any electrical appliance and the mains and must be connected up correctly if it is to do its job properly. With flex in the new colour codes, connect the BRown core to the Bottom Right terminal, the BLue core to the Bottom Left one and the green-and-yellow core (if present) to the top terminal. With cores in old colour codes, Red goes to the bottom Right terminal, BLack to Bottom Left and green to top.
Old colour codes – Before the introduction of new international colour codes, flex used red insulation to denote the live conductor, black for the neutral and green for the earth.

Warning: Electricity is dangerous.

In some European countries, regulations stipulate that all home electrical work must be carried out by a qualified electrician. These insulating materials deteriorate with age (about 25-30 years) so the wiring can become dangerous. Therefore it really does need to be replaced with modern PVC-sheathed and insulated cable.

Electrical Cable & Flex

Two types of wiring are used in the domestic electrical circuits. Fixed cables are normally concealed, and carry electrical current to switches, ceiling lights, and socket outlets. Flexible cords (flexes) connect portable appliances and light fittings to the fixed wiring.

Fixed wiring

This consists mostly of PVC-sheathed cable containing three copper conductors (cores). The core insulated in red PVC is the live and the one in black the ‘neutral’ though in lighting circuits in the cable to the switch both the black and red are live. (The black core is required to have a piece of red sleeving on it to indicate this, although this is often omitted by incompetent electricians. Cables having two red conductors are made for contract work, but rarely stocked and sold retail).

The third core is the earth and this is uninsulated, but when exposed after the sheathing is removed ready for wiring up it must be sleeved in green/yellow striped PVC before being connected to the earth terminal. In some wiring circuits PVC-sheathed cables having one core only are used, for example, where a live core is looped out of a switch or a neutral core is looped out of a light, to supply an additional light or lights. Three-core and earth cable is used for two-way switching. The conductors are insulated in red, blue and yellow; the colour coding is for purposes of identification only.

Cables for fixed wiring
Most domestic wiring is now supplied in metric sizes which refer to the cross-sectional area of one of the conductors, whether it is composed of one or several strands of wire. Most common sizes of cable are 1.0mm2 and 1.5mm2 used for lighting, and 2.5mm2 used for power circuits. Cable with grey sheathing is intended to be concealed in walls or under floors; white sheathing is meant for surface mounting.

Flexible cords

Flexible cords are made in various sizes and current ratings and the types you’ll most often come across are: parallel twin unsheathed, circular PVC-sheathed, circular braided, unkinkable and heat-resisting. Each conductor is made up of a number of strands of copper and it is this which gives the cord its flexibility. The insulation used round the conductors now conforms to an international colour coding standard – brown denotes the live wire, blue the neutral, and green/yellow the earth, when it is part of the flex. Transparent or white insulation is used for a flex that carries a low current and where it doesn’t matter which wire is connected to the live and neutral terminals of an appliance.

Electrical Aid

CHECKLIST FOR ACTION

When something goes wrong with your electrics, use this checklist to identify or eliminate the commonest potential causes of trouble.

Fault

Pendant light doesn’t work
• replace bulb
• check lighting circuit fuse/MCB
• check flex connections at lampholder and ceiling rose
• check flex continuity.

Fault
Electrical appliance doesn’t work
• try appliance at another socket
• check plug fuse (if fitted)
• check plug connections
• check connections at appliance’s own terminal block
• check flex continuity
• check power circuit fuse/MCB
• isolate appliance if fuses blow again.

Fault
Whole circuit is dead
• switch off all lights/disconnect all appliances on circuit
• replace circuit fuse or reset MCB
• switch on lights/plug in appliances one by one and note which blows fuse again
• isolate offending light/appliance, and see Faults 1 and 2 (above)
• check wiring accessories on circuit for causes of short circuits
• replace damaged cable if pierced by nail or drill
• call qualified electrician for help.

Fault
Whole system is dead
• check for local power cut
• reset ELCB if fitted to system (and see Faults 1, 2 and 3 if ELCB cannot be reset)
• call electricity board (main service fuse may have blown).

Fault
Electric shock received
• try to turn off the power
• grab victim’s clothing and pull away from power source, but DO NOT TOUCH WITH BARE HANDS
• keep victim warm
• if victim is conscious, keep warm and call a doctor; don’t give brandy or food
• if breathing or heartbeat has stopped, CALL AN AMBULANCE and give artificial respiration or cardiac massage.

Common electrical faults

Ask for an electrician to help. Be safe

Many electrical breakdowns in the home are caused by only a few common faults.
These include:

• overloading of circuits, causing the circuit fuse to blow or the MCB to trip

• short circuits, where the current bypasses its proper route because of failed insulation or contact between cable or flex cores; the resulting high current flow creates heat and blows the plug fuse (if fitted) and circuit fuse

• earthing faults, where insulation breaks down and allows the metal body of an appliance to become live, causing a shock to the user if the appliance is not properly earthed and blowing a fuse or causing the ELCB to trip otherwise

• poor connections causing overheating that can lead to a fire and to short circuits and earthing faults.

TIP: TESTING FUSES

You can test suspect cartridge fuses (both circuit and plug types) by holding them across the open end of a
• switched-on metalcased torch, with one end on the I casing and the other on the battery. A sound fuse will light the torch.

Tracing electrical faults

When the lights go out or an electrical appliance won’t work, the reason is often obvious. But when it isn’t, it helps to know how to locate the fault and put it right.

Most people’s immediate reaction to something going wrong with their elecricity supply is to head for the meter cupboard, muttering darkly about another blown fuse. Fuses do blow occasionally for no immediately obvious reason, but usually there is a problem that needs to be pin-pointed and put right before the power can be restored. It’s no use mending a blown fuse, only to find that when the power is restored the fuse blows again because the fault is still present. Tracing everyday electrical faults is not particularly difficult.

You simply have to be methodical in checking the various possible causes, and eliminating options until you find the culprit. More serious faults on the house’s fixed wiring system can be more difficult to track down, but again some careful investigation can often locate the source of the trouble, even if professional help has to be called in to put it right.

Safety first

Before you start investigating any electrical faults, remember the cardinal rule and switch off the power at the main switch. When fuses blow, it is all too easy to forget that other parts of the system may still be live and therefore dangerous, and even if you know precisely how your house has been wired up it is foolish to take risks. If the fault appears to be on an electrical appliance, the same rules apply: always switch off the appliance and pull out the plug before attempting to investigate.

Don’t rely on the switch to isolate it; the fault may be in the switch itself. It’s also important to be prepared for things to go wrong with your electrics; even new systems can develop faults, and in fact a modern installation using circuit breakers will detect faults more readily than one with rewireable or cartridge fuses, so giving more regular cause for investigation. Make sure that you keep a small emergency electrical tool kit in an accessible place where it won’t get raided for other jobs; it should include one or two screwdrivers, a pair of pliers, a handyman’s knife, spare fuses and fuse wire, and above all a working torch. There is nothing more annoying when the lights go out than finding the torch does not work.

Check the obvious

When something electrical fails to operate, always check the obvious first – replace the bulb when a light doesn’t work, or glance outside to see if everyone in the street has been blacked out by a power cut before panicking that all your fuses have blown. Having satisfied yourself that you may have a genuine fault, start a methodical check of all the possibilities.

A fault can occur in a number of places. It may be on an appliance, within the flex or plug linking it to the mains, on the main circuitry itself or at the fuseboard. Let’s start at the appliance end of things. If something went bang as you switched the appliance on, unplug it immediately; the fault is probably on the appliance itself. If it simply stopped working, try plugging it in at another socket; if it goes, there’s a fault on the circuit feeding the original socket. If it doesn’t go, either the second socket is on the same faulty circuit as the first one (which we’ll come to later) or there may be a fault in the link between the appliance and the socket – loose connections where the cores are connected to either the plug or the appliance itself, damaged flex (both these problems are caused by abuse of the flex in use), or a blown fuse in the plug if one is fitted.

Plug and flex connections

The next step is to check the flex connections within the plug and the appliance.
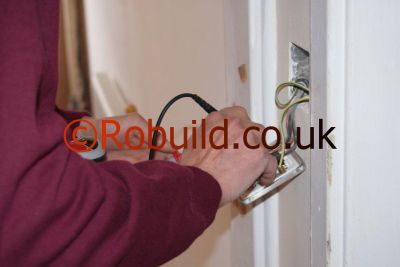
The connections at plug terminals are particularly prone to damage if the plug’s cord grip or flex anchorage is not doing its job; a tug on the flex can then break the cores, cutting the power and possibly causing a short circuit. If the connections are weak or damaged, disconnect them, cut back the sheathing and insulation and remake the connections. Make sure that the flex is correctly anchored within the body of the plug before replacing the cover. If the plug contains a fuse, test that it has not blown by using a continuity tester, or by holding it across the open end of a switchedon metal-cased torch.

Replace a blown fuse with a new one of the correct current rating; 3A for appliances rated at 720Wor below, 13A for higher-rated appliances (including televisions sets). Next, check the flex connections within the appliance itself. Always unplug an appliance before opening it up to gain access to the terminal block, and then remake any doubtfullooking connections by cutting off the end of the flex and stripping back the outer and inner insulation carefully to expose fresh conductor strands. If the flex itself is worn or damaged, take this opportunity to fit new flex >f the correct type and current rating.

Make sure ‘ou re-use any grommets, heat-resistant shelving, special captive washers were fitted to the appliance. Lastly, check the flex continuity; it is possible that damage to the flex itself has broken of the cores within the outer sheathing.
use a continuity tester for this, holding he two probes against opposite ends of each core in turn, or use your metal-cased again, touching one core to the case ind the other to the battery. Replace the flex, any core fails the test; the appliance may work if the earth core is damaged, but he earthing will be lost and the appliance would become live and dangerous to anyone.

Lighting problems

Similar problems to these can also occur on lighting circuits, where the pendant flex linking ceiling roses to lampholders can become disconnected or ‘faulty through accidental damage or old age. If replacing the bulb doesn’t work, switch off the power at the mains and examine the condition of the flex. Look especially for bad or broken connections at the ceiling rose and within the lampholder. Replace the flex if the core insulation has become brittle, and fit a new lampholder if the plastic is discoloured (both these problems are caused by heat from the light bulb). If the lampshade ring will not turn you will have to cut this with a hacksaw.

Mending old blown fuses

A circuit fuse will blow for two main reasons, overloading and short circuits . Too many appliances connected and this will melt an old fuse. Similarly, a short circuit – where, for example, bare live and neutral flex cores touch – causes a current surge that blows the fuse. If overloading caused the fuse to blow, the remedy is simple: disconnect all the equipment on the circuit, mend the fuse and avoid using too many high-wattage appliances at the same time in future. If a short circuit was to blame, you will have to hunt for the cause and rectify it before mending the fuse – see photographs on the next page. When a circuit fuse blows, turn off the main switch and remove fuseholders until you find the one that has blown.

Then clean out the remains of the old fuse wire, and fit a new piece of the correct rating for the circuit-5A for lighting circuits, 15A for circuits to immersion heaters and the like, and 30A for ring circuits. Cut the wire over-long, thread it loosely across or through the ceramic holder and connect it carefully to the terminals. Trim the ends off neatly, replace the fuseholder in the consumer unit and turn on the power again. If the fuse blows again, and you have already checked for possible causes on appliances, flexes and lighting pendants, suspect a circuit fault – see below. If you have cartridge fuses, all you have to do is find which cartridge has blown by removing the fuseholder and-testing the cartridge with a continuity tester or metalcased torch.

A blown cartridge fuse should be replaced by a new one of the same current rating. Again, if the new fuse blows immediately, suspect a circuit fault. If you have miniature circuit breakers (MCBs) you will not be able to switch the MCB on again if the fault that tripped it off is still present. Otherwise, simply reset it by switching it to ON or pressing in the centre button.

Earth leakage circuit breakers (ELCBs)

If your installation has an ELCB, it will trip off if an earthing fault occurs – for example, if a live wire or connection comes into contact with earthed metal. Like an MCB, it cannot be switched on again until the fault is rectified – a useful safety point. However, it will not trip off in the event of a short circuit between live and neutral, or when overloading occurs. The high-sensitivity current-operated ELCB, in addition to detecting earth faults, also protects against the danger of electric shocks by tripping off if it detects current flowing to earth through the human body. It can do this quickly enough to prevent the shock from causing death.

Tracing circuit faults

If you have checked appliances, flexes, plug connections and pendant lights, and a fault is still present, it is likely to be in the fixed wiring. Here, it is possible to track down one or two faults, but you may in the end have to call in a professional electrician.

The likeliest causes of circuit faults are damage to cables (perhaps caused by drilling holes in walls or by nailing down floorboards where cables run), ageing of cables (leading to insulation breakdown, and overheating) and faults at wiring accessories (light switches, socket outlets and so on). Let’s look at the last one first, simply because such items are at least easily accessible.
If the cable cores are not properly stripped and connected within the accessory, short circuits or earth faults can develop. To check a suspect accessory such as a socket outlet, isolate the circuit, unscrew the faceplate and examine the terminal connections and the insulation. Ensure that each core is firmly held in its correct terminal, and that each core has insulation right up to the terminal, so that it cannot touch another core or any bare metal. There is usually enough slack on the mains cable to allow you to trim over-long cores back slightly.

Check that the earth core is sleeved in green/yellow PVC, and try not to double over the cable as you ease the faceplate back into position; over-full boxes can lead to short circuits and damage to cable and core insulation and more trouble. You can carry out similar checks at light switches and ceiling roses. Any damaged accessories you find should be replaced immediately with new ones.

Damage to cables is relatively easy to cure provided that you can find where the damage is. If you drilled or nailed through a cable, you will of course be able to pin-point it immediately. Cable beneath floorboards can be repaired simply by isolating the circuit, cutting the cable completely at the point of damage and using a three-terminal junction box to link the cut ends.

Cable buried in plaster must be cut out and a new length of cable inserted between adjacent accessories to replace the damaged length. Where this would involve a long length of cable (on a run to a remote socket, for example) it is acceptable to use junction boxes in nearby floor or ceiling voids to connect in the new length of cable. You will then have to make good the cutting-out.

Tracking down a break in the cable elsewhere in the installation is a difficult job best left to a qualified electrician. If, however, you find that your house is wired in rubbersheathed cable and faults are beginning to occur, don’t waste time and effort trying to track them down; you need a rewire. Unless you know what you are doing, this is certainly a job for the electrician. If you are unable to trace an electrical fault after checking all the points already described, call in a professional electrician who will be able to use specialist test equipment to locate the fault. Do not attempt to bypass a fault with a makeshift wiring arrangement, and NEVER use any conducting foreign body such as a nail to restore power to a circuit whose fuse keeps blowing. Such tricks can kill.

Regular maintenance

You will find that a little common-sense maintenance work will help to prevent a lot of minor electrical faults from occurring at all. For example, it’s well worth spending a couple of hours every so often checking the condition of the flex on portable appliances (especially those heavily used, such as kettles, irons, hair driers and the like) and the connections within plugs. Also, make a point of replacing immediately any electrical accessory that is in any way damaged.