Staircases are strong things. They are almost impossible to break in normal use, they do not generally suffer from rot, and as a rule the worst that can happen to them is that the handrail comes loose or some of the steps start to creak.
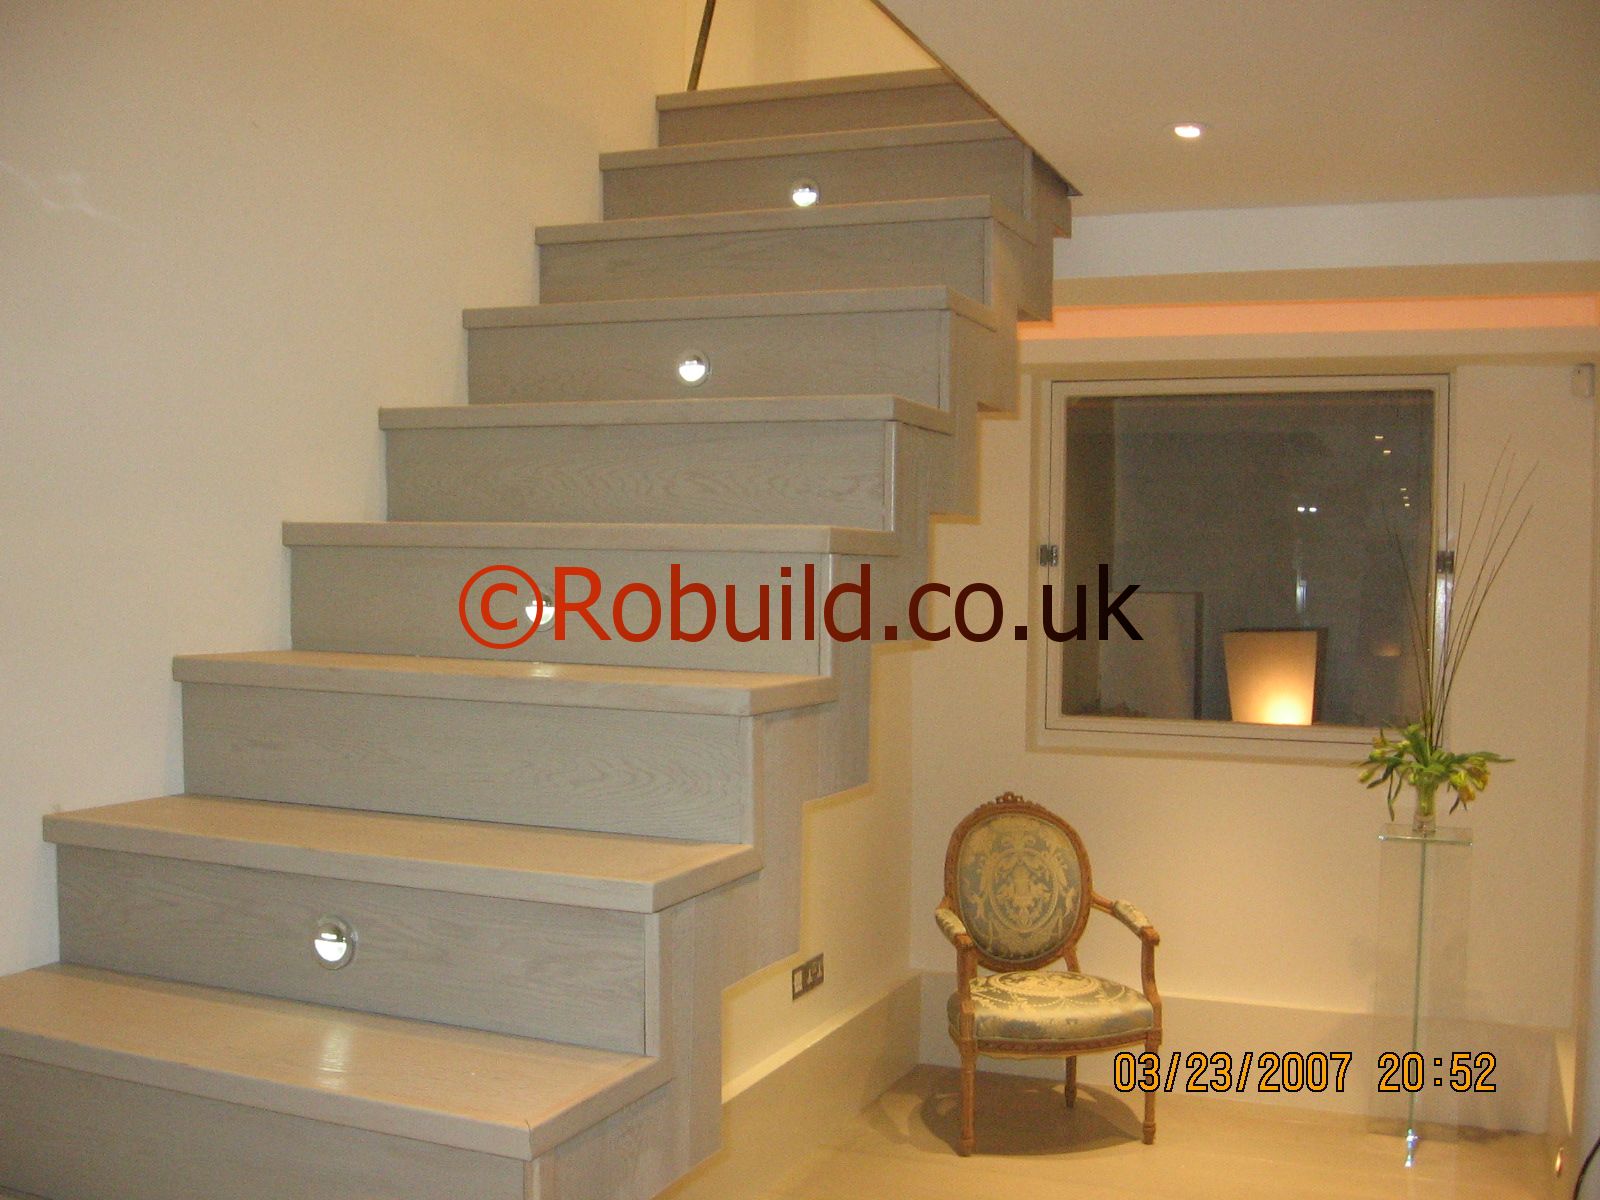
Here is how to deal with both these faults, and some others. Staircases are not difficult to repair. But it is essential first to know how they are constructed, because nearly every part of a staircase supports, and is supported by, some other part. And if you remove the wrong part you may easily bring the whole structure crashing down. All wooden staircases are fairly alike in construction, but there are three main types.
The closed-string staircase is the cheapest type, easier to make and repair and generally found in newer houses. The cut string staircase is better looking but more complicated and expensive to build. It would typically be found in a house built before the first world war. The open riser staircase is built like a step-ladder, with treads but no risers. It is most commonly found in open-plan architecture. The closed-string staircase The main load-bearing components of a closed-string staircase are the strings or stringers, a pair of straight-sided pieces of wood running up each side of the staircase. The treads and risers (horizontal and vertical parts of the steps) are fastened into the strings by housing joints.

Most staircases run along a wall, and have one wall string, which is solidly fastened to the wall and is about 29mm thick, and one outer string, which has to be stronger and so is about 35mm thick. The outer string is held in place by being inserted into the vertical newel posts, one at each end of each string, by a set of large angle mortise and- tenon joints. The newel posts are bolted strongly to the floor joists.

A quick, easy and solid way to repair a staircase
Some staircases are completely free-standing and have ‘outer’ strings on both sides. Others have a wall on both sides and two wall strings. But in both cases, the rest of the construction is completely normal. There are two main methods of treads and riser construction. They can be tongued-and grooved together, in which case it is impossible to remove one tread without dismantling the entire staircase.
Or they can be screwed together, in which case it might just be possible to remove and replace one tread from below-though it would involve chiselling out the rear of the housing and a lot of other arduous work. The screwed construction is not as strong as the tongued and grooved method. The joint between each tread and the riser below it is reinforced by a triangular glue block with 76mm long screws passed through it. These blocks are, of course, used only in the inside angles on the underside of the step. If they were used on the top they
would get in the way of your feet. The method by which the treads and risers are held firmly to the strings is found only in stair construction. They are jammed into their housings by narrow wedges driven along the groove of each housing, so that they are held firmly against the upper side of the housing. The lower side of the housing, against which the wedge rests, is cut at a slant to accommodate it. The purpose of this wedging is to jam each tread and riser so firmly in place that it cannot rock or creak.
If a stair creaks, it is generally a sign that the wedges have come loose under it. The bottom step of a flight of stairs generally projects beyond the newel post. It is normally a completely separate unit from the rest of the stairs, and can be levered off without much difficulty if, for example, you want to repair the floorboards near it. Vertical balusters are set in mortises in the top of the outer string to support the handrail. The tops of the balusters are sometimes inserted in mortises under the handrail, sometimes nailed or fastened by brackets into a groove cut all along the underside of the rail.
The ends of the handrail are strongly fastened to the newel posts, generally by a mortise-and-tenon joint unless the hand rail is a curved decorative one of the type found in many old houses. If there is a handrail on the wall side of the stairs, it is generally just fastened to the wall on brackets, and plays no part in the construction of the stairs. Sometimes there is a newel post fastened to the wall at the bottom to match the one on the outer string. It is just decorative, however, and can be removed if necessary.
Removing the real, outer newel post would deprive the outer string of its support and might easily cause the whole flight to collapse. The cut-string staircase In a cut-string staircase, the wall string is the same as that of a closed-string staircase. The outer string, on the other hand, is completely different. It is cut away to the profile of the treads and risers. The treads rest on it, instead of being housed into it. They are finished with decorative end mouldings that project a short way beyond the string, which gives the outer side of the staircase a very elegant appearance. The risers are mitred into the strings so that no end grain shows.
The balusters are not mortised into the strings, because the tops of the strings are not exposed. Instead, they are inserted in cutouts in the outside ends of the treads, so that their outer sides are flush with the ends of the treads. The outside ol the assembly is covered by the decorative end moulding of the tread, giving the cutout the effect of a mortise. Since the outer string is largely cut away, it is not nearly as strong as a closed outer string. For this reason, there is a strong additional support called a rough carriage running down the centre of the flight.
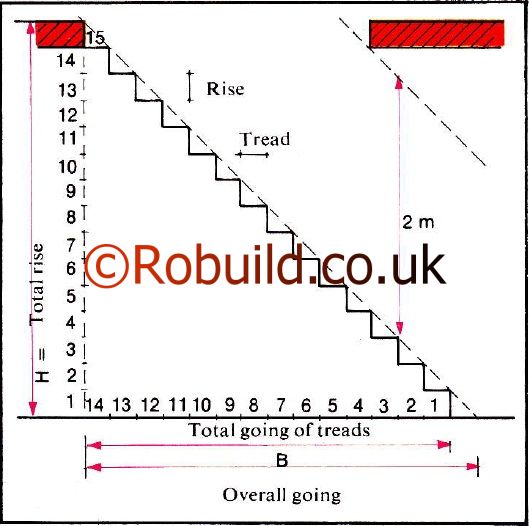
It consists of a heavy piece of timber, probably 100mm x 50mm, just touching the bottom corner of each step where tread and riser are joined. As an extra support for the treads, timber blocks called rough bracket are screwed to the rough carriage, and reach up from it to the underside of each tread. The word ‘rough’ is used because the assembly is not seen, and does not need to be finished to the same standard as the rest of the staircase.
Obviously, this type of staircase is much more complicated than a closed-string one. The cutting to shape of the outer string, the mitred joints of string and riser, the decorative mouldings on the treads and the rough carriage all take extra work. This explains why a cut-string staircase is seldom found in a modern house. Repairs As you may already have gathered, major structural repairs or alterations to a staircase are out of the province of the amateur handyman, and should only be done by a professional carpenters.
Furthermore, in most countries (including Britain) planning permission is required for all work on the load-bearing parts of a staircase, other than extremely minor renovations. This does not mean that you cannot substantially improve the appearance of a tatty old staircase. But it does outlaw some projects- for example removing the risers to create a modern-looking ‘open tread’ staircase. People quite often attempt to do this, but since the risers contribute to the strength of the stairs, removing them is a recipe for disaster.
Squeaky or loose treads
Treads often squeak when they are stepped on, and it is not a sign that they are about to collapse. But when the problem gets worse, and they can actually be felt to move under your feet, it is time to do something about it. The cause of the problem is nearly always loose wedges.
The glue blocks may be loose as well. Both have to be reached from underneath, however, and this may cause difficulties. Where stairs run above a cellar or a hall cupboard, the underside is exposed and easy to reach. But where the lower side of the stairs can be seen from one of the inhabited parts of the house, it is generally covered with lath and plaster. This must be removed to repair the stairs-a really messy job that covers everyone and everything with plaster dust and the filth of ages from inside the staircase. One consolation for having to perform this unpleasant task is that you can replace the plaster with plasterboard, painted chipboard or tongued-and-grooved boarding.
Next time the stairs need attention, it will be quite simple to remove this covering. Cover everything with dust sheets and rip out the old plaster with a club hammer and bolster. When the dust has settled, look over the underneath and find all the loose wedges. Remove them one at a time and glue them back. If they are shrunken, warped or broken,cut new ones, taking care to copy the slope of the original wedge exactly. Reglue any loose glue blocks and tighten their screws.
Make sure that all surfaces you glue together are clean and dry. If you find a cracked tread, strengthen it with a metal angle bracket screwed to the tread and nearest riser. Newel posts are very firmly fixed and seldom need attention. If they do come loose, take up the floorboards and inspect the way the posts are fastened to the joists. It should be possible to reinforce the joints with wood blocks or steel angle brackets screwed into the corners. Sometimes the mortise-and-tenon joint between the outer string and the newel post becomes loose, loosening all the treads and risers with it. You can’t take it apart, so the only thing to do is to brace it with 32mm square wood blocks glued and screwed into the inside corners. Knocking shallow wedges into the gap might work, but it might also split the newel post if it is not strong.
Replacing the handrail
The only structurally important parts of the handrail and baluster assembly are the newel posts. These should never be removed or weakened, but the rest of the structure is easy to repair or alter. A few years ago people used to dislike the ornamental balusters of old houses, and board them up with hardboard or plywood to create the effect of a solid wall. This type of balustrade may or may not be to your taste, but it does have the disadvantage of making the stairs dark, and thus dangerous, unless they are well lit from above. Today, most people appreciate old balustrades with turned balusters, but if they are in very bad condition, there is no alternative but to take them out and replace them. You might be able to get some more of the same type from a demolition contractor. Otherwise, there is a type of replacement that you can easily make yourself. It looks like a ‘ranch-style’ fence and goes well with most modern furniture, but is not suitable for curved stairs.

The construction differs slightly for closed string stairs (where you will probably want a single rail with the outer string finished to match) and cut-string stairs (where two rails will look better). The first step is to remove the old handrail and balusters, and, in the case of a cut-string staircase, to fill the holes where the balusters fitted. This will present a problem only if the treads are finished in polished wood, which you might have some trouble matching. Glue in small square blocks and plane them flat. Next, box in the newel posts to give them a square section (unless they are square already). Use solid timber, or you will have trouble hiding the edge. Most newel posts have a square base, to which the timber can simply be screwed, but at the top you may have to make a ‘yoke’ out of thick plywood to provide something to screw the timber to. If the newel post is too tall, saw the top off.
Otherwise, put a square block in the top of the ‘box’ and pin it in place from the sides. You can screw a polished hardwood cap to the top of the posts if you like. To box in the outer string of a closed-string staircase. first remove all projections such as electric cables. Then cover the outside of the string with the thinnest timber you can find in the necessary width-or you could use veneered plywood. Cover the inside with a strip of the same material scribed to the shape of the steps. This is a boring job but not difficult. The strips need only be pinned in place, since they are not carrying a load.
Finally, cover the top of the string with a strip to hide the mortises. This strip must be solid wood, because the edges will show. If you have used veneered ply for the sides, the top should be in the same material as the veneer; the idea is to create the appearance of a solid string matching the rails. Finish the new balustrade with a rail or rails made of solid l50mm x 25mm boards screwed to the inside (wall side) of the newel posts. Allow plenty of extra length when buying them, because the ends will be cut at a slant. Of course, there are many other designs for replacement handrails. One that is not recommended is replacing it with a rope. If you stumble and fall against it, it gives outwards and downwards and you tend to go over it head first.
Worn nosings
A nosing is the rounded front part of a tread. On uncarpeted stairs, the nosing wears away, particularly in the middle. Replacing the tread entirely is very difficult and not worth the trouble. A better idea is to cut away the nosing and patch the tread with new wood. Do not cut the wood right back to the riser, or you will weaken the joint there, particularly if it is a tongued-and-grooved joint. The best tool to use for cutting away the old nosing is a spokeshave.
Cut a flat surface, glue a wood strip to it (hardwood is best) and cut the strip to shape with the same tool when the glue is dry. A worn bottom step can be replaced entirely if it is the separate, non-structural kind. But be careful to make the new step exactly the height and width of the old one. If it is different, it will alter the going (slope) of the stairs at the bottom, which might make people trip up at the unexpected change. Finishes If your stairs are structurally sound but covered in tired old paint, you can transform them simply by stripping off the paint.
Scrape off a paint sample and see what kind of wood there is underneath. If it is hardwood, as old stairs often are, you are in luck. Unless it has been stained, which you can discover only by scraping a piece clean, it will look magnificent if it is wax-polished. Even an ordinary softwood staircase will look very good if carefully cleaned and given three coats of polyurethane varnish.
The intricate mouldings of an old staircase are best cleaned with chemical paint stripper (open all windows first!) and a combination shavehook. The treads, risers and strings can be finished with an orbital sander (or less well with a disc sander) when you have removed most of the paint. The rails and balusters must be hand-sanded. If you have a really ornate staircase, and you aren’t frightened of over-decoration, you might even bring out the relief on the mouldings with contrasting paints on the highlights.


