How to use Jigsaws

A power-driven jigsaw is a tool used by the carpenters in the same way as a hand-held coping saw-that is, for cutting curves and complex shapes. Its blade is small and pointed and moves rapidly up and down with a stabbing motion. Various types of blade are available for cutting wood, plastic and sheet metal, but it will not cut very thick boards or sheets. It can manage a 50mm thick softwood board or hardwood hall as thick. Jigsaws should not be pressed forward too hard, or the highly tempered blade may snap.

But they should be held firmly down on to the material they are cutting to resist the down-stroke of the blade. The blade is narrow enough to cut l3mm radius curves, but will not turn a right angled corner. It can, however, be started in the middle of a piece of wood by tilting the machine forward on its nose and gradually lowering the blade into the wood until it is upright. Jigsaws are available both as power tool attachments and as integral tools, hand-held or bench-mounted with the blade pointing upwards.

Using a hand held circular saw

If the motor shows signs of slowing down or jamming, stop work immediately or you may burn it out on the spot. It is essential that the Motor should be kept running at a high speed all the time to keep it from being damaged. Do not press the saw forward too hard. and always start the motor before the blade touches the wood, so that the speed of the motor stays up. You need a straight edge, and some practice, to bring in the blade at exactly the point where you want to cut; sighting straight down the blade will make it easier.

Saw cuts can be kept straight by nailing a batten to the wood you are cutting, and running the saw along it; or by using the adjustable rip fence on the saw, which guides it parallel to the edge of the wood. Four types of blade are available: the rip blade, with coarse teeth, for cutting along the grain; the fine-toothed cross-cut; the planer blade, which gives an extra-neat result, and the most useful type, the combination blade, which cuts at any angle to the grain. These blades will not cut metal, so when using the saw on old wood it is essential to remove all nails and screws. To prevent the blade catching on anything underneath the wood, and to reduce the strain on the motor, set the depth gauge of the blade to only slightly more than the thickness of the wood you are cutting. A circular saw blade cuts on the upstroke, so setting the blade as shallow as possible gives a neater result by flattening the angle at which it cuts. If the blade of the saw wanders off the cutting line, do not twist the saw to straighten the line. This may jam the blade in the cut, with disastrous results. Take the saw out of the cut, go back a few inches and cut along that section again.

Enlarging the loft access

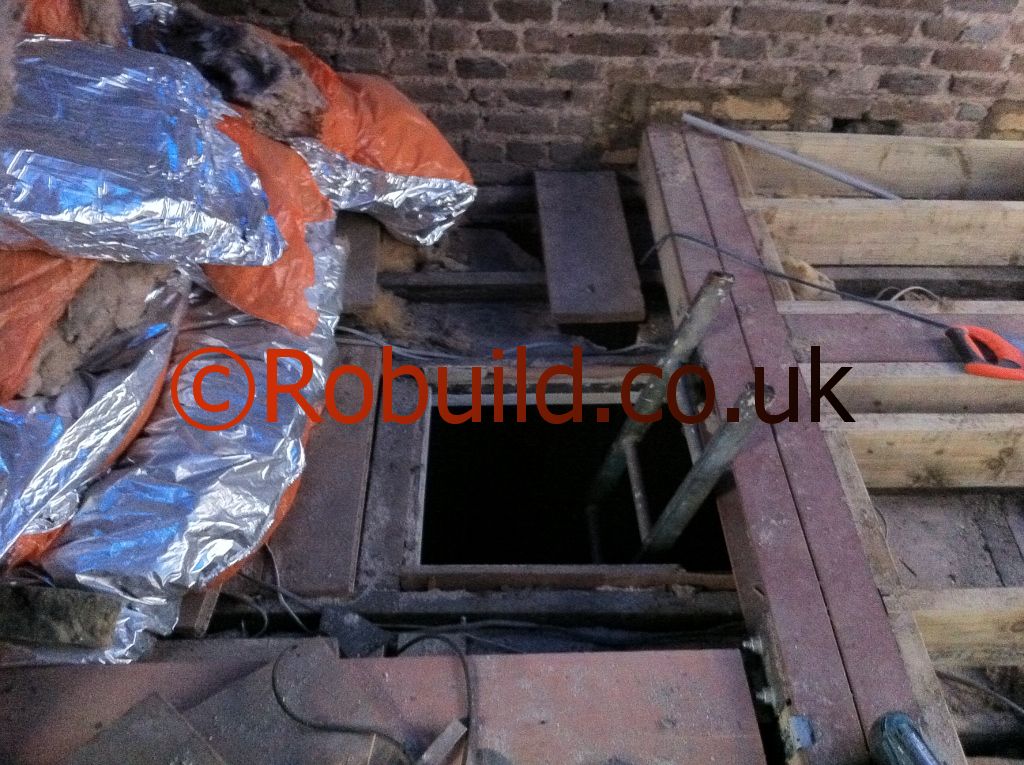
Climb into the loft and examine the existing construction to see how the opening is made, in which direction the joists run, and whether the ceiling finish is of plasterboard or lath and plaster.

loft london loft hatch

You will find that the opening formed by the builder is framed by two trimming joists between the main joists. The easiest way to increase the area is by removing part of one main joist and using longer trimmers. This almost doubles the length and width of your original opening, and will be sufficient for most purposes. Commence by marking out the area of the new hatch, by scribing a line across the joist and ceiling where it will be cut.

Temporary support must be provided for the joist that will be cut. This consists of one sturdy upright, with a bracing batten or plank run to the floor, at each end just outside the line of the new opening. Remove the door and lining of the original opening, and prepare the two new trimming joists. These are marked off by direct marking (you lay each length of timber over its intended position while you mark it) and cut on the outside of the marking lines to ensure a tight fit. Locate the heads of the nails that hold the existing trimmers in place, chisel some of the surrounding wood away so that the heads protrude slightly, then pull the nails out with pincers.

Carefully remove the moulding, if any, surrounding the underside of the opening, then prise the trimmers out. Now cut through the portion of joist that is to be removed. At one end you can use the existing opening to provide space for the downward thrust of the saw, but at the other end you will have to drill a series of holes, then chisel them into a slot, to provide space for the. saw blade. The portion of joist is prised away. Keep it-it can be used as the new trimmer which runs parallel to the existing joists. Carefully remove the rest of the ceiling material by cutting along the marked lines with a panel saw.

Do this very carefully so that you don’t create any broken edges. With luck you can avoid any re-plastering. Fit the new trimmers. The two short ones are skew-nailed to the main supporting joists, and the long one is skew-nailed to the two short ones. Run strips of battening, narrower than the height of the joists, round the bottom inside of the new opening, to provide a lining and a stop for the new door. This battening must be sunk to a depth that will bring it flush with the ceiling below. Any gaps between the battening and the ceiling can be filled with plaster; or you can run a moulding round the edges to finish it off.

Facelift for a fireplace and chimney

Fireplaces and chimney breasts are main room focal points. Without them, room balance may be upset. Adapted for other uses, they can still achieve this balance.

chimney breast blocked

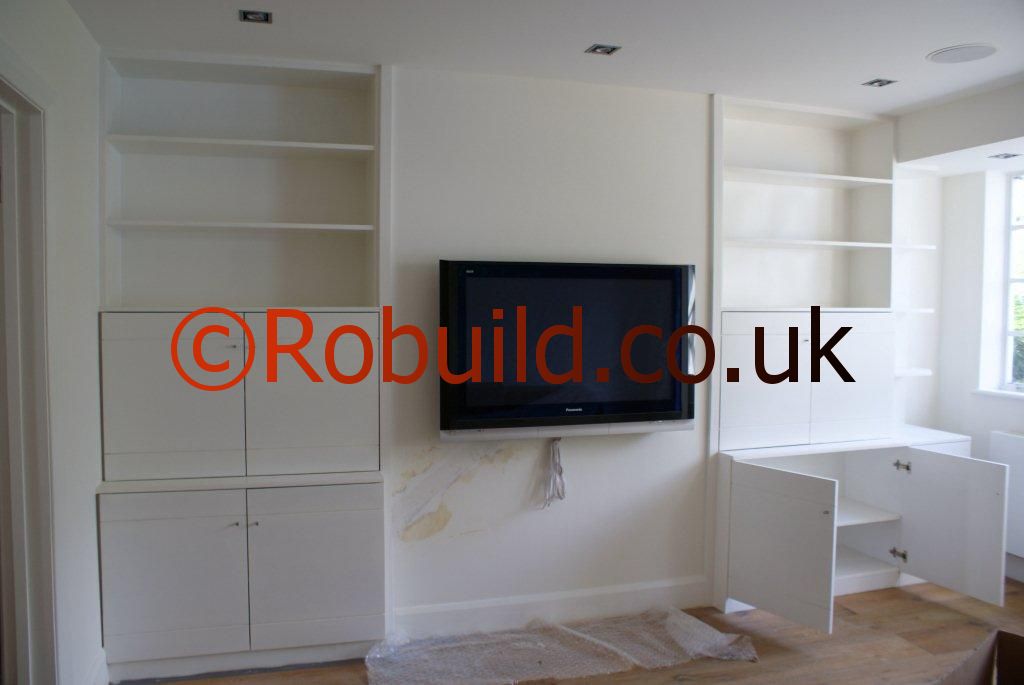
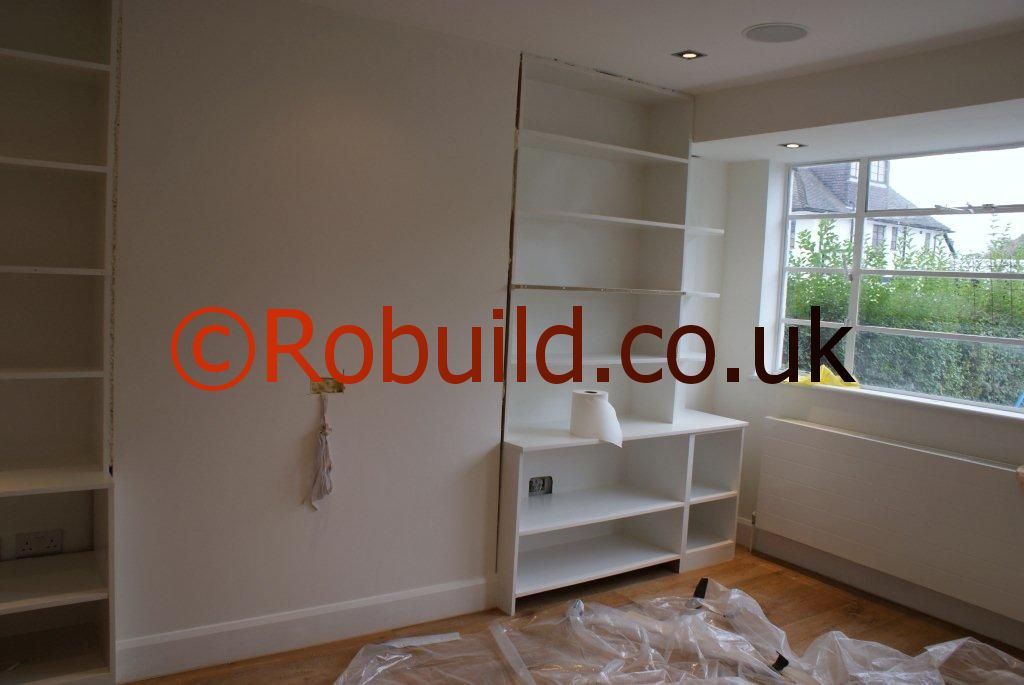
This project is a low-level, room-width storage and seating unit. As shown, it provides a flat screen TV console, a drinks cabinet, a magazine or book shelving and space for storage under the hinged seats, but it can be adapted to suit the individual family’s needs. The design helps make it a visually strong focal point, with the unit’s long, low lines to give almost a ‘floating’ appearance. The unit is relatively easily built from MFD , hardwood or softwood, with a trim, and can be painted, laminated or veneered.

Closing off the chimney

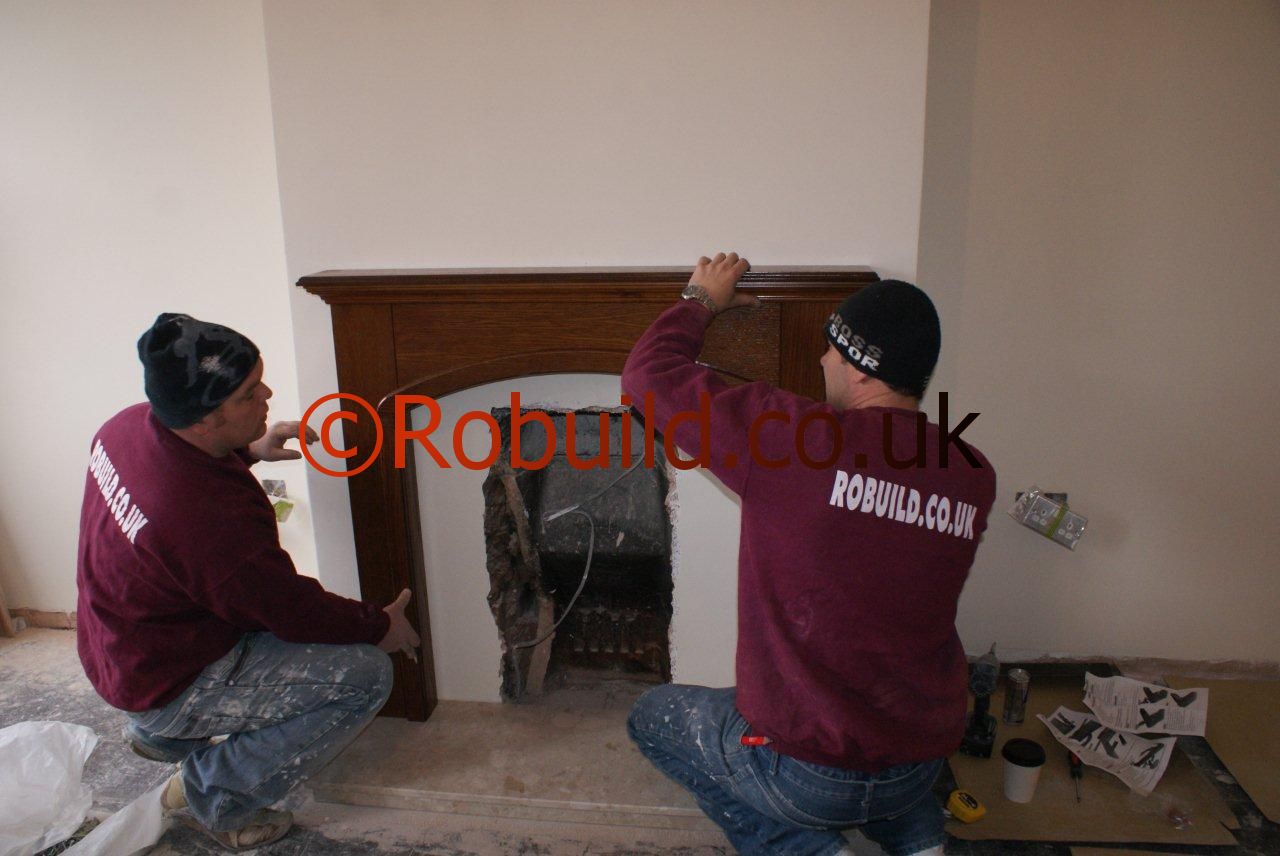
electric fireplace chimney

The first job is to remove the fireplace and hearth, cap the chimney, and block up the fireplace opening except for necessary ventilation holes. A fireplace is usually attached by metal plates screwed to the wall, beneath the plaster, at its corners and in the middle. Once you have hacked away plaster and removed the locking screws, the fireplace should come away easily. Get some help for this job; fireplaces are often too heavy for one-man handling. Next, remove the hearth, which may also be fixed by screws through plates. Frequently the area beneath the hearth has to be made good, either by filling with concrete or by putting in local sections of floorboarding. If you have a suspended floor, make sure that in filling any gap with concrete you do not impede the air flow under the floor. Capping the chimney will prevent rain from entering and obviate any gradual buildup of rain-sodden soot at the base of the chimney, a possible source of damp penetration through masonry walls. You may be able to buy proprietary capping units which can be mortared over the chimney pot, or others which simply slide on. Alternatively, you can mortar on a piece of slate or earthenware.

However, the chimney needs air circulation if it is not to become a dampness ‘trap’, leading to deterioration of the brickwork and even causing plaster to fall away.
So when you come to bricklaying you should install two air bricks as far apart as possible-for example, one just above the seat of your built-in unit, and the other high up on the chimney breast of the room immediately above. Alternatively, you can use metal or plastic grills, screwed into place over a gap in the brickwork.

Masonry chimney breasts

Ordinary bricks ‘commons’ are suitable for bricking in a chimney opening. The bricks should be ‘keyed’ into the surrounding brickwork, either by removing a brick every three courses or so from the existing brickwork and bonding a brick between new and old brickwork-known as ‘toothing’ or by bonding the brickwork by means of metal wall ties. Make sure the new infill brickwork is flush with the original, or at least does not protrude beyond the surrounding plaster, or you will have a problem in getting a flush finish when you come to plaster. An alternative is to fix plasterboard over the chimney aperture. You nail a timber frame to the brickwork on either side of the opening and fix a sheet of plasterboard, recessed a little to allow for surface plastering, with plasterboard nails. However, such a sheet is vulnerable to heavy knocks.

Timber-framed chimney breasts

In countries where frame houses are the norm, chimney breasts are often built of timber. and regulations insist on a gap between the brickwork and the timber. This automatically provides air circulation around the chimney, and ventilators are unnecessary. In such cases, rather than trying to patch up the hole where the fireplace has been removed, the ‘cleanest’ job comes from removing the plasterboard or wood-panel facing from the whole front of the chimney breast. The hole in the framing beneath is then filled with timber jack-studs and nogging, and the whole front re-covered in one piece.

Wiring

wiring electric cable

Wiring should be done by professional electricians between finishing the brickwork or plasterboarding and beginning plastering. For the lights,’loop off’ from the nearest ceiling rose and carry the cable through the ceiling into one of the alcoves. Cut a channel through the wall plaster from the ceiling to a point 3ft above floor level, preferably on one side of the chimney breast, where making good will show up least. Pass the cable through metal or plastic conduit, and ‘bury’ this in the groove. You can make good the plaster while doing your other plastering.

mdf chimney breast cupboard

For the flat screen TV unit, loop off a spur from the nearest outlet on your ring-main and carry the cable behind the skirting board to the right amperage junction box which you will fix below your record deck.

Making good

plastering company london

Once the brickwork mortar has dried out, or plasterboard has been flexed, the opening can be plastered. If you already have some plaster, throw out any which is ‘lumpy’ (instead of having an even, floury texture); it will not bond to the surface, but craze and break away. If you are buying new plaster, buy only what you need for the job, since it does not store well and is easily affected by moisture in the atmosphere. For this job, you may need as little as 6.5 Kilos (l4lb) or as much as l2 Kilos (281b) depending on how well you have done the brickwork.

Buy by the bag from the hardware shop, rather than in bulk, and if you have any left over make sure it is well sealed. You will also need a plasterer’s metal trowel and wood float, an old paint brush of medium size, and some sort of scratching implement. if you are plastering over brickwork, first hack back the existing plaster for about 50mm (2in) all round. This will help you feather the new plaster work neatly into the existing plaster. Now use a vacuum cleaner; the surface to be plastered must be dust-free.

Mix the plaster well, and to a creamy consistency. Now use the paint brush to flick water on to the brickwork until it is damp, but not wet; this will key the plaster. The first coat is applied to just below the surface of the surrounding plaster. Use the metal trowel with firm upward strokes and covering a short area at a time. Before the first coat has dried. it must be cross-hatched with a grid of diagonal lines to provide the key for the fina1, or ‘finish’, coat. Plasterers do this by knocking small galvanised nails into the back of the float and pushing them through until they are just proud of the face.

Unless you are fairly experienced, you might find tire trowel or pair of scissors easier. After the ‘scratch’ coat has dried, the metal trowel is used to apply the finish coat, again with firm upward strokes. Apply the plaster thinly, and leather it into the surrounding plasterwork so that there are no bumps or nudges. As soon as you have finished, check for irregularities by ‘sighting against the light’ over the surface and smooth out any that )you find removing them later would be a dusty job. Next, before the finish coat is dry, flick water on to the surface with the paint brush and polish the work smooth with the trowel.

Decorating over the plaster

closing off the chimney

‘Skim’ coats of plaster over plasterboard dry out quickly; thicker plaster needs six months or so. During this time, the plaster can be painted with an emulsion paint, or tiles can be applied; the moisture will gradually disappear. However, an impervious surface (such as a laminate) or one that might stain (such as wallpaper) should be applied only after the plaster is thoroughly dry.

Building the console unit

The seating and storage unit is built as a series of four ‘boxes’, which are then fitted together. Each ‘box’ is self-supporting, but gains extra strength from being fastened both to its neighbour and to timber battens fastened to the wall. S standard British chimney 122cm (4ft) wide x 36cm (14in) deep, with l22cm (4ft) alcoves on either side. But as alcoves and chimneys come in all sorts of sizes, the first stage is to modify these dimensions if necessary. The second-or rather, continuing stage is constantly to check for ‘fit’ as you go along, and not to fasten any unit until you have tried it against its neighbours.

First, you must establish the accurate sizes of your chimney alcoves, and whether each is ‘square’ within itself and with the face of the chimney breast. A line stretched taut across the face of the chimney and extended to both sides of the room is the best starting point; then you can use rule and steel square to check dimensions and angles. If the areas are only slightly out of square, you can make the units a loose fit, later plastering the gaps and turning the wall covering to cover the joint. Or you can chip out small areas of the plaster for an accurate flt. If the areas are markedly out of square, you may have to cut templates to the shape of the alcoves; in this case, the angles where the units meet one another must, at all costs, be made exact right angles to give you essential datum lines.

living room chimney tv flat

Loft Conversions and Cellar Conversions

You might have a loft that could be converted into a ‘den’ for the whole family, but noise might be a problem, particularly if you have neighbours with small children who may be trying to sleep while you stay up late playing table tennis or doing something equally noisy. But if you do decide to adapt your loft, make sure that the access provided meets the standard fire regulation requirements and Building Regulations.

A cellar would be more soundproof, but then again you might come up against problems with rising damp. A converted loft or a cellar might seem ‘trendy’, but if you have other spare rooms, then try to convert them instead-it will save you money and temper. Many British families find the best place for their family room is next to the kitchen, or in an extended and partially divided-off kitchen area. This way, a busy mother can keep her eye on small children without disrupting her work or the children’s play. And if the play part of the kitchen is provided with adequate storage space, toys can be whisked away when the toddlers go to bed and the rest of the family take over the room for more adult pastimes. This location would also be the most convenient for party goers with the refrigerator handy for chilling drinks and keeping snacks fresh.

In most ‘semis’ however, this arrangement might not be possible, any room next to the kitchen being used as a dining area or utility room. With space at a premium, you might consider adding on a family room, the benefits will outweigh the initial cost, especially if you have a large growing family with a multitude of interests. It will be far better to concentrate the activities in one spot than having them spread out all over the house and making a mess in several places at once.

Furnishing for fun

Before you put one piece of furniture in the family room, make sure you have a good idea as to what its function will be. For example, do you intend to bar television but encourage contemplative games such as chess? In this case, the seating you choose will not be chosen primarily for its luxury but for its support.

If all the activities require a lot of space, then seating should be kept to a minimum and be stackable. If animals are to be kept in the room, priority should be to go deep, strong shelves to take fish tanks, cages and so on. Whatever the individual hobbies, it is always a good idea to provide as much uninterrupted area of washable work-top as possible. These surfaces should be hinged so that they can be folded against the wall if more space is needed. Most rooms tend to be short on storage; this room will need all the storage space it can get.

Solid wooden chests and wardrobes are less likely to get scuffed and dog-eared than lightly-built modern shelving systems or ‘paper’ toy chests for example, but they do take up a lot of room. Be sure that they are solid enough to stand up for themselves even when a young child decides to swing on an open cupboard door or drawer, possibly bringing the whole piece down on top of him. Wherever you have a spare alcove or recess, fill it up with shelves or fitted cupboards, to keep as much floor space clear as possible.

Open shelves can be curtained off to keep the room looking neat, or alternatively, a picture or piece of sculpture you are particularly proud of can be spotlit in the alcove to great effect. Use the largest room you can-this sounds obvious but some families make the mistake of opting for a fairly small area with the idea that it will .be ‘cosy’. In fact, cosiness can be created in large spaces, too, through zoning. You can use screens that slide on tracks to subdivide a largish room so that several entirely different activities can take place at the same time, or slide the screens out of view completely to make use of the entire floor space. Any families keen on theatricals will appreciate this idea immediately-with screens you have an instant auditorium, dressing room, stage and even scenery. As a general rule, loose furniture should be kept to a minimum (a basic design rule for any room but particularly pertinent here), and what there is should be used in conjunction with the screens.

The possibilities are endless-subdividing the room in this way you can ‘create’ areas suitable for study or quiet reading; allow for television viewing while others carry on other reasonably quiet activities; provide completely sealed-off areas to be used as a darkroom, tape-recording area or study; or combine these private ‘ce1ls’ with public space to allow the room to be used for games. There are a large number of permutations you can work with these sliding screens-just three will be enough for most rooms if they reach from floor to ceiling.

To work their arrangement out, draw the room to scale on squared paper and sketch in the screens in the various possible positions on the tracks. This should give you a guide as to where the furniture and fittings would be best placed-you will realise that there should ideally be a power point in each subdivided area, and that storage, lighting and heating facilities should be evenly spaced and accessible throughout the room with the screens in any position. Soft lights, sweet music This is the one room in the house where you can use as many different types of lighting and fixtures as you like. If you use the screen system described above, a variety ol lighting effects will add greatly to the comfort and convenience of the room, and won’t seem cluttered. One central pendant light is totally inadequate to deal with most activities by themselves, let alone groups of activities going on at the same time. The single central light only casts a hard flat glare on the proceedings, with harsh shadows that can cause 34 eyestrain. It is best to use local intense lighting, such as spotlights, tracking and angled desklamps to throw light on the work in hand; precise lighting is needed for work such as sewing or marquetry.

Lights can be brought down low over a coffee table by looping their flexes from the central ceiling rose-the subtle glow that this creates enhances the mood of informal conversation or listening to music. Recessed and concealed strip-lighting minimises any glare, and is especially good when positioned just over work surfaces where a spotlight or desklamp might be distracting to the eye. If you intend to use the room almost ’round the clock’, then a dimmer switch might be useful to control the intensity of the lights and the mood of the room when it is dark. And don’t forget daylight-this is particularly important if the room is used as a ‘den’ or study by day. It would be no use at all providing the room with the most sophisticated lighting on the market and omitting to light the room well naturally.

The glare from an over-large window can be cut down by blinds, but it is difficult to light a room well il it has pokey little windows, or in the case of internal rooms, perhaps no windows at all. In this case you could perhaps provide a skylight or some dormer windows; it is a false economy in terms of health and comfort to skimp on decent lighting facilities. If you or members of your family like your music loud, then take precautions to stop it reaching your neighbour.
On the level

Any room with all its furnishing at or below eye level becomes a bore if you spend any length of time in it. Even watching television at the normal height can be irritating if you become conscious of the blank wall and ceiling above. Modern design is emphasising the need to create focal points at different levels in a room, anywhere from floor to ceiling. A television, particularly one of the modern slimline or small portable variety, can easily be suspended from the ceiling. If the ceiling is low enough or lowered you won’t have to crane your neck. A movie projector could also be suspended, perhaps in conjunction with one or two spotlights; or you could hang mobiles from the lights to add the interest of gentle movement and colour.

There should be one room where the activities dictate the decoration-pictures painted by the children, sculptures, soft toys and so on just scattered around can provide most of the colour if you wish, or be spotlit as focal points in their own right. Even a blackboard can have pride of place-if you want a more sophisticated look for the room you can always draw curtains over it. Both floor to ceiling blackboard and curtaining gives the room the added bonus of versatitity.

In very large and high rooms, such as those found in Victorian and Edwardian houses, you could even build a platform, accessible via a ladder, to be used as a mini-library, or general retreat from ‘downstairs’ activities. Children in particular love the adventure of climbing and hiding, that split-level rooms offer. Or you could set up a room within a room by building is a convenience and useful size-which could be used as an indoor or a private study, for storing clutter centrally or as a show-piece for plants, aquaria and so on.

It can be made on castors so it is easily moved for cleaning and if necessary, can be pushed out of the way when the central floor space is needed for a party. Inflatable furniture is fun and useful; giant blow-up mattresses are now made which cover half the floor and are invaluable for several people to relax on and listen to music. They can be quickly deflated to clear the floor for dancing or games. The round-the-clock room Some families, notably those with a wide range of ages, may like to plan a’24 hot room’-one where anyone can feel at home at any time of the day or night. There will always be someone who can’t sleep and would prefer to have a drink, listen to music or read without disturbing anyone else in the house.

A room like this is best situated next to, or very near the kitchen, and can double as a secondary eating area during the day. Problems of dual-purpose furniture can be overcome by using one or more ‘extension units’ which any handyman can make easily. Basically it is a tower of combined drawers and work-surfaces which pulls out on castors for easy cleaning. The work-tops are hinged so they can form flaps for writing surfaces, then fold up when not in use. The side facing away from the kitchen can be used for toy storage or household ‘business’ such as filing bills or using the computer, it could also hold a sewing machine, which is normally too heavy to carry from room to room. Although separate parts of the room may be used for widely differing functions, you can create a visual unity by accepting that the surfaces must be easily cleaned, and use the same surfaces as for the kitchen in play, leisure and dining areas.

Modern laminates and plastics provide a comprehensive range of colourful and durable finishes to choose from. Take a single colour over all the walls, floors and work-tops; this helps to create a tidy appearance despite any actual mess. A neutral colour would let personal possessions such as toys, plants, and books provide the splashes of colour needed to make the atmosphere welcoming. Don’t make the mistake of cramming in too many colours or much pattern area-it will only make it seem irritatingly ‘busy’ and too small, despite its real size.

A plain, natural material such as wood has the advantage of looking warm and inviting a pleasing contrast to what otherwise would be a cold, plastic environment. You could use it for flooring and take it up the wall, or similarly, as a ceiling finish carried down the wall. If any member of your family has the habit of eating in the middle of the night, perhaps it would be a thoughtful move to devise a small, movable ‘snack bar’, which need only be an adapted trolley housed in an alcove or under a work-surface.