Fitting the hinges

Nearly all doors and casement windows are hung on butt hinges. These come in a good range of sizes from 25mm long, used for cupboard doors, to 15Omm long, used for heavy front doors. Most ordinary-sized doors use 100 mm hinges.Ask for advice from any windows and doors fitters if necessary.
carpenter fitting door

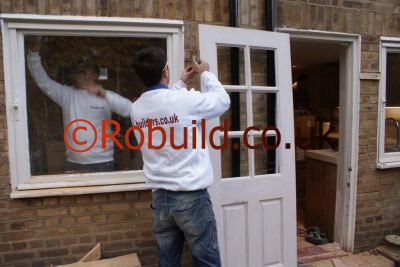
For really large doors, the front doors of some Victorian houses are a case in point, you can use three hinges instead of two, with the third hinge hallway between the other two. This also helps to prevent warping. To fit a pair of hinges, first position the door in its frame in the exact position it will occupy, propping it on wedges to hold it steady.

Then make a mark on both door and frame (and at the same level on each) l50mm from the top of the door and 230mm from the bottom. For small casement windows, halve these measurements. Then take down the door and draw round one flap of the butt hinge with a marking knife to mark its position on both door and frame. Top and bottom hinges should be positioned in.side the lines you have already marked. The hinges should be set so that the ‘knuckle’ (pivot) is just clear of door and frame. When you are satisfied that the position of the hinges is correctly shown, set a marking gauge to the thickness of the hinge flap and mark the front surface of door and frame to show how deep the cutout for the hinge is to be. Be very careful not to mark it too deep.

Some marking gauges will not adjust far enough to make such a shallow mark. One solution to this is to put in a new metal spike at the other end of the arm of the gauge in such a position that the sliding part of the gauge can move right up to it. You could make a good spike from a small panel pin sharpened with a file. Now chisel along all the marked lines to ensure that the wood wilt be removed cleanly. Then turn the chisel bevel-edge down and make some diagonal cuts to the correct depth to make it easier to remove the wood. Finish the cutout neatly by slicing out the raised wood chips from the spindle with the chisel held right way up. Using a broad chisel improves accuracy. Place a hinge leaf in each of the cutouts to ensure that it fits with its upper surface flush with the edge of the door or frame. If the cutout is too shallow, and the hinge stands proud, remove more wood. If it is too deep, you will have to pack it out with a piece of veneer or ply-but this is recommended and it is much better to cut too shallow and work down. When all the hinges leaves are set in properly, drill one hole through each side of each hinge into the door and frame. Drill through the centre hole of each hinge leaf, using a bradawl on small hinges, a drill of the correct size for the mounting screws on large hinges.

Don’t drill the other two holes in each side yet. Prop the door up on its wedges and mount it temporarily on its hinges with one screw per hinge leaf. Then open and shut it -gently, so as not to tear the screws out to make sure that it is not catching on anything. You will almost certainly find it does catch on the lock side, because the projecting hinge knuckle makes it swing slightly wide. The remedy is to bevel the edge of the door slightly with a plane. Nearly all doors and wood-framed windows are bevelled in this way. Open the door as far as it will go to make sure that it does not catch on the floor. If it does, you will have to plane a bit more off the bottom edge. The door should fit flat into its frame and stay there without having to be held. If it sticks and has to be forced, or swings open of its own accord, the screw holes are wrongly sited.

Take the door off and plug the misplaced holes with glued-in dowels. Let the glue dry and try again. When you are satisfied with the fit, take the door down, drill the remaining holes and refit it with all its screws. Make absolutely sure that all the countersink screws heads are in the whole way, or the hinge will not fold flat. If they stick out, file the heads flat this is cheating, but it works.

Fitting doors and windows

Doors and windows have two purposes: they open to provide access or let in air, and they shut to keep out rain, draughts and sound. So they must open easily and shut firmly, which means that they must be fitted very accurately into their frames. Hanging doors and windows is not particularly difficult, and there are only a few facts and procedures you need to know about to get it right every time. The most important part of the job is getting the door or window to fit properly into its frame. They do not fit exactly; there has to be a clearance all round to allow for expansion in wet weather, and to keep the door from scraping against its frame when it is opened and shut.

carpenters fitting door windows

Doors do not open straight as if they were being lifted out of their frame. They swing slightly outwards as they pivot on their hinges, and the lock side of the door, opposite the hinge, has to be cut away to allow for this movement. Different kinds of hinges cause the door to move in different ways, and you have to know how a particular type of hinge will make the door behave. The hinges themselves have to be installed strongly but accurately, so that the door does not sag or hang at an angle. It is not hard to put them in correctly when you know how.

Doors (and wood-framed windows) invariably expand slightly when the humidity rises. If they are painted, or sealed in some other way, it slows down the rate at which the humidity affects them, but they still change size. Outside doors are obviously more affected than inside ones, but even so, inside doors in a house that is centrally heated during the winter or air-conditioned during the summer, may change their size quite noticeably from season to season, perhaps by as much as 1.6mm.

Panelled doors made of solid timber move more than modern ones made from man made boards. Softwood ones move more than hardwood ones. And of course, wide doors move more than narrow ones (in actual distance, not in proportion to their width). The way to estimate the right clearance is to leave a minimum of 1.6mm round the top three sides of the door, and at least 3mm at the bottom (but more about clearance under doors later). Then you can add to this figure 0.8mm for each factor that might make the door expand an extra amount-for example it if is an outside door, in a centrally heated house, or if it is made of solid timber panels. The average clearance for an inside door is about 3mm on the top three sides, and 6mm at the bottom. There used to be a British joiner’s and carpenters rule of thumb that you should be able to get an old penny (just over 1.6mm thick) between a door and its frame all round. This was before central heating, however, and the gap is a bit small by today’s standards. But it is a good way of measuring if you can find a coin of the right thickness for the clearance you need. The method for fitting a standard-sized door into a standard-sized frame is as follows: first, buy a door of the correct size and leave it in the room where it is to be fitted for a couple of days to let it adjust to the prevailing humidity.

New doors with solid timber rails and stiles (this includes many flush doors) often have the top and bottom ends of the stiles (vertical side pieces) left uncut, and these projecting horns, as they are called, should be sawn off and planed smooth. When the door has acclimatized itself, offer it up to the hinge side of the door-frame and examine the edge of door and frame to see if they are parallel. Many frames are leaning or curved, even in new houses. If the frame is really irregular you may have to scribe the door to it, but otherwise an ordinary plane and your own judgement should be enough to make it fit.

Make sure that you don’t remove so much more wood from one end than the other that the door is no longer vertical; an occasional check with a spirit level should guard against this. If the door is not too tall to fit into the door frame at this stage, hold it up with a couple of wedges underneath it while you check it against the frame. If it is too tall, rest it on the floor and put wedges under it only when it begins to take on the right size and shape. After the hanging edge of the door is cut to shape, do the same with the top, then the bottom (remembering to remove more wood than for the sizes).

Then raise it to its correct height on wedges. and shape the last side, which is the side with the lock. Finally run a coin around the top three edges of the door to check that there are no tight spots.

Non-standard sizes

Most door frames in houses less than about a century old are in standard sizes, and you can buy doors that only need a little planing to fit into them. If however, you are unlucky enough to have a door frame in a non-standard size, you are going to have to alter your new door more drastically, than merely planing it. Nearly all doors, including flush (flat surfaced) modern doors have some kind of supporting framework of stiles and rails to strengthen them and keep them from sagging or warping. This is held together by mortise and tenon or dowelled joints. If you remove more than say, l3mm from any side of the door, there is a danger of cutting into one of these joints, and this could seriously weaken it.

One way round this problem is to order a specially-made door, but this might turn out to be expensive. Ask a builders’ merchant and see if you think the job is worth the money.

The best solution is to dismantle a door and re-cut the joints to alter the size-if you can be bothered to do it. It is a laborious job. however, for door manufacturers use good glue and strong joints deliberately to stop their doors from coming apart. Altering the size of window frames in this way is nearly impossible for the amateur carpenter. They will almost certainly have lo be made to measure by a professional joinery and carpentry company.

Ledged and braced doors

Ledged and braced doors are usually seen outside the home where their strength provides necessary security on garages, sheds and other outhouses. If constructed carefully and well designed, though, a ledged and braced door can add an interesting and attractive touch inside the home. The basic construction of ledged and braced doors is simple. The face of the door consists of vertical lengths of timber, called battens, which are butted together along their long edges. They are held together by ledges. horizontal pieces which are as long as the door is wide. Most of these doors also have braces, pieces of timber that run diagonally between two ledges. These always run upward from the hinged side; they give added strength to the door. There are many designs for ledged and braced doors.

ledged door

If the door does not have to be particularly strong-for a cupboard, say you can do away with the braces. You can use only two ledges, one near the top and one near the bottom of the door. Another variation is a framed, ledged and braced door. This has stiles and rails jointed together, with the battens glued and pinned into a rebate cut on the inside edges of the stiles and rails. The construction of this type of door is basically the same for making Dutch doors though, of course, the door is not cut in two. Most British doors are 31 mm thick, and if your door frame will only take this size you can build the door to this thickness. Doors on outhouses. however, need to be fairly solid for security, and for one of these you may wish to increase the thickness to 38mm; you can then use 19mm timber for all the pieces, which will be more convenient and less wasteful than using two different thicknesses of wood. The width of the timber depends largely on the design you choose but 100mm is a common size for ledged and braced doors. Doors made from wider boards tend to look heavy and unattractive. Tongued-and-grooved boards are often used for battens. These help to provide a weathertight seal. Square-edged boards can be used but these are not as weatherproof, especially when they shrink and gaps appear between them.

Hanging the door
Ledged and braced doors are hung with tee hinges. The long part of the hinge is screwed to the ledges. If the door is fairly heavy and has been built from thicker timber than that suggested above a heavier type of hinge, known as a Scotch tee hinge, may be necessary. You will also need to fit some kind of lock, bolt or latch to the door so that it closes securely. A barrel bolt is the most commonly used on ledged and braced doors. These are made from iron, brass or bronze, but for purely functional purposes an iron bolt is sufficient.

Dutch doors

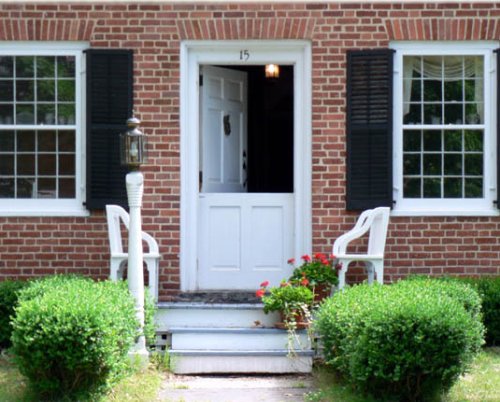
Dutch doors, traditionally seen in farmhouses and rustic country cottages, can be both an attractive and functional addition to various rooms in the more conventional home. Dutch doors are doors that are separated into two pieces across their width. This enables one half to be opened independently of the other. Traditionally Dutch doors were ledged and braced but any design, providing it incorporates a middle horizontal rail, can be copied as a Dutch door. Standard British doors are 1.98m x 0.76m. The size of the door you build will obviously depend on the size of the door you intend to replace. The construction involves quite advanced jointing techniques and very accurate rebating.

A Dutch door consists of a frame composed of four horizontal members, or rails, and two vertical pieces, or stiles, which run the whole length of the outsides of the door. The top rail of each part of the door is made from timber of the same size.

Timber cladding

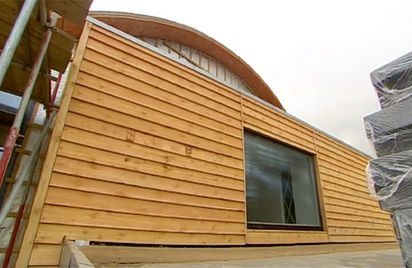
Three main types of board are used for timber cladding.
These are:
1. Tongued-and-grooved (T & G) boarding is timber specially cut and rebated so that one section slots into and interlocks with another. It can be bought in standard lengths or cut to specification by the supplier. A variety of widths and thicknesses is available, the most popular for indoor use being 100mm wide by 19mm thick. They are usually supplied already sanded, but unfinished. The advantage of T & G boards over ordinary square edged planks is that they can be fixed through the tongue-this is known as ‘secret’ fixing, as the nails do not pierce the surface of the board.

2. Finished timber is supplied in a variety of lengths, widths and thicknesses and does not come sanded.

3. Laminated boards are plywood or hardboard panels faced with a laminated wood grain design. They have grooves cut down the face to give the effect of solid wood. They have to be fixed through the surface.

Fire Safety
Make sure the timber cladding complies with the Fire Safety Regulation.

Uses & Design considerations

You will have to decide which way you want the boards to run. Ceiling cladding usually seems to look better running the length of the ceiling-the effect is far less bitty than if you ran it sideways. However, you may wish to alter the existing proportions of the room, by running the boards across the room. This can make a narrow room appear wider. The sawn ends of the boards will have to be disguised in some way and other decorative features of the room may facilitate this. If, for example, you have a wall that is ‘all window’, consider running the sawn ends to it and disguising them with a pelmet above the window.

If you decide to run the boards the long way across the ceiling (and if the joists run across the room) you can fix them directly to the joists either with brass screws or nails. If you use screws, ensure they are of sufficient length so that the whole of the screw thread will be firmly bedded in the joists. Should you wish to lower the ceiling slightly, fix battens at right angles to the direction you want the boards to run, by screwing them either along or across the joists. Before you do anything, however, find out what alterations you will have to make to the light fitting. You will need to fix a new ceiling rose to the boards-if there is any loose flex above the original rose this will be a simple task, but if there is not, some rewiring will be necessary.

South Kensington

Roofing,Carpentry,Joinery

Our team of Carpenters, Roofers and Joiners cover South Kensington & Chelsea area. Flat roofs, new roofs, Pitched roof, tiled roofing, slates, lead roofing, woodworks, carpentry, doors, windows,flooring, cupboards, wardrobes, staircases, roof windows, skylights, roofing repairs.

roofers london

Draughtproofing

Heat insulation will be largely wasted if your house is draughty. It is no good warming the air in a house if the wind just blows in and replaces it with cold air. Curing draughts is cheap, quick, and easy. It is not only old houses that are draughty. Modern ones, too, have cracks and gaps through which air can pass. Even if you cannot feel a draught, heat may be pouring out wastefully and being replaced by cold air-a process that loses you money as well as comfort. Even a well-fitting door lets in an amazing amount of cold air unless it is properly sealed around the edges.

Wooden window-frames, especially in old houses, are no better. In particularly draughty houses, more heat may be lost in this way than any other. Many types of door seal are sold. The cheap kinds work just as well as the expensive ones, but do not look so good. One of the cheapest is a simple felt strip that is hung from the bottom of the door by a strip of adhesive backed plastic. This type is particularly good for irregular floors, because it does not get caught as the door moves. More expensive draught excluders are often attached to the threshold itself and not to the door.

They are generally made of metal, and are screwed or pinned to the threshold so that they line up with the bottom of the door. The great advantage of this type of excluder is that it keeps rainwater from seeping under outside doors. The sides and top of a door may be nearly as leaky as the bottom, but need a different type of sealing. One highly effective type that can be used around doors and windows consists of thin metal strips that are nailed to the frame where the door or window touches it.

After nailing down, they are bent outwards so that they press hard against the door or window to provide a tight seal. Some types of strip come with instructions and a special bending tool. They are quite easy to install. Others must be put in professionally. A cheaper alternative for doors and windows is self-adhesive plastic strip. This is bought in rolls and simply stuck to the door or window frame. Be sure to clean dirt and grease from the place where it is to be stuck.

A chimney takes a lot of heat from a room if there is no fire in the fireplace. Closing off the chimney opening is an advantage, but it should never be blocked completely, or it may cause condensation and damp patches on the walls. The fireplace can be closed off with hardboard or some similar material, leaving a tiny gap at the bottom to ventilate the room without too much heat loss. Or, better still, it can be bricked in for a neater appearance, so long as ventilation bricks are provided. In draught-proofing, ventilators such as air-bricks should never be blocked up. Even the best-insulated buildings need a small flow of air, without it, condensation or dry rot may result.

Rooflights

Rooflights,roof windows,skylights, sun tunnels & mirrors for dark rooms

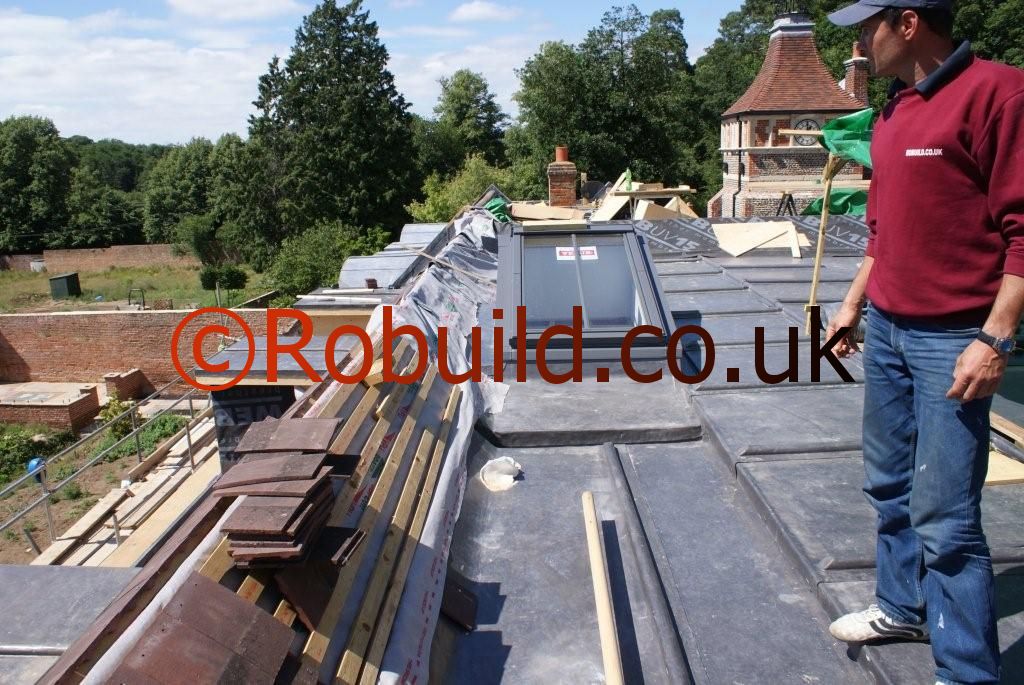
Rooflights or skylights are invaluable for giving extra light, particularly at the top ol a stair well, or let into a flat or sloping roof over a dark room. If you do fit one into a flat roof, you will need to alter the positions of the joists to make room for it, a square one is the easiest. One of the problems which arise with rooflights is that they let in water if they have not been fitted properly. In order to make your rooflight watertight, fit a cowling with a lip around to keep out the rain or install a flashing.

Mirrors
A well-placed mirror is another great help in a dark or gloomy room. The best method is to hang a large mirror on the wall opposite the windows so that it reflects the light coming into the room, doubling its effect. Just as a light near a window will increase light, so will a table light placed near a mirror. The mirror reflects the light again and again, creating an impression of much more light. Full length mirrors transform a dark hall, passage or landing, particularly if they are placed so that they reflect bright, sunny furnishings. In a minute, dark bathroom, you can go further and have a complete wall of mirrors. Add a strip light concealed behind a fake pelmet above the mirror, casting light down where it is needed. Look for huge old mirrors in junk shops and use them as bedheads in dark bedrooms. If you cover all the doors of a fitted row of cupboards with mirrors, it will help to create a feeling of more light and space.

Dark areas
Basement rooms or flats can be brightened up considerably by decorating the area outside in light colours. The simplest and cheapest way is to paint everything, brick walls, steps, doors and dustbin cupboard in a light colour such as white or yellow. Dark-leaved climbing plants will darken an area, so choose the type with variegated leaves if you want greenery outside the window. Plant whitepainted tubs with bright flowers like marigolds and nasturtiums and arrange them on the outside window sill or at the base of the wall if you have full-lengthwindows. Mirrors can be used here, too. Fix a mirror on the area wall opposite the window; the bigger the mirror the better. Any old cracked or damaged mirror will do, and you can arrange a’frame’ of plants around it to make the area seem larger. If you don’t want to have to look after plants all the time, try painting a bright flowery mural on the area wall opposite the window. Even a simple yellow sun on a blue background looks effective, and makes a light-hearted treatment for a dull area.

Free standing shelves

Shelves which do not have their ends supported by a wall are harder to fix unobtrusively. Most people putting up this kind of shelf settle for small, nest brackets, but if you feel you must have invisible fixings, there are solutions to the problem. The simplest method is suitable only for timber framed stud walls. Few houses in Britain have this type of wall, except in the ‘box room’ over the stairs, but a few recently built houses have stud partition walls.

Another similar method for brick breeze-block walls uses steel angle brackets the flat solid steel kind not the U-section type made of sheet metal. The horizontal parts of the brackets are slotted into the shell as the coach screws were. The only difference is that the slots in the shell are rectangular, rather than round. These slots are made by drilling several holes and cutting out the wood between them with a long, narrow chisel. It is easier to make the slots too wide and insert narrow pieces of wood as a wedge to hold the shelf firm to the brackets. The other half of the bracket is harder to hide.

One solution is to plug and screw’ it to the wall and hide it with a backboard. If there are three or more rows of shelves and the backboard runs behind them all, it can be quite a decorative feature. A more satisfactory way of hiding the brackets is to recess them into the wall 6 -13mm and cover up the recess with filler. A neat. shallow channel can be cut in a plaster wall with an ordinary carpenter’s chisel, though you will have to sharpen it afterwards. The blade should be held at an angle so that its cutting edge always points towards the centre of the channel. Then, if the blade slips, it will damage the plaster inside the channel instead of making a long gash in the wall. Once the channel is cut use proprietary plugs and screws to fix the bracket to the wall. As brick is much harder to cut than plaster, the above method is probably not worthwhile for a brick wall. Brackets should not be placed too near the ends of shelves or they will make it liable to sag in the middle. A proper position for a pair of brackets under a free-standing shelf is roughly one-quarter and three-quarters of the way along it. With this arrangement, neither the middle nor the ends is very far from a solid support. A shelf should always be fixed rigidly to its brackets to stop it from tipping up if the end is pressed down.

Featured fixings
If you cannot hide the fixings of your shelves, the best thing to do is to bring them out into the open and make a feature of them. One way of doing this is to buy a ready-made shelving system, which has the great merit of being adjustable. If this doesn’t appeal to you, there are many good-looking fixings you can make yourself. If you have period furnishings,timber brackets are probably the most suitable. A typical design, intended to be made out of l5mm thick hardwood, is a good choice. The shape can, of course, be varied , provided that the vertical depth of bracket is at least half the width of the shelf. The bracket is best fastened to the back plate with a mortise-and-tenon joint as shown, but can be screwed on from the rear if you prefer. One of the simplest ways of holding up shelves, and one that looks particularly good with modern furniture, is to run vertical boards up the ends of the shelves to turn them into a wall-mounted box. All the shelves except the top one should be attached to the vertical boards by stopped housing joints. and the top shell rebated at each end. This construction, makes the shelves look like a bookcase, is very strong. (in good carpentry, shelves are never supported by just the strength of screws driven into the ends.) A backboard, even of hardboard, fitted behind the unit makes it even more stable, by acting as a brace in a long unit, short vertical ‘spacer’ boards can be put between the shelves to hold them apart. An attractive random effect can be created by placing these boards at irregular intervals. There are many other methods of giving your shelving an interesting appearance.

As long as the boxes are not stacked too high, they provide a strong, stable storage space that can be rearranged to any shape. If all the boxes are made the same height, but some are twice or three times as wide as the others, an enormous variety of arrangements can be made to suit any use. A wide variety of fixings are available for interior and exterior use. The choice of fixing will depend largely on the weight of the object to be fixed, and the type of wall or ceiling it is to be attached to. There are three basic methods of fixing: for solid walls, masonry nails and plugs and screws (or bolts in the case of very heavy objects) are used, and for hollow surfaces such as panelled walls or ceilings, cavity devices can be used.

Chimney breast and alcoves

General construction details for cabinets and shelving

chimney breast cabinets london

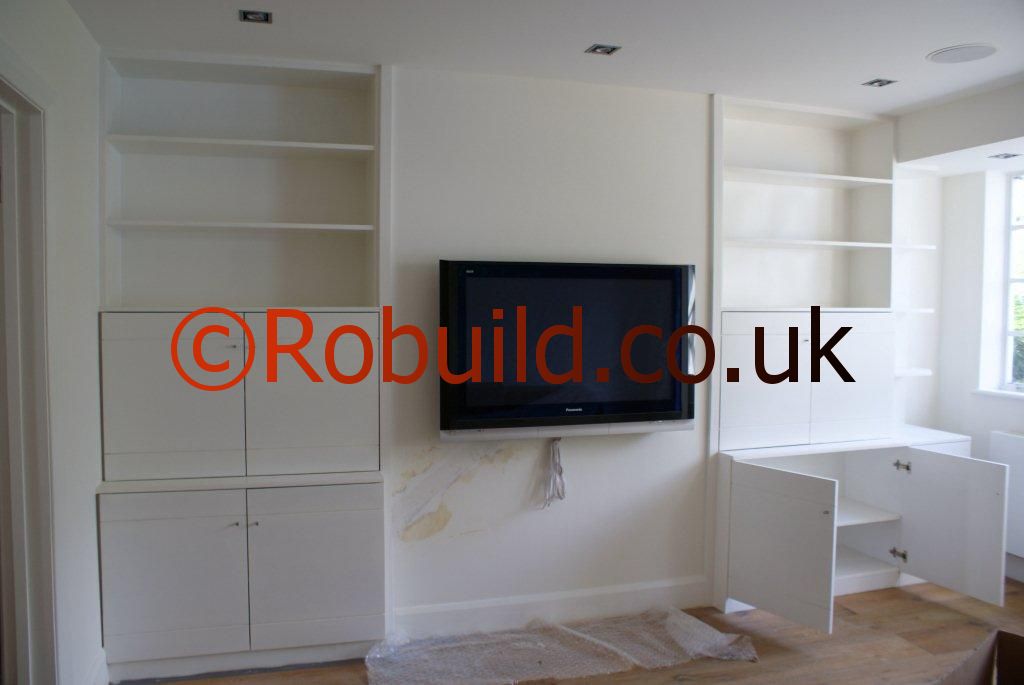
The alcoves on either side of a chimney breast are usually just wasted space. The recesses and breast can be used to make a feature of the area, and fitted with shelving and storage units to make good use of the space. In some instances the chimney flue has to be blocked up, and the fireplace opening used for other purposes, but you could just as easily panel round a fireplace that is in use. The walls can be battened, panelled, and fitted with shelving brackets to which storage cabinets are fixed. Or you could have custom build cabinets and shelving. The shelving brackets are used to hold two cabinets there could be more-and in this case one is used as a casing for a DVD player and other for storing different electronic equipment and gadgets. But they could be used for other purposes or for general storage.

shelving cupboards living room

The shelf brackets that hold the cabinets obviously support a considerable weight, so their fixing strips are screwed through the panelling into extra strips of hardwood batten which are in turn screwed securely to the wall.

The cabinets can be made from MDF, but you might prefer other materials, like hardwood or laminated surfaces.

Electricity
It is almost certain that at least one of your alcoves will have a power point or switch in it, which will have to be brought out flush with the panelling. All the wiring should be hidden in such way that there are no cables hanging around.

The shelving strips

These are the vertical strips into which the shelf brackets fit. They are screwed to the support battening using 25mm screws. After you have fitted one strip, make sure that every adjacent strip is lined up so that the shelf bracket holes are in line. To do this, fit a shelf bracket to the strip you have just fixed to the wall, and one at the same height on another strip. Hold the loose strip in place while a straightedge is placed along the two shelf brackets. You can now adjust the correct level of the loose strip with a spirit level.

The cabinets
The construction of the cabinets is comparatively simple, but there are a few points to bear in mind. First the cabinets must be large enough to accommodate their intended contents easily. This might be obvious, for example, in the case of fitting a game console or a TV unit.

Obviously, if other equipment is installed in this space, the requirements will be different and the cabinets will have to be altered to match. But the basic design is so simple that you should have no trouble altering them, or for that matter, any other part of the unit.