Roofers and Carpenters in London

Roofers and Carpenters in London

Aluminium and UPVC replacement windows

Although they are still available, it would be difficult to find either aluminium or UPVC replacement windows which are intended for use with single pane glazing. Invariably, such windows are designed to be fitted with sealed units having a 6 or 12mm gap. It is common for companies specialising in these windows to operate a supply-and-fit service. However, most will also work on supply-only basis.

This means that they will provide you with all the component parts ready for you to install yourself. When doing your own fitting, the only measurements you need to give the supplier are the height and width of the opening into which the window is to be fitted. If the existing outer wood frame is in excellent condition particularly at the bottom of the iambs and along the sill, you can normally fit the new window in exactly the same place as the old one, with no trouble at all. If the outer frame is in poor condition and a new one is required, then the window supplier will be able to provide this as well. In this case, the only dimensions he needs are those of the opening in the wall. From these he will be able to calculate all the other sizes.

You will, of course, need to specify the style of window, the type of glass, whether or not the glass has to be leaded or fitted with a grille to be made non-standard in any other way. The sealed double glazing units fitted in replacement aluminium or UPVC windows are the same as those used in wooden framed windows butthe installation method is somewhat different.

The glazing unit is always fitted ‘dry’, rubber or PVC gaskets being used to provide a seal to the frame. No mastics or sealants are required at the glazing stage. There are two basic glazing methods in common use. One of them nvolves making up the frame around the glazing unit. Each frame section, complete with gaskets on either side, is pushed over the sealed unit and then the four corners are screwed together tightly to hold it in place. The other method is to make up the frame, which has an integral glazing rebate, insert the glazed unit and secure it in place with a ‘snap-in’ glazing bead.

New wooden window frames

New wooden window frames The increasing use of sealed double glazing units has led to most manufacturers supplying new wooden frames with glazing rebates of sufficient depth to take standard sealed units up to a maximum thickness of about 20mm. By choosing your supplier carefully you will be able to order both frames and glazed units at the same time.

new window installation

You won’t need to measure for the glass if the frame is one of the many standard sizes available. If you need to have frames made, you should make it clear to the carpenters & joiners that you will befitting sealed double glazing units. He will then make allowance for this when making up the frames Normally, the glass is fitted using wooden glazing beads to hold it in place and putty or a similar glazing mastic to provide a seal between the unit and the frame. Acrylic putty is coming into use now and is ideal for double glazing units.

Fitting double glazing units to existing wooden frames

There are several factors you should consider in deciding whether or not to replace single panes of glass with sealed double glazing units. Your existing window frames must be in excellent condition as there is little point in fitting sealed units into frames which may themselves have to be replaced within a few years.

If the frames are more than 60 years old they are not likely to be of a standard size and so they would need specially-made sealed units. These would not be reusable in a new standard replacement frame and so this would have to be made specially, too. Standard size sealed units are, in effect, mass-produced and so are cheaper than specially made ones. They are obtainable virtually ‘off the shelf from many suppliers, particularly for use in wooden-frame windows.

carpenters windows doors glazing

The rebate in the existing frames must be deep enough to accommodate the thickness of the sealed units and still allow them to be puttied in place or fixed with a glazing bead. You are likely to be changing from a single glazing thickness of 3 or 4mm to at least 12mm, rising to 18mm if you want units with a 12mm gap. For the latter, therefore, you would need a rebate measuring some 30mm from front to back, and not all old frames have this.

It is possible, however, to overcome the problem of too narrow a glazing rebate by using what are known as ‘stepped’ sealed units. These have one sheet of glass smaller than the other, the larger pane being fitted exactly in the same position as the original single pane with the smaller one on the inside, overlapping the back of the glazing rebate. Such stepped units are readily available to fit standard modern window sizes, or they can be made specially. They can be used in wooden frames but not in steel, which are generally unsuitable for sealed unit double glazing. The same can be said of any windows incorporating a large number of small panes, such as Georgian styles.

The cost of replacing all the individual panes with sealed units would be extremely high, even if the glazing bars were of a suitable size. However, if you wish to keep this appearance, complete sealed units are available that reproduce the Georgian or leaded-light look quite effectively.

If you are quite satisfied that sealed units can be fitted to your existing frames, the first step is to measure the rebate so you can order the correct size. Take great care to get the correct dimensions because, once made, the size of the sealed unit cannot be altered. With standard sizes this is not so much of a problem, but if you are having the units specially made it could prove to be an expensive mistake if you get it wrong. The height and width of the rebate should each be measured in at least two places. If there is a difference between any of the measurements, work with the smaller size.

Deduct a further 3mm from both the selected height and width to allow for clearance around the unit, and this will be the size you should order. Once you have the new sealed units, remove the putty from the window frame using an old chisel or similar tool and taking care not to damage the wood. Pull out the glazing sprigs with a pair of pincers and carefully lever the glass from the frame. Wear thick gloves or wrap a towel round the edge of the pane to prevent cuts as you lift it clear. If the glass is stuck fast to the old bedding putty, you may find that it can be tapped out from inside by a helper.

Only gentle taps should be used to avoid breaking the glass accidentally. If all else fails, break the glass from the inside with a hammer (making sure there is no-one outside who might be injured by the flying fragments) and pull out any remaining glass with a gloved hand or pair of pliers. Clean out the remains of the putty and brush any dust or dirt from the rebate. Reprime any areas of exposed wood and allow the primer to dry before fitting the new unit. Line the rebate with a bedding layer of fresh putty, inserting rubber spacing blocks at intervals along the bottom and at each side.

These should be cut to a thickness that will centralise and square the double glazing unit in the frame. Offer up the new unit bottom edge first and gently press it into place with the palms of your hands so that the bedding putty oozes out round the inside edges of the sealed unit. Apply pressure only to the edges of the unit to prevent the glass breaking where it is unsupported in the middle. Check inside that there is about 3mm of putty between the inner face of the glazing unit and the rebate. Next, very carefully tap in the glazing sprigs, using a cross-pein hammer. Use at least two sprigs per side and slide the head of the hammer across the glass to avoid breaking it.

Drive each sprig in squarely so that it does not pinch the glass until only 6mm (1/4in) remains visible. If you can’t obtain proper glazing sprigs, you can use 19mm panel pins with their heads nipped off

Apply a finishing fillet of putty all round the rebate, pressing it into place with your thumb so that it covers all the edges of the glass. Smooth this off to an angle with a putty knife, making sure it does not project above the level of the rebate otherwise it will be visible from inside the room. Mitre the corners carefully and clean off any excess putty from both inner and outer panes of the unit.

Leave the putty to harden for two weeks before applying a coat of primer and finally a finishing coat of paint. The latter should overlap onto the glass by 3mm to ensure a watertight seal. If stepped double glazing units are to be fitted, a rebate for the stepped portion of the unit can be made by pinning lengths of beading around the inside of the window frame. Extra putty will be needed around this stepped rebate to provide a bed and surround for the inner pane of glass.

London Carpenters

Installing Double Glazed Sealed Units

Fitting sealed double glazing units will provide good heat and sound insulation as well as reducing draughts. They are easy to install in either existing or replacement window frames.

It is well known that double glazing offers considerable benefits for the homeowner. It can considerably reduce draughts from around the window area, not only those which enter through badly fitting frames but also down-draughts caused by warm air close to a cold, single pane of glass being quickly cooled and so falling.

double glazed dormer window

Eliminating these down-draughts makes for a more comfortable environment and prevents that ‘chilly’ feeling even though the room is heated. Some forms of double glazing can, to some extent, also reduce the penetration of noise from outside the building, but the major advantage is that the use of two panes instead of one can help reduce heat losses through glazed areas, providing a potential for saving energy and, hence, cutting fuel costs.

By far the most efficient method of achieving such thermal insulation is by the fitting of sealed double glazing units in place of single panes of glass in the window frame. This is known as primary double glazing.

Each sealed unit comprises two sheets of glass separated by a metal, glass or rigid plastic spacer which is fitted around the edges. The air between the two panes is dehydrated so that it contains no moisture, and the entire unit is sealed hermetically so that none can enter. As long as the seal remains unbroken condensation cannot form between the two sheets of glass. The space between the panes normally varies between 6 and 12mm (1A and 1/2in), the wider gap providing the best thermal insulation properties.

The glass itself will vary in thickness from 3mm upwards depending on the size of the pane and the position of the window, many different types being available including float, laminated, toughened, standard sheet, tinted and obscured. All sealed double glazing units are factory made by specialist companies and cannot be assembled at home. However, they can be fitted by the non-professional glazier in much the same way as normal replacement panes of glass either to existing window frames or into completely new replacement windows.

Local glass merchants and double glazing manufactures are involved in the supply of sealed double glazing units in a wide range of standard sizes or in made-to-measure form to suit individual requirements, and it is now common practice for complete replacement windows, made from wood, aluminium or UPVC, to be supplied with sealed glazing units fitted as standard.

How to Remove Broken Glass

Criss-cross the pane with brown sticky tape so that when you tap the glass out it won’t fragment.

TOOLS FOR REGLAZING

Hacking knife: has a flat back for tapping in glazing sprigs.
Cross-pein hammer: light, has a wedgeshaped pein opposite the striking face.
Putty knife: can have square-ended blade, or flat and curved edges to the blade.

carpenter wood door glass

Replacing and repair broken glass for windows and doors

Buying new glass

It’s important to choose the right type of glass, but don’t try to cut it to size yourself. Your local glazier will do a much better job, and is less likely to break the pane in the process. There’s also no financial advantage to doing the job yourself for you’ll be left with unusable off-cuts. And don’t think you can use up that odd piece of glass you may have lying about.
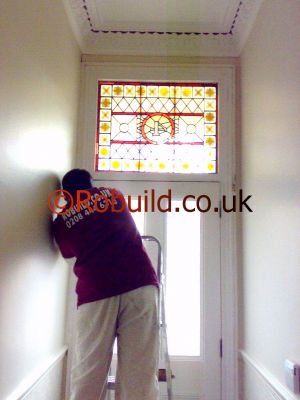
robuild painting glass door

Old glass does not cut well at all, and tends to break in the wrong place even when you’ve scored it with a carbide – diamond tipped glasscutter. So measure the width and height of the rebate into which the glass must fit; double check the measurements to be sure, and order the glass to be cut 3mm smaller on each dimension. This allows for any slight inaccuracy in your measurements, and avoids the risk of the glass cracking due to expansion or contraction of the frame. If you need patterned glass, make a note of which way the pattern runs.

The fixing process

First you must line the rebate with putty. You can either take a ball of putty in the palm of your hand and squeeze it out between thumb and forefinger using your thumb to press it in; or you can roll the putty into fingerthick sausages and press these into place. Wet your hands before handling putty to prevent it sticking to your fingers, and knead it until it is pliable and any surface oils are thoroughly mixed in.

Next, press the pane into the puttied rebate with the palms of your hands, so that putty oozes out, around and behind the glass. Apply pressure around the edges rather than in the centre of the pane and check that, when you’ve finished, the glass is separated from the frame on the inside by a bed of putty which is 2mm to 3mm (up to 1/8in) thick.

Now for the unnerving part – nailing the glass in place.

It’s best to use glazing sprigs, but you could make do with 19mm panel pins that have had their heads nipped off with pliers. You’ll need at least two per side, spaced no more than 230mm (9in) apart, and you must be sure to drive them squarely into the wood so they don’t pinch and crack the glass. When you’ve finished, just over 6mm (1/4in) of pin should be showing. The final stage is to fill the rest of the rebate with a triangular fillet of putty that neatly covers the pins.

Apply the putty in the same way as when lining the rebate, and use a putty knife or an ordinary filling knife to do the shaping, mitring the corners of the fillet as neatly as possible. Wet the knife blade to prevent the putty sticking to it as you draw it over the fillet. Clean off the excess putty – including any that oozed out inside the pane earlier – and allow to dry hard before painting. When you need to reglaze a window that isn’t at ground level, you’ll have to work from a ladder. Obviously you’ll have to be organised when working at a height. Tap out most of the glass first from inside-and make sure there’s no one standing below as you do so. Put all the tools and equipment in a bucket which you can hang on a hook attached to the ladder at the top. Don’t try to carry the glass – it’s best to get someone to pass it through the window.

Modern windows

Conventional steel-framed windows are reglazed in almost the same way as wooden ones, except that the glass is fixed with wire clips fitting into holes in the frame, rather than with glazing sprigs. Remove these and re-use them to fix the new pane – along with the right type of putty – after priming with a metal primer. Because putty needs paint to protect it, and because modern aluminium and plastic windows aren’t meant to be painted, a different method is used to hold the glass. Normally, it’s a variation on the rubber gasket system used to keep the windows fixed in a car. Just how easy these windows are to reglaze depends on the design; different manufacturers have their own systems and unless it is obvious how the glass fits in, all you can do is ask the window manufacturer for his advice. In some cases, he will prefer to do the repair himself.

Replacing double glazing

There are few problems where secondary double glazing is involved. This system uses a completely separate window frame to hold the extra pane of glass. All you do is treat each element of the system as a single glazed window. One complication you may come up against is where a do-it-yourself double glazing kit has been used.

In this case the extra ‘frame’ may be no more than plastic channelling clipped over the edge of the glass, so it’s more a case of remaking this frame than reglazing it. Replacing double glazing where both panes are mounted in the same frame is more involved, and how you approach it depends on whether factory-made sealed units or two ordinary panes of glass have been used. In the latter case, you merely fix two new panes in the same way as if reglazing an ordinary window. Just be sure you don’t get marks on the panes facing into the double glazing’s air gap – you can’t clean them off once the second pane is in place.

Factory-made sealed units are also sometimes fitted like a single pane of glass but, more often, you’ll have a modern gasket system to contend with. In any case, the most important thing is to order the new sealed units to exactly the right size. They cannot be trimmed if you make a mistake. Dealing with leaded lights Strictly speaking, to reglaze a leaded light, you must remove the putty and glazing sprigs from the main window frame and lift out the entire glass and lead latticework, so it can be worked on flat.

You may, however, get away with working in situ if you get a helper to hold a sheet of hardboard or something similar against the other side of the pane, to keep it flat while you carry out the repair. Whichever approach you adopt, you must lever away the lip of lead (called the ‘came’) holding the glass in place by using an old chisel. Cut the lead near the comers of the pane with a knife to make this easier. Remove the broken glass, clean out the putty from the channel in the lead, apply new putty and then fit the new pane-this should be cut to fit the dimensions of the rebate exactly. Finally, smooth back the lead with the handle of the chisel to hold it in place. To finish, make good the knife cuts with solder, or with a proprietary plastic repair compound.
There’s more about this type of repair in another section.

Why glass?

You may be wondering why nobody has come up with a glass or glass substitute that never breaks. Well, they have. Leaving aside bullet-proof glass and the like, there are a host of plastic glazing materials on the market ranging from the familiar Perspex to compounds with complicated chemical names. But they all have two major drawbacks – they are comparatively expensive to buy, and they scratch so easily that they lose their transparency.

SKEW NAILING

SKEW NAILING

There II be some situations where you cannot get at the end of the wood to use dovetail nailing. Here you must use skew nailing instead. This means glueing the two pieces securely together and then driving a nail into the upright piece of wood at an angle so it also penetrates the horizontal piece.

skew nailing

Put a couple of nails into each side of the upright so that they cross. To stop the upright moving, clamp a block of wood behind it or wedge it against something solid.

Wood Joints

Wood Joints in Carpentry

JOINTING BLOCKS

Made from plastic, these are just sophisticated versions of the wooden blocks you can make yourself, and they’re used in similar situations. Their only real advantage is that they tend to give a neater result when you’re working with veneered or melamine covered chipboard, but only because they come in the right colours. There are basically two kinds to choose from.

joints blocks

The simplest is just a hollow triangular ‘block’ that comes with a snap-on cover to hide the screws. More complicated versions come in two parts. You screw one half of the block to each piece of wood, and then screw the two halves together using the machine screw provided. It’s essential here that both halves of the block are positioned accurately, and since the blocks vary from brand to brand in the details of their design, you should follow the manufacturer’s instructions on this point.

ANGLE IRONS JOINT PLATES

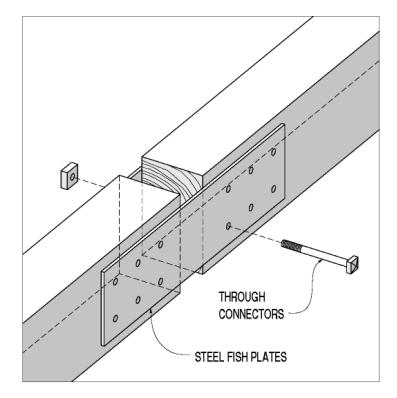
If still greater strength is needed, use either an angle iron or a corner repair bracket to reinforce the joint. These are really just pieces of metal pre-drilled to take screws and shaped to do the same job as a reinforcing block (the angle irons) or to be screwed to the face of the two pieces of timber across the joint (the flat T-shaped and L-shaped corner repair brackets).

metal plates joints carpentry

In either case, bring together the pieces of wood to be joined, position the bracket, and mark the screw holes. Drill clearance and pilot holes for all the screws, then screw the bracket to one of the pieces before glueing the joint together and screwing the bracket to the second piece. They don’t look very attractive, so use where appearance isn’t important, ie, at the back of a joint, or where the joint is going

Fitting and Fixing in Carpentry

Fitting and Fixing in Carpentry

FIXING INTO CHIPBOARD

Because neither nails nor screws hold well in chipboard, how do you hold a butt joint together? The answer is that you do use screws, but to help them grip, you drive them into a chipboard plug. Chipboard plugs are a bit like ordinary wall plugs.

In fact, you can use ordinary plugs, but you have to be careful to position the plug so that any expanding jaws open across the board’s width and not across the thickness where they could cause the board to break up. The initial stages of the job are exactly the same as for the overlap joint – marking out, drilling the clearance holes, and so on. The difference is that instead of boring pilot holes in the second piece of wood, you drill holes large enough to take the chipboard plugs.
Pop the plugs into the holes, glue the joint together and drive home the screws. Incidentally, if you can’t use any sort of plug at all – for example, when screwing into the face of the chipboard the only way to get the screw to hold properly is to dip it in a little woodworking adhesive before you drive it home.

REINFORCING BLOCKS

The joints described so far are fairly robust, but if a lot of strength is needed it’s worth reinforcing the joint with some sort of block. The simplest is a square piece of timber. First drill and countersink clearance holes through the block and glue and screw it to one of the pieces you want to join so that it’s flush with the end. To complete the joint, glue the second piece in position, and drive screws through into that.

You can arrange for the block to end up inside the angle or outside it. Choose whichever looks best and is easiest to achieve. With the block inside the angle, you’ll have a neat joint and the screw heads won’t be openly on display. However, in most cases it means screwing through a thick piece of wood (the block) into a thin piece (one of the bits you want to join), so it’s not as strong as it might be. If greater strength is needed work the other way round, driving the screws through the pieces to be joined, into the block. You can neaten the result to a certain extent by using a triangular rather than a square block.

DOVETAIL NAILING & THE OVERLAP WOODWORK JOINTS

DOVETAIL NAILING & THE OVERLAP WOODWORK JOINTS

DOVETAIL NAILING

This is a simple way of strengthening any butt joint. All you do is grip the upright piece in a vice or the jaws of a portable work-bench, and glue the horizontal piece on top if it – supporting it with scrap wood to hold the joint square – and then drive in the nails dovetail fashion.

Wood work joints dovetail

If you were to drive the nails in square, there would be more risk that the joint would pull apart. Putting them in at an angle really does add strength. The only difficulty is that the wood may split. To prevent this, use oval brads rather than round nails, making sure that their thickest part points along the grain. If that doesn’t do the trick, try blunting the point of each nail by driving it into the side of an old hammer. This creates a burr of metal on the point which will cut through the wood fibres rather than parting them. Once the nails are driven home, punch their heads below the surface using a nail punch, or a large blunt nail. Fill the resulting dents with wood filler.

Dovetail Joint hand cut

THE OVERLAP

This is the simplest of all and is one you can use on relatively thin timber. The example shown is for a T-joint, but the method is the same if you want to make an X-joint.

joint wood

Bring the two pieces of wood together as they will be when joined, and use a pencil to mark the position of the topmost piece on the one underneath. To reinforce the joint, countersunk screws are best, so mark their positions on the top piece of wood, and drill clearance holes the same diameter as the screw’s shank – ttie unthreaded part – right the way through. The screws should be arranged like the spots on a dice to help stop the joint twisting out of square. Enlarge the mouths of these holes with a countersink bit to accommodate the screw heads, and clean up any splinters where the drill breaks through the underside of the wood. Bring the two pieces of wood together again using a piece of scrap wood to keep the top piece level.

Then make pilot holes in the lower piece using either a bradawl or a small drill, boring through the clearance holes to make sure they are correctly positioned. Make sure the pilot holes are drilled absolutely vertically, or the screws could pull the joint out of shape. Finally, apply a thin coating of adhesive to both the surfaces to be joined (follow the adhesive manufacturer’s instructions), position the pieces of wood accurately and, without moving them again, drive home the screws.

London Carpenters and Roofers