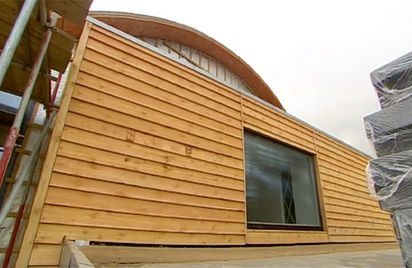
Three main types of board are used for timber cladding.
These are:
1. Tongued-and-grooved (T & G) boarding is timber specially cut and rebated so that one section slots into and interlocks with another. It can be bought in standard lengths or cut to specification by the supplier. A variety of widths and thicknesses is available, the most popular for indoor use being 100mm wide by 19mm thick. They are usually supplied already sanded, but unfinished. The advantage of T & G boards over ordinary square edged planks is that they can be fixed through the tongue-this is known as ‘secret’ fixing, as the nails do not pierce the surface of the board.
2. Finished timber is supplied in a variety of lengths, widths and thicknesses and does not come sanded.
3. Laminated boards are plywood or hardboard panels faced with a laminated wood grain design. They have grooves cut down the face to give the effect of solid wood. They have to be fixed through the surface.
Fire Safety
Make sure the timber cladding complies with the Fire Safety Regulation.
Uses & Design considerations
You will have to decide which way you want the boards to run. Ceiling cladding usually seems to look better running the length of the ceiling-the effect is far less bitty than if you ran it sideways. However, you may wish to alter the existing proportions of the room, by running the boards across the room. This can make a narrow room appear wider. The sawn ends of the boards will have to be disguised in some way and other decorative features of the room may facilitate this. If, for example, you have a wall that is ‘all window’, consider running the sawn ends to it and disguising them with a pelmet above the window.
If you decide to run the boards the long way across the ceiling (and if the joists run across the room) you can fix them directly to the joists either with brass screws or nails. If you use screws, ensure they are of sufficient length so that the whole of the screw thread will be firmly bedded in the joists. Should you wish to lower the ceiling slightly, fix battens at right angles to the direction you want the boards to run, by screwing them either along or across the joists. Before you do anything, however, find out what alterations you will have to make to the light fitting. You will need to fix a new ceiling rose to the boards-if there is any loose flex above the original rose this will be a simple task, but if there is not, some rewiring will be necessary.
