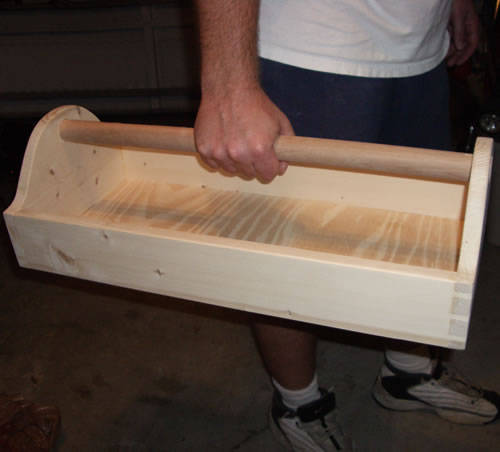
Tool box and tool carriers for tradesmen – organize your tools with these practical carriers and tool box. They are all quite simple to make, and for the carriers you can use offcuts and scraps of wood.

Keeping your tools tidy helps to keep them in good condition and if they are all ready to hand it helps you to work more efficiently too. There is ample room in this tool box for a comprehensive kit of woodworking tools, each in its own place. The two tool carriers are ideal for jobs which you have to do outside the workshop—at locations where you need just a few selected tools and materials.
All three are quite simple to make, although the tool box has a more complicated dovetailed frame. All of them use the minimum of materials, and you can probably make the carriers from offcuts and scrap. Both the tool carriers are made in a similar way. The main difference is in the dimensions and the divisions fitted in the smaller one. The larger tool box also has strengthening blocks fitted to the corners. The joints are simple glued butts, reinforced with carefully inserted pins.
Cut out all the parts from plywood. There is no reason why you cannot alter the dimensions slightly to suit pieces of wood which are available, or to suit the size of particular tools. Glue and pin the box together and fit the dowel handle in place. There is no real need to finish the wood at all, but it is a good way to use up scraps of paint or lacquer left over from other jobs.
It is a good idea to leave the centre of the handle unpainted as it gives a better grip: The tool box is a basically simple construction, but it is complicated by the dovetailed corners. Although these give a much stronger frame, if you prefer you can replace them with box joints or even butts, reinforced with corner blocks. Make the rectangular frame first, taking care to keep the corners square. If you are using dovetails, note that one of the upper joints is wider than the rest. This is to allow for the saw cut which separates the lid . Make this when the frame is dry.
Fit the plywood front and back panels, which are glued and pinned in place. Glue and pin the hinge fillets along the edges of the lid and fit the piano hinge. Make up the two drawers and fit their runners. You can add divisions as you require. Fit the bracket for the hand brace. If you wish, you can make a similar bracket for a coping saw. Fit turnbuttons inside the lid, positioning them to suit your saws. Finish all the timber with lacquer, then add clips and a handle.
