Metalworking Techniques

Occasionally you will have to tackle a metalworking job which calls for more advanced techniques. Here basic instructions are given for sawing metal bars and hardening and tempering home made tools, together with all you need to know about drill bits, screw thread taps and dies. The first consideration is how to cut the material. Before this can be done it must be supported firmly. Here a good solid bench vice is vital. Don’t be tempted to use a carpenter’s woodworking vice-you will spoil the jaws and damage the screw-but use a solid metalworkers’ bench vice. As a rule, always buy the largest, biggest and best you can afford since it will make your work so much easier. The weight of a large vice will help to prevent the work juddering during sawing and provides a perfect support. A tight grip on the metal you are to cut is very important; if the metal slips while you are cutting it, at the very least you may break the hacksaw blade and you may also bruise and skin your knuckles at the same time.

Cutting metal

robuild builder cutting metal

The hacksaw is the best tool for sawing metal, but remember that a hacksaw is not a universal tool. It is only a frame into which you can fit a variety of blades. These blades come in two basic types-ordinary carbon steel and high-speed steel. The latter are more expensive but, used with care, last perhaps three times as long as the more brittle carbon blades. Blades are also described by the number of teeth they have to the inch. The fewer the number, the coarser the blade, and you must select the right one to suit the job. A good guide is that, whatever you are cutting, there are a minimum of three teeth of the blade in contact with the metal at any moment. This is important when cutting narrow sections because if the blade is coarser than this, the teeth will straddle the metal and chip off. For cutting large sections of steel, the coarser the blade (within reason) the better since the wider gaps between the teeth will allow plenty of clearance for the tiny chips of metal which the teeth remove as they are pushed across the metal.

When you fit a blade into a hacksaw frame, always make sure that the teeth point forwards, and keep the blade tight by screwing up the adjuster on the frame-a slack blade is easily broken. Working with a hacksaw is simple providing you use the correct technique. Hold the saw firmly in both hands with your forearms horizontal. Push the saw forward and pull it back with a smooth, steady movement. Don’t saw too quickly-one forward stroke per second is ideal. Do not apply pressure on the back stroke-this does not cut and you will only blunt the tips of the saw teeth. With practice you will automatically develop the correct sawing technique. When you do you will be able to work with a hacksaw for long periods without fatigue. If you have to make a long cut through a narrow section, you can turn this blade through 90 degrees in the frame so that the bow of the frame is well clear of the metal.

How To Drill

Drilling techniques can vary.

builder driling a wall

Whatever you are drilling, the position of the hole should be clearly marked before you start. and a small indentation made in the work piece with a centre punch (or, at a pinch, nail punch or big nail), to stop the drill from wandering in the first few seconds of work. Clamp the work piece down securely, or it may start to revolve. It is essential that the drill should be at right angles to the surface to be drilled. You can line it up with a try square before you start though of course the drill always tilts a bit once you start drilling. Simple drill guides are made that hold the drill at right angles to any fat surface. Or you can buy a drill stand, which holds the drill vertical on a frame. The drill can be moved up and down by a lever. The work piece is placed underneath on the base of the stand. Drill bits should be prevented from overheating through friction.

If they become too hot, the metal loses its ‘temper’ and becomes soft. This is a particular problem with ordinary carbon steel twist bits. Special ‘highspeed’steel bits, made for drilling hard metals, are more resistant-but also more expensive. Masonry bits are very prone to overheating. When drilling wood with a twist bit, remove it occasionally to check that the spirals are not clogged with wood dust, which can lead to overheating. When drilling any metal other than brass or cast iron, lubricate the drill bit frequently to cool. When drilling glass, make a small pool of lubricant around the hole in a plasticine ring. Thin metal should be clamped to a wood backing when being drilled to reduce distortion and keep the drill from jamming as it breaks through to the other side. A piece of thin sheet metal revolving with a drill is extremely dangerous.

Home office

Building a Home Office

An individual home office can solve many problems for you, especially if you run your own business or your job involves working at home. As an ordinary householder, too, you will find it invaluable for the storage of important documents, stationery and laptops. A home office clears away those drawers overflowing with papers and you’ll be able to lay your hands on such items as stamps, envelopes, insurance and mortgage documents without having to conduct a full scale search often without success.Contact London Office Builders for a free Estimate.

The reduced clutter and the resulting increased efficiency of your home makes the installation of a home office well worthwhile. If you run your own business or your job involves a lot of working at home then having an office in your own home is an economic proposition as well as a pleasant convenience. An office at home cuts down travelling time and expense. Also, it is cheaper to use part of your own home than to have to rent and heat a separate office.

If you are in the kind of job where the amount of work exceeds what can be done during normal working hours a home office will allow you to get on with it and still be near your family. You may not run your own business or need to take work home but this does not make a home office any less useful. A well planned home office, tailored to your particular needs, will make a pleasure of sending emails and organising paperwork. And one day you may find yourself handling enough private work, as a salesman or builder for example, to justify adapting it to your commercial requirements.

Types of office

What you expect from your office will have an important influence on its size, design and layout.

If you intend to run your own business from home or your job demands that you work at home a lot you’ll need a larger office with more generous allowance for filing and storage than if you need it only to help you handle the domestic bills and personal correspondence. You should avoid placing a business office in a room which your family regularly use, especially if you have small children.

Ideally your office should be sited in a separate room or best of all in a converted loft garage or in a shade in the garden. If your house does not allow enough space for this, you can make do by taking over part of your bedroom. You are less restricted when it comes to siting domestic office facilities as you won’t need anything like as much space as that for a business office. Also, a domestic office will only be used from time to time and therefore should cause no inconvenience to the rest of your family. When it comes to a small domestic office there are a number of ideas for self-contained units.

Office in the garden
An outdoor garden building converted into an office

Demolishing walls

Knocking through – demolishing the wall

The first step is to remove any skirting boards, cornices and picture rails on the wall. Do so with care if you are leaving a small section of wall either side of the opening, as you can re-use pieces of them when finishing off. Any lighting switches or power points on the wall must be removed but first turn off the the power and take out the relevant fuses in the fuse box. If you want to keep the lighting on during the operation, the switch can be carefully removed and held clear of the wall by tying it back to one of the temporary supports. If you are doing this, ensure that it will be perfectly safe and will not get in the way of the demolition work.

The cables will be revealed when the plaster is removed, but check that the lighting circuit is off when removing the plaster as it is possible that the cable could be pierced. Remove the plaster with a club hammer and bolster chisel. If you are leaving part of the wall at either end as supports, it will only be necessary to remove the plaster a couple of inches beyond the intended sides of the opening. At the top of these supports, however, you will have to remove more plaster to allow for the length of the bearing surface for the lintel. Once the plaster has been removed, and any electrical points or switches taken out, you can start to cut away the masonry.

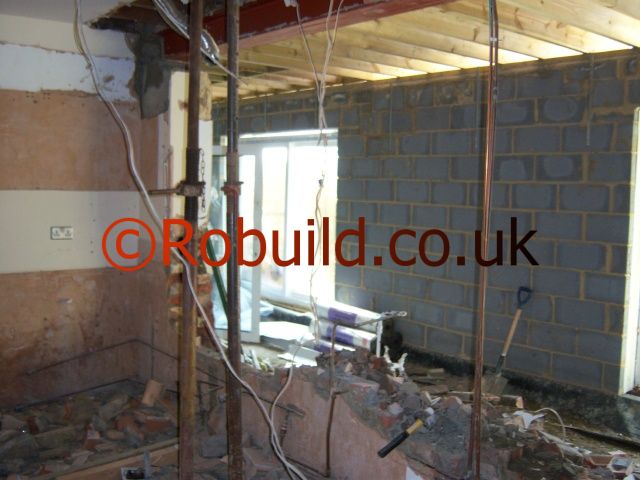
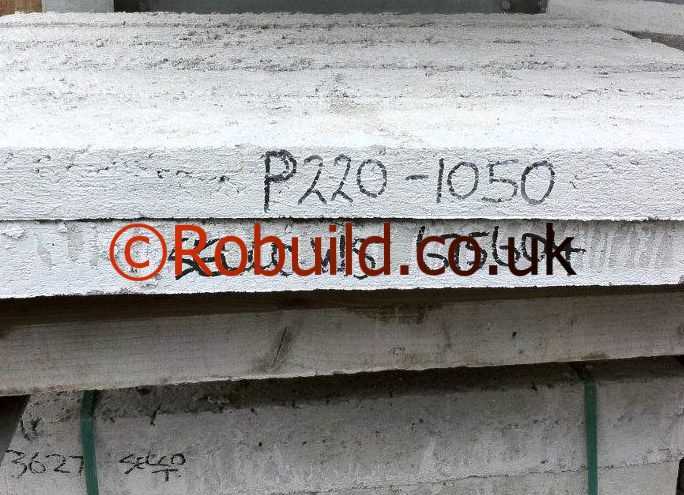
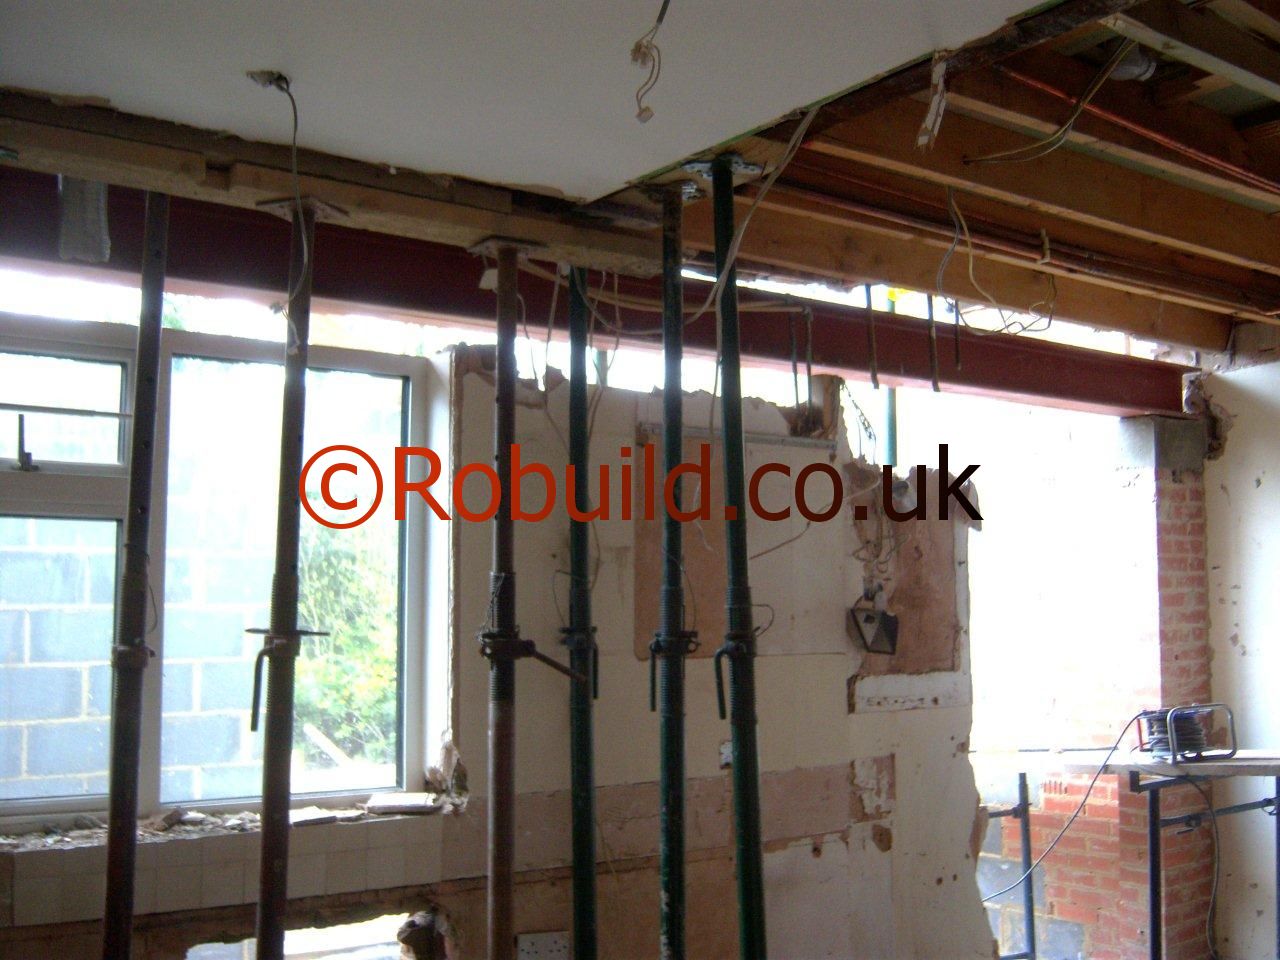
Although the ceiling and wall above will be adequately supported, it is essential to get the lintel in place as soon as possible. This will prevent a possible disaster if one or more of the supports are accidentally dislodged during the removal of the bulk of the wall. The lintel must bear on a perfectly level and flat surface. It is not sufficient to rest the lintel directly on the masonry, so a concrete padstone should be positioned at either end. Its position should be taken into account when cutting away the masonry for the lintel. Padstones can either be cast in formwork on top of each of the support walls or cut from a 50mm thick concrete paving slab, which is then placed on a bed of mortar. If you are casting your own, it should be at least 75mm thick, as it will not be compacted as tightly as a concrete paving slab. In the situation where the ends of the lintel are to rest on the wall through which you are cutting, the size of the padstone must be equal to the dimensions of the bearing surface.

lifting metal beams

For example, a l53mm x 115m padstone must be used if a 1l5mm lintel is to rest on a ll5mm thick brick wall. Where, however, one end of the lintel (or both in some cases) is to be taken into an adjacent wall, the padstone must be at least twice the width of the lintel to spread the load properly. For example, your 115mm lintel would require a padstone 229mm wide x ll5mm deep. First cut away sufficient masonry to allow for the depth of the lintel plus the padstone (remembering to include about 13mm for the mortar bed if you are using a piece of paving slab). Use a club hammer and cold chisel about 230mm long and about 25mm wide. The first course of masonry is often difficult to remove and may have to be broken into small pieces. Once this course has been removed, however, the remaining strip of masonry needed to be removed at this stage can be cut out by chiselling into the mortar joins and levering each brick or building block loose. In the situation where masonry is supported by needles above the opening, it is wise to wedge temporary pieces of brick or hardwood in the slot as you work along the wall. These will stop the odd brick falling away. Pieces of slate can be used to pack out these supports if necessary. If you are intending to position one end (or both ends) of the lintel in an adjacent wall, you must work out at this stage how it can be lifted into position. In some situations it may be possible to pass the lintel right through from the other side of the wall. If not, it will have to be swung into position and this may require more masonry to be removed than necessary to position the padstone.

padstone

You can estimate the amount by using a piece of wood similar in size to the lintel. Attempt to swing it in position as you would the lintel and remove any masonry which may be impeding its progress. When the slot for the lintel has been cleared, place (or cast) the padstone in position. If you are using pieces of paving slabs on a mortar bed, check each one for level with a spirit level. To ensure that they are both in line, lay a long straight edge across them, and check the straight edge with a spirit level held underneath. If you are casting your own, check the formwork, which should be nailed to the sides of the masonry supports, in a similar way before pouring in the concrete. It is essential that the padstones should be firmly set in place before being subjected to the weight of the lintel. so leave the work for about 24 hours.

Lifting the lintel

lifting RSJ beam

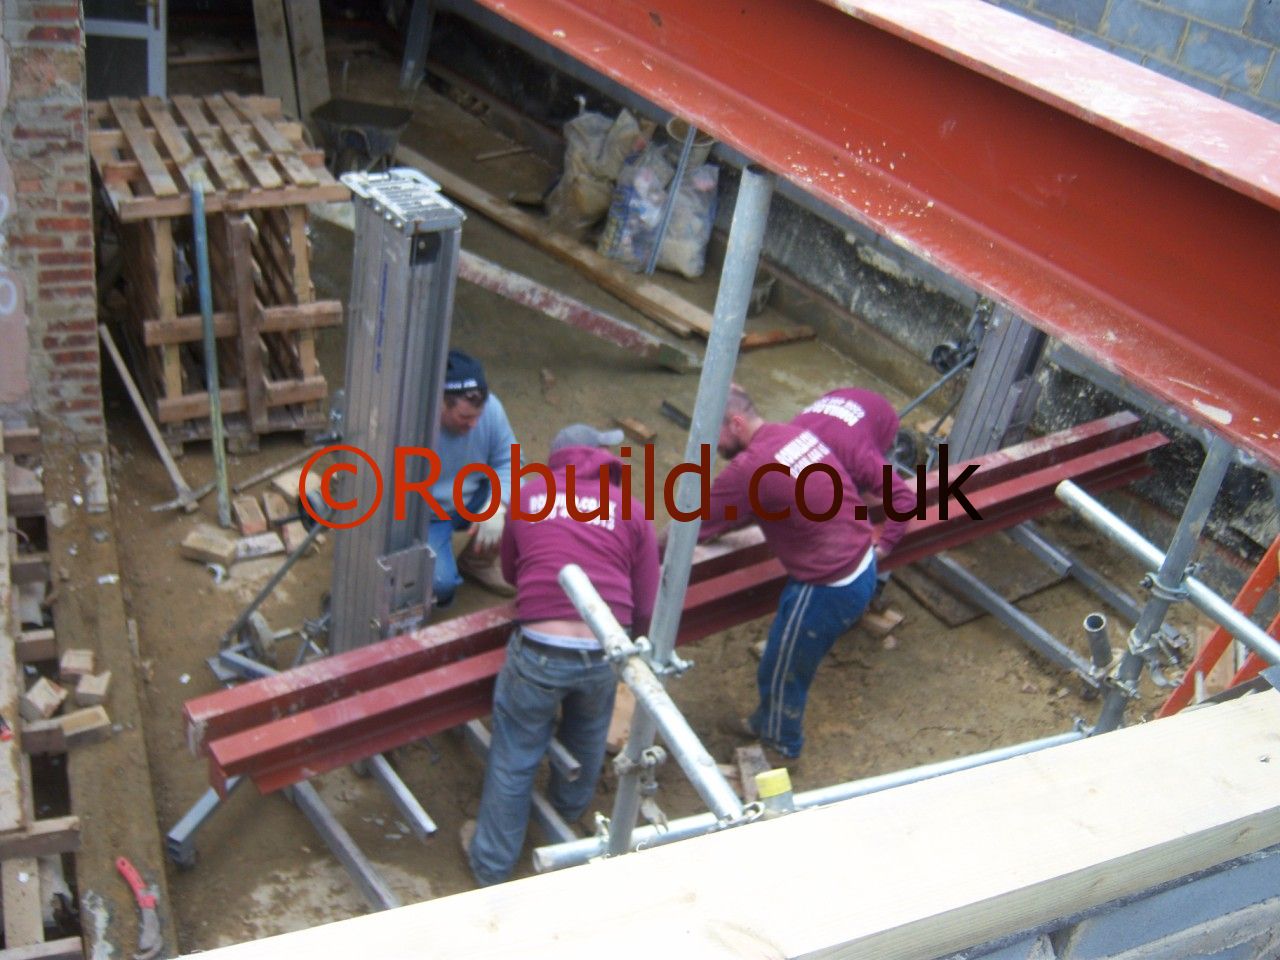
The lintel is placed directly on to the padstones and no mortar is used between the two surfaces. Steel lintels can be very heavy, depending on their size, so you will need the help of a few strong friends. Lift the lintel in stages. In many cases, two stages-from the ground to the scaffold platform, set at a convenient height, and then into position-will be sufficient. If the lintel proves too heavy for this, add another stage by placing the lintel initially on suitable supports, say two strong sawhorses, and setting the next stage, the scaffold platform, higher. Make sure that any supports you use will be strong enough to take the weight. If masonry is being left above the lintel and wedges have consequently been used as additional support, then the lintel must be inserted at a slight angle. Position one end on its padstone and, as you swing the other end across, knock out the supports as the edge of the lintel reaches them. When in position, any gaps between the lintel and the masonry or ceiling joists above must be packed with suitable slate or quarry tile wedges. These are knocked in as far as they will go, and any protruding ends are broken off. Finally squeeze mortar into any small gaps still remaining. If the lintel has been fitted into an adjacent wall, fill in any gaps between the lintel and the surrounding masonry with suitable pieces of brick and mortar. Now that the lintel is firmly in place, the rest of the wall can be knocked down. If the edges of the wall are being used to support the lintel, drop a plumb line from the lintel to the floor to correspond with the finished edge of each ‘pillar’ and mark the wall with chalk along this line.

mansonry opening wall

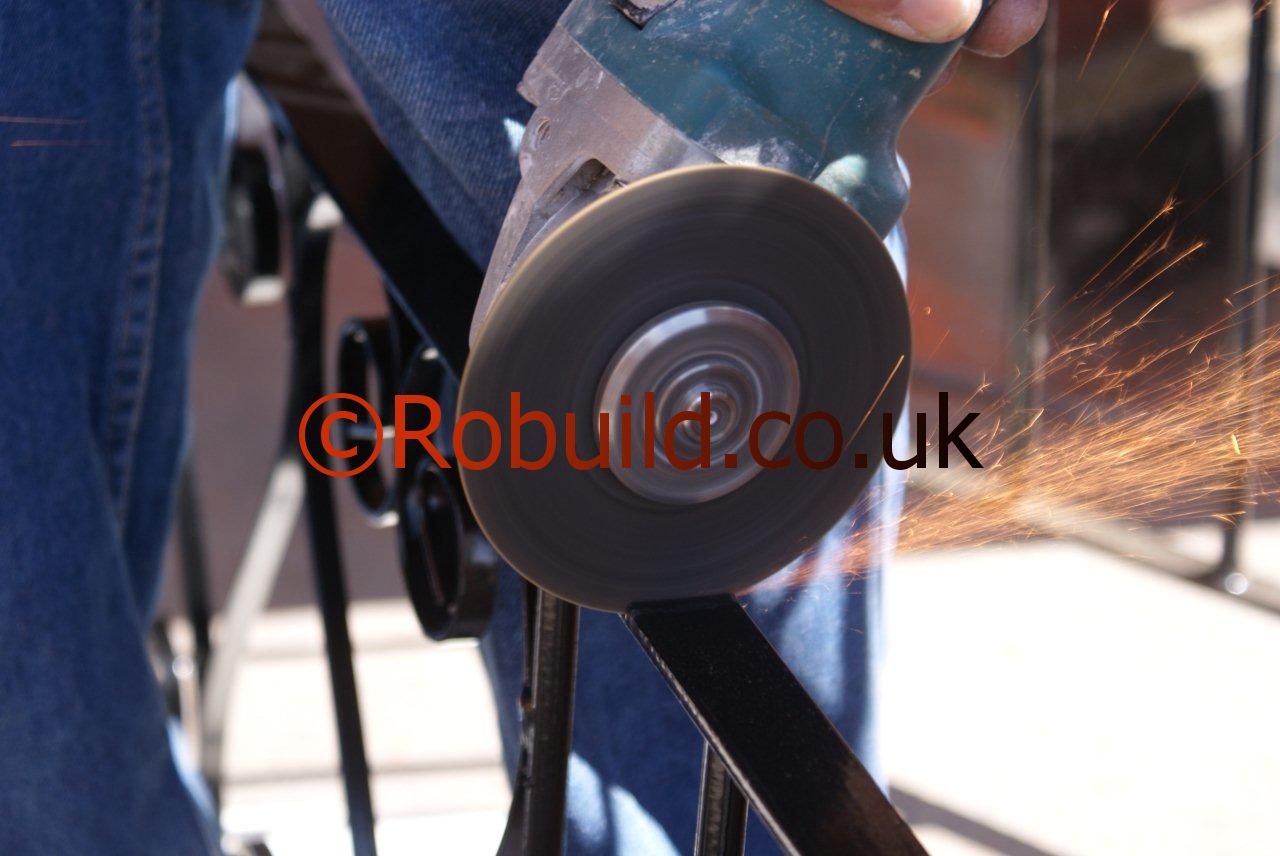
When cutting away the rest of the masonry, avoid cutting right up to this line until last, when it will be easier to obtain a neat edge. Demolish the wall with the cold chisel and club hammer as described before. When you reach the base of the wall, cut down sufficiently below floor level to allow for a new piece of floorboard or other floor surface to be inserted (see below). The sides of the opening, if supports are left at the edges of the opening, should now be carefully cut and trimmed. Use the bolster chisel this time to help you get a neat edge. If it is a brick wall, some of the bricks may fall out rather than split and the gaps will have to be made good with cut bricks and mortar. An alternative, and much easier, method for obtaining a neat edge is to hire an electric ‘chasing’ tool. This has a carborundum cutting wheel which will give about a 5lmm cut, so you will have to work from both sides of the opening. Nail a vertical batten each side of the wall as a guide.

Finishing off

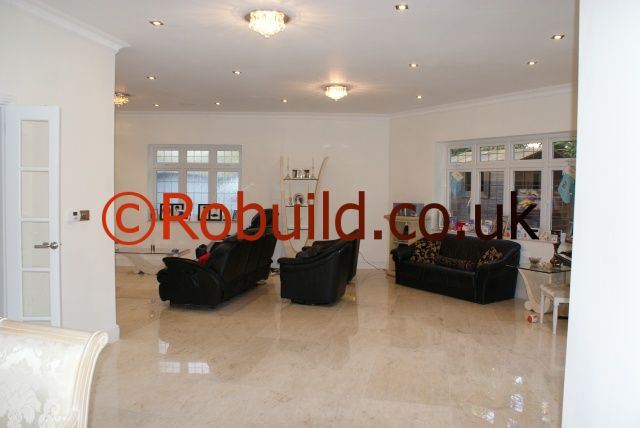
Once the opening has been made, all that remains is to make good the sides, top and bottom of the opening, and to fix the skirting boards and so on into position. The floor surfaces in the two original rooms will need to be joined at the new opening.

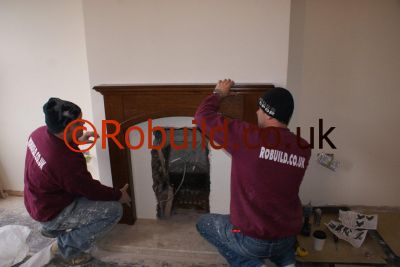
If your floor surface is floorboards, fix suitable battens at about 400mm across the gap. Bed the battens in mortar on the base of the masonry wall. Check that they are level and in line with a long straight edge and spirit level. When the mortar has set, cut and nail a suitable length (or lengths) of floorboard to the battens. Where vinyl or linoleum tiles are to be used, first lay a smooth bed of mortar over the masonry, using a sander to take off any high spots, and fix the tiles in position when it has set. The sides of the opening will require replastering. If the ends of the original wall are left as supports, you can use either angle bead to make neat edges, or the traditional method, using battens as guides. Unless you consider that a painted lintel will enhance your decor (which is unlikely), the lintel will have to be boxed in. This can be done with plasterboard.

To attach the plasterboard, wood ‘soldiers’, or noggings, will first have to be placed at regular intervals along each side ol the lintel. These can be cut very slightly oversize and jammed in place, or attached with bolts passing through the ‘web’ of the lintel. This latter method is harder work but more satisfactory, as it ensures that the soldiers will remain in place. These soldiers should be slightly wider than the recess into which they fit. This is so that battens can be nailed to them across the underneath of the lintel.

Once the ‘framework’ is in position, plasterboard can be cut to size and nailed to it. The joins should then be strengthened with scrim to prevent cracking and the whole surface covered with one coat of finish plaster. Timber frame houses Makinga largeopening in an internal,loadbearing timber stud wall is more straightforward than it is for a masonry wall. As timber frame houses are frequently one storey, it is easier to calculate the load imposed on the wall and, consequently, the size of lintel required. (In this case a wood lintel is used. ) The thickness of the lintel is usually equal to the thickness of the wall (normally l00mm ).

The depth of the lintel required for most situations is arrived at by measuring the width of the opening, dividing it by twelve, and then adding 5lmm. For example, a 244cm opening will require a 25.4cm deep lintel. But this is just a rule of thumb calculation, and you should show sketch plans to the building inspector before drawing final plans. The lintel is supported by double studs at each end of the opening.

The inside stud of each pair is housed 19mm at the top to accept the lintel. In some cases the double studs can be made up by nailing new studs to the existing ones at the sides ol the opening. If this arrangement does not suit the size of your intended opening, you will have to fit a pair of new studs either side of the opening and link them to the existing ones with noggings or, if the distance between them is not large enough for noggings, with packers. In any case, you must make sure that the studs are directly above a pair of floor joists, and not just sitting on unsupported floorboards.

For extra support, nail in nogging between the joists. Start by supporting the ceiling with boards and struts. Take care not to jam them in so tightly that the ceiling is moved. Then remove the wall covering and cut out the unwanted vertical studs. Either double up the existing studs at the sides of the opening or fit a new pair of double studs as described above. Skew-nail them to the top and bottom plates. Once the support studs are in position, the lintel can be fixed in place. Nail it through the studs at either end and also through the top plate, if you can reach this from above. The structural work is now complete, and the ceiling supports can be removed to give you more room to work. The sides and top of the opening can be covered with plasterboard, and the corners neatly finished with corner moulding. At the base of the opening, you may find that roughly-trimmed ends of floorboards meet where the wall has been. If so, trim them off straight with a flooring saw (or hired ‘skilsaw’), and then nail boards across the opening.

Lintels, RSJ beams

Lintels and RSJ metal beams
RSJ beam lintel

Once you have determined the function of your wall, a Structural Engineer should consider the type and size of the lintel you may have to use, and the way in which it is to be supported. Various materials can be used for lintels, namely wood, steel and concrete (either prestressed or reinforced). For most knocking through operations within the home, however, the steel lintel, known as an rsj (rolled steel joist), is the one best suited. Although it is heavier than some other types, it is particularly strong and also relatively small in size. Steel lintels can be obtained in either ‘H’ section or ‘U’ (channel) section. They can sometimes be bought second-hand from a demolition yard, but take care to buy one in good condition-a badly rusted one will not be suitable.

rsj beams supporting walls structure

The correct size of lintel is crucial. It must be adequate to support the weight, but the dimensions must be such that it can be properly supported at either side of the opening. Two methods can be used for this support. You can either leave some of the wall in place on either side of the opening (often necessary if a folding partition is to be fitted) and rest the lintel on these ‘pillars’ or, in some cases, fit the ends of the lintel into the adjacent walls. Note however that your local authority may not permit you to fit the lintel into a party wall dividing two houses. If the lintel is supported by an external wall running at right angles to it, the end of the lintel must be supported on the inner wall if it is a cavity wall, and halfway into the wall if it is a double brick solid wall. Where a whole wall has to be supported (in the room upstairs, for example), the width of the lintel must be the same as the width of the wall to provide the necessary support.

concrete lintels

For example, a 115mm thick brick wall will require a 115mm wide lintel. If the outer edges of the wall are left to support the lintel, the length of bearing surface must never be less than the width of the lintel and, preferably, should be slightly more. For example, a 150mm long surface at each end of a ll5mm lintel will provide a margin of safety; a 100mm one will not. It is essential that these supports are strong enough, and your building inspector may insist that they are rebuilt with hard brick. Once the width of the lintel is established, the depth required to give it sufficient strength must be calculated. The load to be imposed on the lintel, and the depth of the lintel needed to support it, depend on so many things-whether there is a wall above, how your roof is supported, how thick the wall is and so on-so you will need expert advice.

Your building inspector may be able to help by quoting from standard tables. However, you will need to give him every possible scrap of information about the dimensions and materials of both your room and its walls, and everything above them, otherwise you will have to consult a Structural engineer.

Supporting the structure

Once your plans have been passed, work can start. The first job is to ensure that the floor and wall, if any, above the opening will be properly supported while you cut away the masonry and insert the lintel. A combination of special adjustable steel props and timber planks can be used. Their arrangement will depend upon the type of load-bearing wall you are removing.

supporting wall ceiling steel props

Before fixing the supports, however, there is one point to watch. If the opening is to be a wide one, and consequently a long lintel is being used, it may be necessary to lay it at the foot of the wall before you erect your support structure. It will not be possible to start removing struts to enable the lintel to be placed in position once the opening has been made. In the majority of cases where the ceiling joists run across the wall, whether the wall carries on through into the upper room or not, both sides of the ceiling have to be supported if you intend to position the lintel flush with the ceiling. To support the ceiling, a line of struts,or steel props, have to be placed every 122cm apart and a minimum of 6lcm away from each side of the wall.

metal lintel wall opening

The load they carry needs to be evenly transferred to the floor, so stout planks should be positioned at the bottom and the top of the supports. These should be about 76mm thick by 153mm or 203mm wide and run the complete width of the room. Placing supports on suspended – hallow floors needs special care. In cases where the joists run at right angles to the wall, the base plank can be laid at any convenient position across them. But if the joists run parallel to the wall, ensure that the base plank is placed centrally over one of the joists. This, of course, applies only to hollow floors in sound condition.

loft conversion metal beams RSJ support flooring

If you doubt that your floor can carry the weight, you will have to remove some of the floorboards and take the struts right down to the sub-floor. It is essential that these supports replace the strength of the wall, and it will probably be necessary, if timber struts are used, to insert wooden wedges at the bottom of the struts to ensure that they carry the weight properly. It is safer to cut too much off the struts and to use wedges than to have the struts too long and angled out of plumb. These wedges are known as ‘folding wedges’, and two are used at the base of each strut.

Each pair is made from one piece of 100mm x 50mm timber about 300mm long. This should be cut diagonally through the narrow side, allowing at least 13mm at the thin end for strength, so that identical wedges 100mm wide are produced. To fit them, the strut should be cut slightly less than 50mm shorter than the gap between the bottom and top planks, and the wedges should be driven in from opposite sides of the strut. Make sure that they are the right way round, so that the top and bottom surfaces are parallel. If wood struts are used, cross-bracing should be nailed to them after they have been placed in position. Where joists run parallel to the wall, and the wall is continued in the upper storey, a different method of support is used.

In this case, attempting to support the floor alone would result in the collapse of the upper wall when the downstairs wall was removed. It is the wall itself that needs to be supported. This is done by inserting timber needles through the wall and then transferring the load to temporary vertical supports. These needles should be about 153cm long and have a minimum size of l00mm x 75mm. They should be spaced about 3ft to 4ft apart, with one at either end of the wall. This method involves some extra work, but the arrangement of the wall and joists enables you, in many cases, to bury the lintel in the ceiling.

Start by removing the skirting on either side of the upstairs wall. Then use a club hammer and cold chisel to remove a brick, or to cut a hole in a building block, to correspond with the proposed position of each of the needles. Insert the needles and pack out any gaps left between the needles and the wall with wooden wedges, pieces of slate or quarry tile. Then arrange your supports downstairs to transfer the load to the- ground floor. This time, however, the boards at the top of the props will have to be placed at right angles to the wall, using one board to each strut. Make sure that at least two joists beneath the needles are supported.

metal RSJ beam lintel

If you are positioning the lintel lower than ceiling level, and therefore will be keeping some masonry above the opening in the room, support should be provided by needles inserted through the wall immediately above the proposed position of the lintel. Needles must also be used below ceiling level if you have the arrangement where the joists run to the wall, but rest on wall plates or joist hangers and do not pass through the wall. Once you have determined the function of the wall you are removing and erected the correct supports to ensure that nothing above the opening will collapse when the wall is removed, you can start on the actual demolition of the wall.

demolishing external wall

Demolishing an internal or an external wall is a messy business, and a large amount of masonry will have to be disposed of- First decide on which side of the wall it will be easiest to carry out the bulk of the work on. An important consideration here is the place where you are going to dump the debris. Choose the room that gives the easiest access to this point and if you are going to use a wheelbarrow, try to avoid having to take it through narrow doors nor passages, otherwise you may find yourself with more ‘making good’ than necessary ! It is a good idea to try to contain as much dust and so on as possible in one part of the proposed through room to keep cleaning to a minimum. One of the existing rooms can be effectively ‘isolated’ by hanging large dust sheets from the temporary supports in that room. Also lay sacking or boards over the floor surface to protect it from falling masonry.

demolition

Some form of working platform will be essential for much of the work. It is best to use an adjustable scaffold system at least two planks in width. This will also be useful, and in many cases essential when lifting the lintel into position. Never attempt to work off a ladder or pair of steps. As well, you should wear gloves and goggles as protection against splinters.

rsj joist floor house extension

metal rsj beam L shaped extension

rsj metal works joist flooring extension
Builders in London

Knocking through walls

Houses are normally designed for the ‘average’ family. On the ground floor of British houses, this usually means a separate living room, dining room, hall, and kitchen (in some older houses, a few more rooms are thrown in for good measure). If this type of layout does not suit your needs, or if small rooms are a result, then there is an alternative: knock down one or more of the dividing walls to give you the space you want. The most popular wall for the ‘knocking through treatment’ is the wall dividing the living and dining rooms.

open space living dining room

Often, the dining room is a seldom used part of the house. If this is the case, combining it with the living room will create more space for everyday living, as well as making the house seem larger. If you want to keep some form of division between the two rooms for certain occasions, say if you have children who have to study or want to entertain friends, a simple foldaway screen can be used. Other walls, depending on the layout of the house, can be removed for an open-pian effect.

The wall dividing the kitchen from the dining area in some homes could be replaced by a breakfast bar, with the seating on the dining side. A pleasant effect can also be achieved, in some situations, by taking away the hall wall and incorporating the stairs in the living area. Bear in mind that in a cold climate, removing walls can make the house more difficult and expensive to heat. In a hot climate it will help keep the house cool. Either way, unwanted noise will more easily spread throughout the house.

Preparation

wall removal

Removing an internal masonry wall is not simply a question of hacking the bricks or building blocks away to form the opening. Most internal walls support some other part of the house structure, and this support has to be replaced when the wall is removed. This is done by placing a lintel across the top of the new opening to carry the masonry, floor joists and so on above. In Britain, all structural alterations within the house have to be approved by the local building inspector before work starts. You will have to have plans and calculations passed by him, showing that the structural strength of the wall to be removed will be adequately replaced. The first job is to determine the function of the wall you are replacing. Few walls are simply room dividers. Even if they are not continued on the next floor, they may still be used to support floors joists, and their removal will require additional strengthening. The best way to solve this problem is, literally, to get on top of it; in other words, go up to the floor above (or into the loft if you live in a bungalow).

removing external wall rsj beam installation

By measuring the upstairs room dimensions and comparing them with downstairs, you will be able to tell if your wall supports another. By removing a section or more of floorboards as near as possible above the wall to be removed -obviously this will not be necessary in the loft-you can see how the joists are arranged. In many situations, only a short length of board needs to be removed, say between a pair of joists, and a combination of mirror and torch can be used to carry out a complete examination.

To remove a section of floorboards, you can use either a power saw or a special curved hand saw. Take care not to risk cutting through electric cables or water pipes running across the joists. If you are using a power saw it is best to set the blade slightly shallower than the thickness of the floorboard. The thickness can be ascertained by carefully drilling a hole with a hand drill and noting the point on the drill bit when it breaks through the board. Once the cut has been made, the final severing of the board can be done carefully with a chisel. To enable you to replace the piece of board easily, cut it as near as possible to the joists, so that battens can be nailed to the sides of the joists to carry the replaced board. The location of the joists can usually be determined by the position of the nail heads in the floorboards. Before cutting, however, check that you will not be cutting through the joists as well. Careful probing with a bradawl or drill will normally be a sufficient guide to the exact location of the joists.

load bearing walls

The picture above show examples of most situations you are likely to encounter.

1. The wall is not continued above the level of the upstairs floor, but the joists run across it and bear on its top. Joists arranged like this are usually lapped above the wall. Such a wall, whether the joists are lapped or not, is usually load-bearing, and its removal will necessitate the installation of a lintel.

2. A situation where the joists run parallel with the wall. At first sight, the wall appears to be non-load-bearing, but check carefully. In some cases the wall may also carry a beam running outwards from some point on it, which may be used to support the joists or other structure. If so,the top section of wall carrying this member will have to be retained, and a lintel inserted below it to carry the weight of the floor.

This situation may also be found where the wall continues up through the floor. It is not a common one, however. If you have this type of arrangement, where the downstairs ceiling and upstairs floor surfaces extend over the top of the wail, it is likely that the wall has been added later. The wall does not carry any weight, and can simply be knocked away. A lintel must be used to support the remaining masonry, but it is still necessary to check the position of the joists, so that.proper temporary support is given while the wall is removed. This is obviously essential if a major disaster is to be avoided.

Building brickwork arches

• Types of brick arch
• Designing an arch
• Choosing the correct bricks
• Erecting and reinforcing a Soldier arch
• Ringed arch construction: building plans, erecting a former and bricklaying
• Pointing and finishing off

brick arch

First measure across the opening and note the proposed position of the bricks (do this on both sides of the wall if you are erecting two arches). Using this information, try to place the key or middle brick—directly over the centre of the opening and so avoid having to place a shorter, cut brick at one end of the arch. Mortar each brick into place carefully and place a straightedge across the face of the wall while you are building to ensure that the arch is correctly aligned. When you have finished, leave the mortar to set for three to four days.

Then carefully life-size plan of the intrados arc on a large piece of paper or card. Measure across the springing line at the top of the opening, then go to the paper and draw a line of the same dimension across the bottom of the sheet. Mark the midpoint of the line carefully and this will give you the striking point of the arch. With this, the base line of the arch, marked, use the striking point as a centre and draw a semi-circle above the springing line with a large compass or a pencil tied to the end of a piece of string. Then lay a square or protractor along the springing line and draw a line up from the striking point which bisects the half-circle.

This gives the exact position of the key brick. Use the half circle and the perpendicular line running up through it to mark the position of each brick on the plan. Make sure all the bricks face inwards towards the striking point and that they are separated by neat, wedge-shaped joints. Once the plan is drawn out—using one or more rows of brick—it can be used to calculate the exact number of bricks needed to complete the job. Remember, though, that the total has to be doubled in a cavity or double thickness wall where the arch has to be reproduced on both sides of a door or window opening.

Former construction: To construct the former, you need a sheet of 15mm plywood to make up the rounded sides and the soffit plus a piece of hardboard to go across the top. Mark the two semicircular side pieces first, to the same dimensions as the plan. Cut them out carefully using a fretsaw. Then cut a third piece as wide as the soffit—excluding the two side sections—and as long as the opening. Attach the three pieces together by nailing along the bottom of the two side sections into the edge of the soffit section. With the frame completed, pin a piece of hardboard as wide as the soffit across the top and make sure that it is flat and level with the two sides . After you have rechecked the former against the original plan, locate it in position across the top of the opening.

Supporting the former: To hold the timber former in place during construction, you must build a small frame to fit underneath. This should consist of two side pieces with one wider cross-piece which fits across the top—although in the case of particularly wide soffits two frames may have to be built, one for each side. First measure the distance from the ground to the springing line. Subtract the width of the cross support, then cut two side bearers from 50mm square timber to this size. Fix the side bearers to the brickwork in the middle of the soffit using masonry or galvanized nails. Next, lay a piece of flat plywood almost as wide as the soffit across the top of the side bearers. Check carefully that it is correctly aligned with a spirit level and then place the timber former on top. Finally, cut four folding timber wedges and drive two from each side between the cross-piece and the side bearers. These allow you to make minor adjustments to the position of the former during construction and make it easier to remove it after the mortar has set.

Building the arch: To help keep the arch brickwork level with the face of the wall, nail four flat boards about 500mm long on each side of the opening extending from the top to the bottom of the arch. Then attach a string across the bottom of each pair of boards to act as a guiding line this can be moved up as building progresses. Start at the bottom of the arch, building each side at the same pace. As you position each brick check— with the help of a line stretched up from the striking point—that it is correctly positioned according to the original plan. Try to make neat, wedge-shaped mortar joints between each brick by putting more mortar on one end than you do at the other. Alternatively, insert small wedging pieces of slate between each brick and leave them permanently to set with the mortar.

Continue upwards until you reach the key brick, raising the guiding lines as you go. Check carefully that the final bricks are positioned correctly, especially the key brick which sits directly above the middle of the opening. Leave the mortar to set for at least three to four days—then knock away the folding wedges and remove the former. Finally, pull the side supports away from the wall and point the brickwork on the arch. Take great care when you are building or rebuilding the brickwork around the top of the arch, and use the lines you erected earlier as guides. Try to ensure that each brickwork course meets the sides of the arch neatly, and cut any bricks to fit with a hammer and bolster. Point around the outside of the entire area and then while the mortar is still wet run a soft brush across the surface.

Removing a fireplace and blocking up the opening

Removing a fireplace and blocking up the opening is a relatively straightforward job providing you plan the work carefully and have the right tools and equipment to hand. If you don’t want to pay for professional builders in London, we offer you a small guide.
fireplace
To remove the surround, hearth and fireback use a crowbar, club hammer and a bolster. These should be adequate for prising the various parts free of their fixings without the need for excessive force, but you will need safety glasses or goggles if you have to hack away mortar with the bolster since loose material is bound to fly. Where the surround is screwed to the wall or chimney breast you also need a large screwdriver, plus a hacksaw to cut through any fixings which cannot easily be shifted. Bear in mind that the hearth and surround are likely to prove heavy and you will need the help of at least one other person to dispose of them.

An assistant can also help by steadying the surround while it is being levered free of its fixings. Once all the equipment has been assembled, clear the room ready for the work. Removing the fireplace will create a great deal of rubble and dust, so it is best to take everything out of the room, including the carpet. Sheet polythene can be bought in large rolls to completely cover the floor and protect it while the work is going on. If the fireplace is near flat surfaces such as window ledges or built-in furniture, cover these with newspapers and masking tape. A number of heavy-duty polythene bags are useful for disposing of the loose rubble and soot created during demolition and clearance of the site.

Removing the surround

Since the surround is likely to be resting on top of the hearth it is best to start by removing this. The technique you use will depend on how the surround is constructed.

Tiled surrounds:

Here the first task is to remove the plaster covering the two fixing lugs. To do this start at the top right hand corner of the fire and chip away the plaster using a hammer and bolster. When you have uncovered the fixing lugs, ask a helper to steady the fire surround while you undo them.

Sometimes they will simply unscrew from the wall; if not, cut them off at or near their junction with the wall using a bolster or hacksaw. With your helper still steadying the far end of the surround, use your left hand to steady the other end and hold the crowbar in your right hand. Insert this between the surround and the chimney breast, somewhere near the base. If the surround moves by even a few millimetres there are no more fixing lugs. If not, there may be fixing lugs at the bottom edges which should be removed before you proceed. Once you are sure that all the lugs are free, slowly lower the surround to the ground in front of the fire. Two people can usually carry the surround outside to be disposed of, but i f you have to negotiate a stairway or an awkward doorway, get some extra help.

Removing a timber surround:

The procedure used to remove a wooden surround is much the same as for a tiled one except that the fixing lugs usually face towards the fire opening rather than outwards away from it. Start by taking the crowbar and driving it between the wooden part of the surround and the brickwork behind it. By levering with the crowbar and using your hands to pull the surround away from the wall you should be able to open a gap between the surround and the wall big enough to look down.

Check whether the timber is held in place by any other fixings—either metal studs or bars. If not, simply lever the facing away from the wall and pull it clear. If there are other fixings, work your way around the edges of the facing gently levering it away from the wall; do this a small amount at a time to avoid damaging the wall and cracking the brickwork. If the fixings refuse to pull clear, insert a hacksaw between the facing and the wall and cut through the studs or bars.

Removing a brick surround:

A stone or brickwork surround is easily removed with a hammer and bolster one course at a time. Starting from the top, insert the bolster into each of the layers of mortar. Then gently tap each brick free and remove it by hand, out of the way. You may come across steel ties bridging the two walls in which case work these loose by knocking them gently backwards and forwards with the hammer then pull them free with your hand. Continue downwards removing the soldier arch and steel support as you go until you reach the fire hearth.

Levelling the hearth

Most hearths consist of a slab of concrete—usually covered in tiles— which sits below the opening and is bedded into place on a weak limemortar mix. If the bottom of the hearth is level with the surrounding floor loosen the bedding mortar by chopping around it with a hammer and bolster. Then insert the crowbar under one end of the hearth and raise it high enough to push a thin batten of wood underneath. Do the same with the other side and you should be able to lift the whole hearth away with the help of another person.

However, if the hearth is lower than the surrounding floor, you have no choice but to break it up or chip it away down to the required level using a hammer and bolster. Removing the fireback The fireback is usually held in place by a bed of mortar laid against the edges of the opening. It is usually old and crumbly so if it does not immediately pull free, use the hammer and bolster to break it into more easily handled pieces. The cavity above will be full of soot and rubble and you should make sure that this is removed and the opening brushed clean before you continue.

Blocking up the opening

Once the fireplace has been knocked down and the area cleaned, the opening should be blocked off to prevent draughts and to stop dust falling down the chimney into the room. For this you can use bricks, lightweight building blocks or more lightweight materials such as hardboard, chipboard or asbestos. In order to bed the blocking material into place and allow a neat plastered finish, you need to cut away some of the existing plaster around the opening with the hammer and bolster.

If you decide to retain the present surround, first break out the fireback and then cut away the plaster around the opening to a distance of about 200mm on each side. Try not to damage the brickwork underneath as you do this and leave straight edges around the area you have cleared away so that final plastering is made easier. What you do next depends on whether you block up the opening with bricks or some type of sheeting. But whatever method you use, the blocked opening must contain a ventilation grille, fitted at a distance of about 100mm from the floor.

Bricking in:

Bricks and lightweight building blocks are both perfectly adequate where you want to block up an opening permanently. But if the opening is particularly small, bricks are preferable since they are easier to manoeuvre and fit into place.

First prepare a mix of 1:4 mortar and lay a bed of it on the floor between the existing wall. Then build up each course of bricks.; remember to leave a gap 100mm from the floor to accommodate the vent. As the wall is built upwards, hold a straightedge against the face of the brickwork to check vertical and horizontal alignment. Any bulges and indentations should be corrected and adjusted before you continue.

Build up successive courses until you fill the cavity. The gap on the last course may be too thin to take whole bricks, so you should cut them lengthways to make up the difference. Finally, look over the new brickwork and fill all gaps to create a smooth and flat surface. Leave it to dry out for 12 hours before plastering. Boarding up: For this use 6mm oiltempered hardboard, chipboard, or if you intend to fit a gas fire in front of the wall, asbestos sheeting. Measure and cut the sheeting to size, and make an internal hole to take the ventilator using a drill and a padsaw. When cutting and drilling asbestos, make sure you wear a mask to avoid breathing in the dust. Fix the sheeting into place by marking and drilling holes along its edge and using wall plugs to secure it to the wall beneath. If necessary pack it out to bring it nearly level with the surrounding plaster.

Replastering

Before plastering make sure that the surface is prepared properly and that old and flaking plaster is stabilized. Check brickwork for loose mortar: strengthen any crumbling joints then chip away excess mortar once this has dried. Try to plaster the area neatly by feathering off around the edges. Once both coats of plaster have been applied and allowed to dry thoroughly, the ventilation grille can be fitted and fixed firmly in place with bolts or self-tapping screws. Although the plaster may dry hard after about 20 minutes, it often takes months to settle on the brickwork below; consequently, redecorating, especially with wallpaper should not be undertaken straight away.

Sealing

Disused fireplaces often run the risk of penetrating damp as a result of rain falling down the chimney. The simplest way of avoiding this is to fit a rain bonnet, a blocking piece which is cemented into the chimney pot. The bonnet effectively stops rain entering the chimney, but allows air to circulate freely. Alternatively, you could remove the chimney pot, cover the opening with slate and then seal it with mortar flaunching.

In this case, though, ventilation must be provided in the form of an airbrick in the chimney stack. The brick should go as high as possible, preferably in the roof space. Note that in the UK, sealing a chimney constitutes a structural alteration and you will need building permission from your local Building Control office or District Surveyor. He will want to know how the sealed chimney is to be ventilated and also what alternative methods of heating are being used.

Fireplace installers in London

London powers ahead of the UK

London is home to over eight million people. It is also called the capital of the world. The economy of the city itself, it is extremely unconnected to the rest of the United Kingdom, a Vatican style cosmopolitan city. At a time when the rest of the UK and Europe suffers from job loses and property prices falling, London seems to be immune to the economic recessions that plagues the rest of the world. The employment is rising in London according to the latest figures, balancing the figures for the rest of the United Kingdom, where job loses are increasing.The property market in London is a perfect example to illustrate the contrast between the city and the rest of the UK.

London Big Ben

The properties in London alone, are worth more than the rest of the United Kingdom added together. Investors from all over the world, from Russian oligarchs to anyone who has money to invest follow the principle : safe as houses and invest in the brick and mortar business. London Olympics also helped grow the economy of the city state like, despite the recent riots. Massive construction projects have taken place, and many more are being planned by architects. Building works like the Shard , the Olympic village , Crossrail project, etc , are providing the city with investments into the property market and infrastructure.

And then there is of course, The City of London , the truly financial capital of the world, home to the bankers and financial business. Statistics show that most Londoners contributes 70% more to the national budget than the rest of Britain. But there is also a darker side to the statistics. The quality of life for Londoners is well below the standard for the rest of the UK. People work harder and longer, the so called rat race is the norm and everything is more expensive. For most homeowners in London, maintaining a property will cost them about 40% more than the rest of the UK. A plumber or an electrician will charge a small fortune and the cost of building a house extension or a loft conversion in London, can buy you a whole street in Liverpool, where £1 houses were put on sale recently by the local council, on the condition that the buyer will refurbish the property and has experience in a building trade.

In London, Battersea Power Station has been purchased by foreign property development and a decent sized apartment is expected to cost more £ 1 million. Because of the high demand of residential properties in London, some 800 apartments have been promised to be sold to British buyers, but foreign buyers will have the chance to buy a flat ahead of British buyers from London. The wife of the new governor of the Bank of England, recently complained that is impossible to find a place to live in London having a budget of less than one million. This summons the development of London in the United Kingdom, a two speed economy in a single country.