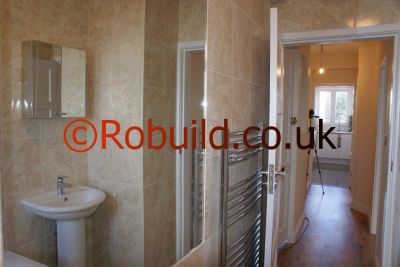
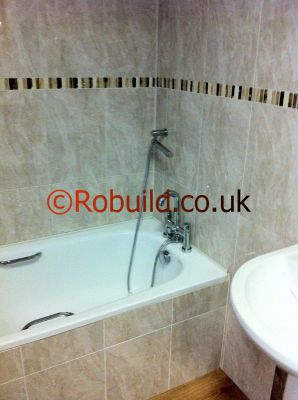
Planning the floor tiles layout

Planning the floor tiles layout

Planning

As when tiling a wall, it is well worth planning your layout on paper first, particularly if you intend using a. complicated design. For rectangular or square tiles make a scale drawing on graph paper; for hexagons or other specially-shaped tiles, draw the shapes to scale on tracing paper, to act as an overlay to a scale floor plan of the room. From your scale drawings you can see if the layout you have in mind is going to work.

It will help you set out an attractive design and it will also enable you to work out the number of tiles you will require. Mark on your plan the position of fixtures such as a WC, wash or sink stand, cupboards or pipes to indicate where cutting will be required – where necessary adjust your plan so you will not have to cut pieces which are too narrow for convenient cutting.
tiler bathroom
Similarly, your layout should be designed so you avoid having to cut narrow pieces of tile to fit around the perimeter of the room. Floor tiles, being so much tougher, are less easy to cut than wall tiles and attempting to obtain narrow strips is likely to cost you several broken tiles. Where you are not using a_complicated design you can plan your layout directly on the floor. For this you will need a tiling gauge.

Adhesives for laying floor tiles

Adhesives for laying floor tiles

Types of adhesives

There are several types of adhesives for laying floor tiles. Some come ready-mixed, others in powder form to be mixed with water. A number are waterproof and where the floor will be subjected to frequent soakings (as, for example, in a shower cubicle, wet floor, kitchen floor) or heavy condensation you will need to use one which is water-resistant.

The picture below shows wall tiles adhesive 🙂
adhesive

Usually the adhesive does not become waterproof until it has set completely, which means that you can clean tools with water and do not require a special cleaner. On a solid floor with underfloor heating you should use an adhesive which is also heatresistant or the adhesive will fail and the tiles will lift necessitating continual re-fixing.

A cement-based floor tile adhesive is suitable for use on good, level concrete whereas a suspended wooden sub-floor will need an adhesive with some degree of flexibility built in. Combined cement/rubber flexible adhesives are available for this purpose but even these, sometimes should not be used on suspended wooden floors which are subject to a lot of movement, you will have to add a covering of external grade plywood boards to provide a more stable surface before fixing the tiles.

Manufacturers’ instructions give guidance as to the type of adhesive suited to a particular situation and you should study these carefully before making your choice. You should also follow their recommendations as to the thickness of adhesive bed required; most resin-based ready-mixed adhesives are used as thin beds (3 to 6mm/Vs to 1/4in), while cement-based powder adhesives may be laid up to 12mm (1/2in) thick. Usually a spreader is supplied with the adhesive to make applying it a straightforward job.

Laying ceramic floor tiles in kitchens and bathroom

Laying ceramic floor tiles in kitchens and bathroom

You can lay ceramic tiles to provide a floor surface which is particularly resistant to wear and tear.

Ceramic floor tiles provide a floor-covering which is attractive, extremely hardwearing and easy to maintain and keep clean. The wide variety of tiles available means you should easily find a pattern which suits your colour scheme. Floor tiles are usually thicker than ceramic wall tiles (they are generally at least 9mm thick), very much stronger and have a tough hardwearing surface to withstand knocks as well as wear from the passage of feet.

The backs of the tiles have a brownish appearance caused by the extra firing – done at a higher temperature than for wall tiles, which are often almost white on the back.

floor tiles kitchen brick style

Types of tiles

Square tiles are commonest, in sizes from 150 x 150mm (6 x 6in) to 250 x 250mm (10 x 10in). Besides square tiles you can choose objong ones in several sizes, hexagons or other interlocking shapes. Surfaces are usually glazed but are seldom as shiny as those of wall tiles or scratch marks would inevitably become apparent as grit was trampled in. So most floor tiles are semi-glazed; others have a matt, or unglazed finish. Patterned ceramic tiles are quite frequently designed in such a way that several tiles can be laid next to one another to complete a larger design. The commonest is built up by laying four identical tiles in a square, each tile being turned at 90° to its neighbours.

The full impact will only be achieved if a sufficiently large area of floor is being tiled. Patterned and plain tiles can also successfully be intermixed to create unusual designs, but it is essential that the tiles are all supplied by the same manufacturer, and ideally come from compatible ranges, to ensure uniformity of thickness and size. Some manufacturers supply floor tiles1 designed to co-ordinate with wall tiles, and in addition make matching panels to act as skirtings between wall and floor tiles.

Drilling tiles

Drilling tiles

When drilling in hard shiny surfaces, ceramic tiles, for example, you often find that the drill bit wanders out of position as soon as you turn on the drill. To avoid this, cover where you want the hole with masking or sticky tape.

It’s not just hard surfaces that can make the drill wander off course. It can happen on plaster, too. Here the answer is to make a shallow dent by turning the bit by hand. The dent should then keep the tip of the drill just where you want it.

Sticky tape is also handy for making sure you don’t drill too deeply. Just wrap it round the drill bit the length of the plug in from the tip, to form a little flag. When the flag touches the wall, you know you’ve drilled far enough.

Take care when drilling into walls not to go through electric cable. The main danger areas to avoid are above and below light switches or power sockets, and anywhere near wall lights. Also avoid areas near pipes.

Condensation in kitchens and bathrooms

Condensation in kitchens and bathrooms

CONDENSATION causes and cures

Condensation in buildings is a bigger problem now than ever before – the result of changes in building methods and our way of life. To tackle it, you need to know what it is and why it happens.

The air around us contains water vapour, and the amount it can carry depends on the temperature – the higher the temperature, the greater the amount of water vapour. If the air becomes cooler it cannot carry as much vapour, and the excess may be released in the form of water droplets. In the atmosphere this produces clouds and rainfall; in confined spaces like the home it produces condensation. You can see this happening quite easily in a kitchen when you’re cooking.

A lot of water vapour is created by boiling pans, and this remains suspended in the air in the kitchen as long as the temperature is high. But if the air meets a cold surface – a window, for example – its temperature drops, and the excess water vapour turns back into water, or condenses. Condensation occurs particularly in bathrooms, but can be found throughout your home at some time or another. Condensation is always a menace, and can lead to corrosion and rot as can any unwanted water. If it forms only a thin film of moisture, this may quickly evaporate when the room heats up, but too often the water seeps into cracks and crevices in the house’s structure and starts to cause problems.

The problem of moisture

Dense materials, like glass and glazed tiles, are not harmed by moisture and can be easily wiped off.
But if it runs off the surface it can carry with it dirt, which can stain nearby materials. Metal surfaces do not absorb moisture, but moisture combined with oxygen in the air will cause iron to rust. If mineral salts are present, or if dissimilar metals are in contact, corrosion may take place. Some materials, likefibreboard and plasterboard, lose their strength when wet and may swell and sag. But more damaging is the risk of mould and rot. Mould spores are almost always present in the air, and on the surface of many materials. To flourish, they need moisture, and food which is supplied by general dirt.

Condensation provides the moisture. Textured surfaces collect more dirt than smooth surfaces, and are more likely to develop mould growth. Mould first appears in spots or small patches and spreads to form a furry layer – usually grey-green, black or brown in colour. Though unsightly it can easily be cleaned off in the early stages. It may do little harm, but will reappear unless a fungicide is used. Fungal attack on timber, particularly dry rot, is more serious, causing lasting damage.

Once established, dry rot can actually produce the moisture needed for further growth and it can spread extensively through other materials such as brick. Moisture has another unwanted effect. Many materials, such as sheeps’ wool and plastic foam, gain heat insulating qualities through the small pockets of air in them. If this air is replaced by water, then this insulating power is lost. If this happens within a brick wall – so-called ‘interstitial’ condensation – the wall’s resistance to heat flow is decreased and the wall gets colder, producing still more condensation.

How water vapour is created

We can’t avoid producing water vapour indoors. For example, during eight hours of sleep, every human body gives off a quarter litre of water. When we are active we make much more.

A solid concrete floor takes a long time to warm up and usually provides a cold surface.
Washing machines can discharge very hot steamy water and must be properly plumbed.
Cold water pipes provide cooled surfaces on which water vapour can condense.
Clothes driers produce large amounts of water vapour from the clothes they dry.
Kettles produce masses of water vapour if allowed to go on boiling.
Sinks being used for washing-up can be very steamy if the water is too hot.
Cooking means boiling pans which can easily pour out water vapour.
Baths being filled with hot water get very steamy unless you mix the right temperature.
Showers are a source of vapour but if properly surrounded a lot is trapped.
Tiled surfaces provide a cold surface which rapidly condenses any vapour around.
Cupboards on outside walls provide a restricted space where condensation can form.
Flat roofs can’t breathe particularly if they are covered with bitumen.
Weather, hot or cold, damp or dry, has a lot to do with condensation.

CAUSES OF DAMPNESS

Condensation is not the only cause of dampness in a dwelling. Before you jump to conclusions, check the other possibilities:

• rising damp. Usually found in older property which has no damp-proof course or an ineffective one, but it may also occur in newer property where earth, a terrace, or small extension has bridged the dampproof course
• rain penetration. More likely in older houses lacking cavity walls, in parts of the country where there is a lot of driving rain
• other penetrating damp. Can be the result of water getting in through faulty roofs, chimney stacks, ill-fitting door or window frames, or a result of faulty gutters, downpipes or plumbing
• wet building trades, like bricklaying, concrete-work and plastering. These use a lot of water which has to be dried out which again requires heat and ventilation.

CONDENSATION CHECKLIST Once you’ve eliminated the other causes of dampness, you can justifiably suspect condensation if dampness occurs
• in corners • over windows
• in unheated rooms
• when double glazing has been installed
• when a fireplace has been blocked up.

SIMPLE CURES
Take condensation seriously: it could seriously damage the fabric of your home. Simple remedies include the following:
• keep doors shut and windows open in steamy rooms
• vent clothes driers direct to the outside
• use a ventilator hood over the cooker
• use an extractor fan in the kitchen or bathroom
• fit vents if you don’t want open windows
• try to keep cupboards and bookcases away from cold outside walls, so condensation cannot form behind them.

INSULATION GUIDELINES
When insulating your home:
• include vapour barriers whenever you are installing wall or loft insulation
• where surface condensation is a major problem, line rooms with polystyrene liner
• when you install loft insulation see that it is well ventilated, the trap door is draughtproofed, and gaps around pipes and cables entering the loft are filled.

KILLING MOULD
Mould growth produced by condensation can be removed with a toxic wash, such as bleach or a proprietary fungicide.

HOW TO CURE CONDENSATION

Mechanical ventilators

Powered by an electric motor, these are the sophisticated development of operated vents and obviously much more efficient. If one is installed in a room where there is a central heating or hot water boiler there should be a vent in the inside door to ensure that noxious gases are not drawn into the room.

Cavity wall insulation

This reduces heat loss from the house and therefore your heating bills. It also cuts down the incidence of cold outside walls, reducing the likelihood of condensation.

Vented clothes driers

Clothes driers produce masses of water vapour and should always be vented direct to the outside of the house. This can be done via a flexible hose put out of a window, but ideally should be through a vent pipe placed in the wall exiting via a protective cowl.

Self-closing doors

Where there are heavy sources of water vapour, as in the kitchen, it is best to contain them rather than let the vapour spread to other rooms where quite often they are likely to condense. A self-closing door is the answer here.

Cooker hoods

These are designed to vent hot air and gases coming up from the cooker. Those which simply filter the air are really only good for getting rid of kitchen smells, but those which can be vented to the outside air, either directly through the wall or via a fan controlled duct, can cut down condensation risk.

Having a bath or shower can produce two litres of water vapour. Another offender is damp. This can penetrate an outside wall or a solid ground floor lacking damp-proofing and later evaporate because of indoor warmth, so adding more water vapour to the air. Because it is impossible to prevent the creation of water vapour, the main aim then becomes to get rid of it before it can give trouble by forming condensation.

Ventilation is the answer. This can be done by opening windows, installing extractor fans, venting exhaust air from clothes driers to the outside air and the use of balanced flue gas heaters. Water vapour moves about. It doesn’t only condense on cold surfaces in the room where it is produced; it can penetrate all parts of the home, and is likely to condense in any colder area it reaches. It also rises by convection to cooler bedrooms and the space under the roof. Warm, moist air gets into the roof space through ceiling cracks, holes used by pipes and electric wiring and gaps around the trap door.

It doesn’t matter how small the gap – it can still get through as it’s a gas. It also passes through porous plaster or plasterboard ceilings unless they incorporate a moisture barrier. Unless there is sufficient ventilation for it to escape to the outside air, it will condense on the roof covering and roof timbers. The severity of the condensation depends on the roof construction, how well the loft is insulated and ventilated, and how easily moist house air can get into it. However, it can very quickly build up in a poorly ventilated loft, saturating the insulation and making it quite useless. In the end it can soak through the ceiling too.
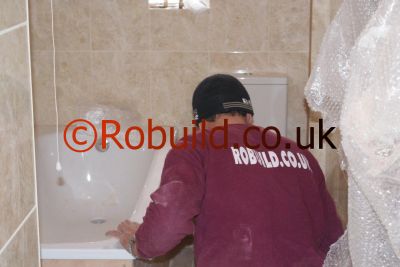
Replacing a washbasin

Apart from replacing a cracked basin, which you should do immediately, the most common time to install a new basin is when you’re improving a bathroom or decorating a separate WC. The chances are that the basin you’ll be removing will be one of the older ceramic types, wall-hung, a pedestal model or built into a vanity unit.

The main advantage of a wall-hung basin is that it doesn’t take up any floor space and because of this it is very useful in a small bathroom, WC or cloakroom.
You can also set the basin at a comfortable height, unlike a pedestal basin whose height is fixed by the height of the pedestal.
pedestal washbasin
However, it’s usual to fit a wall-hung basin with the rim 800mm (32in) above the floor. Vanity units are now increasing in popularity. In fact they’re the descendents of the Edwardian wash-stand, with its marble top, bowl and large water jug. The unit is simply a storage cupboard with a ceramic, enamelled pressed steel or plastic basin set flush in the top. The advantage of vanity units is that you have a counter surface round the basin on which to stand toiletries.

There is rarely, if ever, sufficient room for these items behind or above conventional wall-hung or pedestal basins. Usually the top has some form of plastic covering or can be tiled for easy cleaning.

Fittings for basins

It’s a good idea to choose the taps and waste fittings at the same time you select the basin, so everything matches. You could perhaps re-use the taps from the old basin, but it’s doubtful if these will be in keeping with the design of the new appliance. As an alternative to shrouded head or pillar taps, you could fit a mixer, provided the holes at the back of the basin are suitably spaced to take the tap tails.
bathroom basin
Ceramic basins normally have a built-in overflow channel which in most appliances connects into the main outlet above the trap. So if you accidentally let the basin overfill you reduce the risk of water spillage.

London bathroom refurbishment

Shower fitters and Installers, London

Shower Installation

There are two basic types of shower heads:

• those attached to a mixer on a bath
shower head bath

• those independent of the bath, discharging over their own bases, in their own cubicles.
shower

Bath showers may be attached to a mixer head on which you have to adjust both taps, or they may simply fit over the tap outlets. The shower head in either case is detachable and may be mounted at whatever height you require. Independent showers have fixed position heads or are adjustable. They may have a single control mixer, or a dual control which means that you can adjust the flow as well as the temperature. Thermostatic mixing valves are also available which can cope with small pressure fluctuations in the hot and cold water supply. These only reduce pressure on one side of the valve if that on the other side falls; they cannot increase the pressure unless they have already decreased it.

SHOWER FITTINGS

Before you get to grips with installing a new shower cubicle, you ought to select the type of control fitting you’re going to use. Your choice may affect the way the bathroom and shower installer organise the plumbing.
shower fitter plumber

Once you’ve decided where you’re going to site your shower – over a bath or in a separate cubicle – you’ll have to determine what type of fitting you’re going to use to run it. In order for the shower to work effectively, you need to be able to control the rate of flow of water and also, more importantly, it’s temperature.

There’s nothing worse than standing under a stuttering supply of water that’s hot one minute and cold the next. So it’s the job of the shower fitting to provide this control fast and effectively. Some fittings work by having individual taps to control the hot and cold water supplies, while the more sophisticated types have a simple valve or a mixer. How they are connected up to the water supply depends primarily on their design.

shower head rose

For example, instantaneous showers (not recommended for DIY fitting) need only to be connected to the mains cold water supply, as they heat all the hot water required just before it comes out erf the shower rose. A hot water supply is therefore unnecessary. But for all other showers, the temperature of the water is controlled by mixing together separate supplies of hot and cold water which may also be at different pressures.
electric shower

The simplest fittings

Before proper showers over a bath and separate shower cubicles became popular, it was quite common to find a rather makeshift device being used to supply a spray of water. This consisted of a length of rubber hose with a rose attached at one end and two connectors fitted at the other which slipped over the hot and cold taps on the bath. By adjusting these taps you could regulate the flow and temperature of the water. In fact the principle of this very basic mixing valve was used in early shower cubicles.

Gate valves on the hot and cold distribution pipes were used to control the flow, and the two supplies were mixed at a ‘tee’ in the pipework before being fed in a single pipe to an overhead shower rose. Mixer taps An improvement on this very simple arrangement, as far as showers over baths are concerned is the bath/shower mixer. This resembles an ordinary mixer tap on a bath, except that a flexible metal hose rises from the centre of the mixer to a spray head which can be fixed at varying heights on the wall above the bath.

Again the water is mixed by adjusting the hot and cold taps, and at this stage it will becoming out of the spout of the tap. When the required temperature has been reached you pull up a lever on the body of the tap and this diverts the water upwards to the spray head. Nowadays, showers in cubicles normally have what’s known as a manual mixing valve. This has two inlets, one for the hot and another for the cold supply; but the temperature is regulated by turning just one mixer knob.

The flow may also be adjusted by turning another knob which is set round the outside of the temperature control. In this way you can control the water more quickly and positively than you could do if you had to adjust two separate taps (which tends to be a bit of a juggling act). Shower mixers are constantly being improved so that they are more convenient and safer to use. With one modern manual mixing valve, for example, the temperature of the water is controlled by turning a knurled knob, not unlike the handle of a tap. And the flow and on/off control is worked by pushing in or pulling out this knob.

You can therefore control the flow and temperature of the water in one movement. Another advantage of this kind of control is that the shower can be stopped instantly if the pressure on the cold side falls (as a result of a toilet being flushed or cold water being drawn off elsewhere in the house, for example). If this happened the shower would suddenly run very hot, but by flicking the control knob downwards the flow ceases. It’s not so serious if the pressure falls on the hot side, because the shower would just run cold. But again, to prevent discomfort the flow can be stopped quickly by flicking the control knob.

However, prevention is better than cure and there are ways of organising the plumbing so that this problem can’t arise. To alleviate the danger it’s best to run the 15mm (1/2in) cold water supply pipe to the shower direct from the cold water storage cistern and not as a branch from the 22mm (%in) distribution pipe to the bathroom. This will supply a continuous volume of cold water provided the cistern is working properly.

Thermostatic valves

Of course it may mean too much of an upheaval to lay in a new pipe run, but instead you could install a special thermostatic mixing valve. This enables you to pre-set the temperature of the shower water and this will remain constant despite fluctuations of pressure in the hot and cold supplies. And apart from this, thermostatic mixers provide just that extra margin of safety and assurance against discomfort.
thermostatic valve shower mixers

Before buying a thermostatic mixing valve, it’s important that you recognise its limitations as well as its advantages. These valves can deal with relatively minor fluctuations in pressure that can result from water being drawn off from one or other of the supply pipes. They can’t accommodate the great differences in pressure between a hot water supply under pressure from a storage cylinder and a cold supply taken direct from the main (in any case, you should never arrange your shower plumbing in this way).

Some thermostatic valves even require a greater working ‘hydraulic head’ (the vertical distance between the cold water cistern and the shower rose) than the 1 m (3ft) minimum that is usual for manual mixers. So it’s a good idea to check on these points or ask the plumber before you buy one of them.

Kitchen and bathroom lighting

Kitchen and bathroom lighting

The kitchen is one room in the house where emphasis must be on efficient lighting. The work surfaces must be lit to avoid shadow and glare—but this does not mean it should be twice as bright as anywhere else in the house. The point is proficiency, not brute force.

A single, central pendant is not the answer. If possible, light fittings should be directly above the work surfaces but shielded from direct view. Strip fluorescent lighting, positioned out of sight underneath wall mounted cupboards, will shine directly onto work surfaces giving a good clear light. And fluorescent ceiling fittings are ideal for general lighting in the kitchen area.

You might also consider fitting small lights inside deep storage cupboards. Carefully placed spotlights, or tracking lights fixed to an overhead rail are also very efficient and provide lighting without glare in the kitchen. These tracks enable special light fittings to be clipped into any position on the track and can be angled at stove, sink, table, and work surfaces. (Lighting tracks, in fact, can be very useful throughout the house—as supplementary lighting in a study or workroom for example.)

kitchen lights plinth

Generally, there is little call for flexibility of lighting in the kitchen. But if chores such as the ironing are done there, then the tracking or spot lights could be swung into the appropriate positions. Open plan kitchen/ living rooms may need a lower, more subtle, level of illumination at times, for a cosy supper or to flatter a sophisticated dinner party. If you entertain only occasionally, then a portable light fitting that gives a soft, coloured light in the dining area can be effective. Or a pendant light, which is height adjustable, will light the dining table effectively for both formal and informal occasions.

But again, without supplementary lighting— picture lights, wall lights, or even candles— there will be a considerable, glaring contrast between the background and light fitting which can be tiring. To eliminate this, and help create a cosier atmosphere you could use a dimmer to lower the wattage of your single light. The bathroom mainly needs a good, general purpose, overhead light, combined with mirror lights. A fixed bowl shade will not be affected too much by steam. And for very small bathrooms there are combined light fittings which are useful.

Always use a qualified electrician.