Wallpapering

Cutting the wallpaper

Unroll the wallpaper face (‘right’ side) upwards. Measure the length required and cut off 51-102mm (2-4in) below this (the additional amount is for easing the paper at the top and bottom). If the paper is patterned, find the first complete motif and cut off 25- 51mm (l-2in) above. Measure the length, and cut off 25-5.1 mm (1-2in) below. These extra amounts allow you to position the paper accurately, and to ease it in at the top and bottom. Cut the next length, checking that the pattern matches exactly at the top and sides, again allowing the additional inches at top and bottom. Lay the cut lengths on top of each other. Cut 2-3 lengths before pasting. Turn the pile over, so that the ‘wrong’ side now faces upwards, with the first cut length on top.

Pasting the wallpaper

Arrange the pile of paper centrally on the width of the pasting board, so that a little board shows on either side of the paper and the top edge of the paper is on your right. If the paper is longer than the board, have the overhang on your left. Push the top length only so that its far edge slightly overlaps the edge of the board. This is to avoid getting paste on to the board, and then on to the face of one of the other sheets. Apply a liberal brushful of paste along the centre of the length of the paper, and brush out to the far edge. Always brush outwards, as there is a danger of paste getting on to the face of the paper if you brush inwards.

Slide the paper towards you, so that the unpasted side now slightly overlaps the near side ol the board. Brush the paste from the centre to this edge. When the length on the table has been pasted, lift both the corners on the right edge and bring them over to make a large fold, without creasing (the pasted sides will be facing). Gently draw the paper along the table until the unpasted portion is flush with the left-hand edge of the board. Paste this length as before and then bring this section over and down to meet the first fold. As each length is pasted, place it on another table to ‘rest’. This lets the paste soak in-the time depends on manufacturers’ instructions-and the paper becomes supple.

Hanging the wallpaper

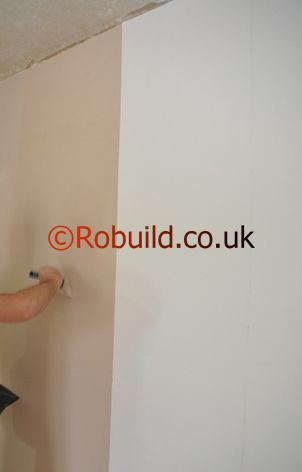
Lift the first length of paper over your arm and carry it to the wall. Unfold the top half and, holding the length carefully, place the top edge in position, easing it upwards until the 25-51mm (1-2in) excess overlaps at the top. Keep the side edge exactly level with the plumb line. If the corner is vertical, ease the paper into it exactly. Otherwise let it overlap into the corner. Smooth along the top of the piece with the paperhanger’s brush to hold it in place. Now smooth down the centre and out to the sides in a series of arrowhead motions. This movement eliminates air bubbles, and spreads the paste evenly on the wall. Don’t brush from side to side, as this could move the paper out of position.

Try not to over handle or stretch the paper. If any paste seeps out from the sides of the paper, wipe it off with a rag. Keep the paperhanger’s brush completely clean, and don’t let any paste get on to the ‘right’ side of the paper. Check again for correct placing, then unfold the bottom section and smooth it out, brushing it as before, until the whole length is completely flat without creases or blisters. The bottom edge will overlap the skirting board. Run the back edge of the scissors along the paper into the angle between the wall and the cornice or picture rail. Ease the top of the paper from the wall gently, and trim off the excess paper along the crease. Now repeat the procedure at the bottom, where the wall meets the skirting board. If you overlapped the paper into the corner, trim off the excess in a similar way. Smooth the paper back into position. Hang the next pieces of paper in the same way, butting the edges together (do not overlap them) and carefully matching the pattern. Run the seam roller down the joint when the paste is nearly dry.

Lining Paper

Lining the walls with lining paper

For a really first-class wallpapering job, always use a lining paper under the wallpaper. It provides an ideal surface of even porosity, to which the wallpaper and its adhesive will marry, particularly if the wallpaper is heavy (the principle being that paper sticks to paper more firmly than to plaster). Heavy papers, especially embossed ones, have a tendency to stretch as their fibres first absorb the paste but shrink on drying. This can mean that the joints (joins between pieces) open because the paper loses its grip on the plaster surface.

lining paper

Lining paper prevents this happening. Another advantage of lining papers is that they can disguise a ‘bad’ surface, as well as having some insulating value. The method of pasting and hanging lining paper is similar to that for wallpaper. It is best hung horizontally as the finished effect is smoother. This makes the paper rather difficult to handle on a long wall, so you should fold the paper, without creasing, concertina fashion (always with pasted side to pasted side). Start in the right hand corner of the wall and, holding the paper with your left hand, brush it out with your right hand (reverse this if you are left handed). If you prefer to hang the paper vertically, stagger the joints with those of the wallpaper to avoid the possibility of ridges. Like wallpaper, lining paper should be butt-jointed (the pieces are positioned edge-to-edge,with no overlap).

Wallpaper Adhesives

Make up the adhesive according to the directions given on the packet at least 2O minutes before you want it. This gives it time to absorb the water properly and become completely smooth.

wallpaper adhesives

Always make up a complete packet at a time to ensure a correct consistency-any paste left over can be kept in a completely airtight jar and be used for touching up, if necessary. Don’t mix batches of paste. When the wallpaper is cut, it is a good idea to test for colour-fastness on a waste piece. If the colours do run, take extra care not to get paste on the surface of your cut pieces.

Prepairing the walls for paperhanging

Walls must be carefully and thoroughly prepared in order to make paperhanging a complete success. New wallpaper slapped on top of old is by no means certain to stay up, and is likely to bubble and blister. The walls should be as even as possible, and completely clean and free of grease. Newly plastered walls containing lime can be papered if they are perfectly dry.

painter decorator repairing walls

Coat the area with an alkali-resisting primer which will neutralise any active lime in the plaster. Alternatively, use one of the papers which have been specially treated for use on new plaster; a lining paper would be useful here. Distempered walls should be washed down with soapy water to remove all grime. Painted walls should also be washed down with soapy water to remove all grime. When dry, gloss-painted walls should be keyed by thorough scouring with coarse glasspaper (this slight roughening of the surface will help the paper adhere securely).

Previously papered wa1ls should first be stripped by soaking the paper well with warm water and an old distemper brush. A chemical stripper may be added to the water-but if the chemical splashes the paintwork, wipe it off straight away. While the paper is still wet, use the stripping knife to ease it off a little at a time. Properly soaked paper will come away from the wall easily and cleanly. Once all the paper is off, wash the walls with soapy water, rinse with clean water and, when dry, sand them lightly to remove surface blemishes, small pieces of paper, old paint drips, and so on.

Making good the walls

Fill any holes and cracks with a proprietary cellulose filler and when it is completely dry smooth it with glasspaper. The next step is to ‘size’ the walls. This prevents them from absorbing the paste too quickly, allowing time to position the paper on the walls correctly. To make size, dilute the adhesive you intend to use according to the manufacturers’ instructions (the packets usually give instructions for making it up for both size and adhesive). Coat the walls with it, using a pasting brush.

Paperhanging & wallpapering

For your first attempt at paperhanging, choose walls which are free of awkward obstructions like doors and windows. Move as much furniture as possible from the room, put the rest in the middle and cover it. Give yourself plenty of time paperhanging can’t be rushed and try to work in daylight.Otherwise use a team of Painters & Decorators.

wallpaper in bedroom London

Materials required for decorating

For preparing the walls you will need:
1. Bucket.
2. Sponge.
3. Sandpaper wrapped around a cork block.
4. Plaster filler. (Use a cellulose based proprietary brand )
5. Lining paper. If your walls were previously papered you will also need:
6. An old distemper brush.
7. A broad stripping knife.
8. Chemical stripper (optional).

For putting up the paper you will need:

l. Plumb bob, chalked line and chalk.
2. Scissors with 280-305mm blades.
3. 1 meter rule.
4. Soft pencil.
5. A table or board supported on trestles. (The board should be at least 600 wide and l.8m long to provide an adequate surface for pasting. An old flush door suspended across two chairs could also be used.
6. Adhesive. (Most manufacturers give advice about which adhesive to use for the type of paper.
7. Buckets in which to mix adhesives. ( Plastic ones are better than metal. )
8. Pasting brush.
9. Paperhanger’s brush. (Have two brushes, if possible to save delay if one has to be washed, after picking up paste).
10. A hop-up or stepladder, plank and strongly built box (to make a platform from which to reach the top of the walls safely).
1l. Seam roller.

Quantities of paper, material

A roll, or piece, of standard British wallpaper is about 10 meters long and 52cm wide. This covers an area of approximately 57 sq ft, but some is usually wasted through cutting and matching patterns. Most papers are ready trimmed but if they are not, this can be done by the retailer. To estimate how many rolls of paper you need, measure the total length right round all the walls you want to paper, and the height of the room from skirting board to ceiling (or to cornice or picture rail). Rolls of paper are produced in batches, so check that they come from the same one (each has a serial number), as rolls from different batches may vary slightly in colouring. If you buy a ‘job lot’ of paper in a sale, always buy more than you need to cover wastage by matching patterns or through damage.

Paint Sanders

Sanders
Several types of sander can be fitted to a power drill. The most commonly used is the disc sander. A flexible rubber disc is mounted in the chuck of the machine and an abrasive reduces these marks to a minimum. The disc is made of metal, and is flat and completely rigid. To give it flexibility in use, the shaft on which it is mounted can be bent at a slight angle while it is turning. The drum sander consists ofa wide revolving drum made of stiff foam rubber, with an abrasive belt fastened around its edge.

It makes no swirl marks, but can only be used for sanding small objects or narrow strips of wood. On large, flat surfaces it tends to give an uneven result. The orbital sander, on the other hand, can be used to give a perfect finish to any surface. It has a large, flat sanding pad covered by an abrasive sheet. This moves to and fro in a small circle without revolving, so it leaves no swirl marks at all. Orbital sanders are available both as attachments and as integral tools. The abrasive discs, belts, and sheets for all these tools are available in coarse, medium and fine grades as well as special types such as ‘wet-and-dry’ and ‘preparation’ for rubbing down paintwork.

Interior design for living room and dining room

A living-dining room in which all the woodwork dining furniture, sideboard (if you must have one), occasional tables, chair armrests and so on are all of the same colour, and of as few different heights as possible, looks much bigger than one whose colours and heights are a jumble. Arranging a room to make the most of available space is a question of careful planning and compromise. One of the problems often encountered-unless you are lucky enough to be refurnishing completely, is trying to incorporate the often unsuitable furniture you already own. Inevitably, one has items inherited from a parent or grandparent, or that were bought on impulse, or to fit a different house.

living dinning room

But even if you cannot-indeed would not want to-throw everything out and start again, some improvements are always possible. Even a box unit that takes away two cubic feet of clutter will help. And in the long run, the daily comfort and convenience of having a well organised room, and the family friction avoided by flexible, practical furniture, will be worth any pangs of regret that you feel at parting with the ancient, much loved, but totally impractical object that once filled your room.

In a small space, you simply cannot have a huge sofa across a corner with yards of wasted space behind it, nor afford to ignore an alcove which could take shelving and cupboards and work-top but in fact still houses a cumbersome old desk or sideboard. And if there is something you simply cannot bear to part with, you will have to earn a place for it by perfect planning in the rest of the room. However intelligently you plan your space to suit your family’s various activities, there will still be limitations and problems. But in many ways these provide half the fun as well as the headaches. For they give you the incentive to be imaginative, and,ultimately, the satisfaction of knowing you have solved some problems and disguised others. And in terms of sheer comfort, space-saving can be a very rewarding activity.

Modern families tend to have sophisticated hobbies which involve a mass of equipment and materials. If these were allowed to ‘stray’ all over the house they would cause untold havoc. Small children have their nurseries to clutter up, and specialists have their workshops, but a properly planned ‘family room’ provides the whole family with a social centre where each member can create his own brand of mayhem. And then, perhaps, you will meet more often than just at mealtimes.

living room london

It’s no use packing the whole family into the spare room and hoping that everyone will have a marvellous time. Family rooms do have to be planned, if only to ensure that they are warm enough, well ventilated, suitably lit, insulated against noise, provided with adequate storage and somewhere to sit, and so on. The ‘basics’ should be carefully thought out before you try to plan the layout of the room.