Painters and Decorators in London

Painters and Decorators in London

Painters and Decorators London

London Painters and Decorators

We cover cover Greater London area. Our Painters & Decorators offer : all types of Painting & Decorating jobs, refurbishments, Internal Painting and Decorating, External Painting and Decorating.
Flats, Houses, Offices, Hotels, Restaurants, Shops, Commercial and Domestic.

painters decorators london

Barking and Dagenham, Barnet, Bexley, Boroughs, Boroughs of London, Brent, Bromley, Camden, City of London, City of Westminster, Croydon, Ealing, Enfield, Greenwich, Hackney, Hammersmith and Fulham, Haringey, Harrow, Havering, Hillingdon, Hounslow, Islington, Kensington and Chelsea, Kingston-upon-Thames, Lambeth, Lewisham, london, Merton, Newham, Redbridge, Richmond upon Thames, Southwark, Sutton, Tower Hamlets, Waltham Forest, Wandsworth

SELECTING PAINTS

When choosing paints, remember that:

• emulsion paints are quicker to apply, dry more quickly and lack the smell of resin- or oil-based paints. They are also cheaper and can be easily cleaned off painting equipment with water
• non-drip paints are best for ceilings and cover more thickly than runny ones, cutting down on the number of coats
• a silk or gloss finish will tend to highlight surface irregularities more than a matt finish
• textured paints are suitable for use on surfaces which are in poor condition since they will cover defects which a standard emulsion paint cannot.

FILLING HAIRLINE CRACKS

You may not be able to push enough filler into hairline cracks to ensure a good bond:

• it is often better to open the crack up further with the edge of an old chisel or screwdriver so the filler can penetrate more deeply and key better to both sides of the crack
• when using a textured vinyl paint there is no need to fill hairline cracks, but cracks wider than 1mm should be filled.

painter decorator filling cracks walls

DEALING WITH FITTINGS

Protect electrical fittings so paint or water can’t enter them during cleaning and decorating:
• ideally, power to these fittings should be cut off and the fittings removed
• if items cannot be removed, use masking tape to protect them.

LINING WALL SURFACES

LINING WALL SURFACES

You can use lining paper to do the same job for paint as it does for wallpapers, covering minor cracks and defects on the wall or ceiling and providing a smooth surface for painting.

Unless wallpaper is of a type intended for painting it is usually better to strip it off. and walls which have been stripped of their previous wallcoverings need a thorough washing to remove all traces of old paste. Make sure the floor is protected against debris by covering it with a dust sheet or sheets of old newspaper. Emulsion-painted walls also need washing to remove surface dirt.

If you decide to leave the wallpaper on the walls you will have to wash it down before you paint. Take care to avoid overwetting the paper, particularly at joins. When the surface is dry. check the seams; if any have lifted, stick them down with a ready-mixed paste. Ceilings should be washed in small areas at a time and rinsed thoroughly before you move onto another section systematically.

painting decorating room

If the surfaces are left in perfect condition, they can be painted as soon as they are dry. It’s possible that walls or ceilings may have been painted with distemper, which may only become apparent after you have removed the existing wallcovering. Unless it is the washable type, you will have to remove it completely since emulsion paint will not adhere well to it. Use hot water, detergent and a scrubbing brush to soften and get rid of the coating; this is hard work, but you could use a steam stripper to speed up the process. With all the surface cleaned, the next job is to fill any cracks and repair defects such a as indentations caused perhaps by knocks or the blade of a carelessly handled wallpaper scraper.

TIP: SEAL STRONG COLOURS
Wallcoverings with strong colourings, and particularly those tinted with metallic inks, will almost certainly show through the new paint. To prevent this they should be stripped off, or sealed with a special sealer.

Preparing the surface before painting & decorating. Walls, Ceilings, Woodworks

Preparing the surface before painting & decorating. Walls, Ceilings, Woodworks

No painting will be successful until the surface beneath has been properly prepared. Unless wallpaper is of a type intended for painting it is usually better to strip it off. and walls which have been stripped of their previous wallcoverings need a thorough washing to remove all traces of old paste. Make sure the floor is protected against debris by covering it with a dust sheet or sheets of old newspaper.

Emulsion-painted walls also need washing to remove surface dirt. In both cases, use warm water with a little household detergent added. Then rinse with clean water. If you decide to leave the wallpaper on the walls you will have to wash it down before you paint. Take care to avoid overwetting the paper, particularly at joins. When the surface is dry. check the seams; if any have lifted, stick them down with a ready-mixed paste.

Ceilings should be washed in small areas at a time and rinsed thoroughly before you move onto another section systematically. If the surfaces are leff in perfect condition, they can be painted as soon as they are dry. It’s possible that walls or ceilings may have been painted with distemper, which may only become apparent after you have removed the existing wallcovering.
Unless it is the washable type, you will have to remove it completely since emulsion paint will not adhere well to it. Use hot water, detergent and a scrubbing brush to soften and get rid of the coating; this is hard work, but you could use a steam stripper to speed up the process. With all the surface cleaned, the next job is to fill any cracks and repair defects such a as indentations caused perhaps by knocks or the blade of a carelessly handled wallpaper scraper.

painters decorators

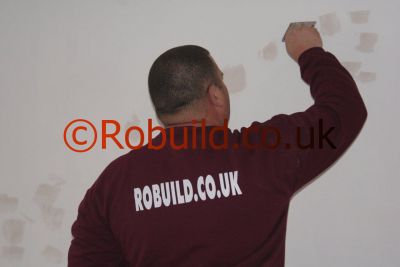
Whenever a filler has been used it should be sanded down flush with the wall surface, once dry, and the resulting dust should be brushed away. If the plaster is in bad condition and obviously covered in cracks you should consider covering it completely with liningpaper. woodchip or other relief wallcovering before painting it. The paper will provide a good base for redecoration, and will save a great deal of preparation time. However, this can only be done if the plaster itself is still bonded securely to the wall.

If it is coming away in chunks or sounds hollow behind the cracks, then the wall should be replastered. Cracks which have developed round door and window frames are best filled with a flexible sealant, which will be unaffected by movement of the frames.
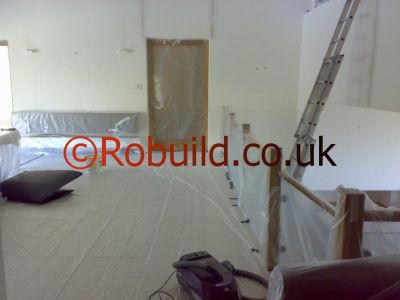
Acrylic-based sealants are available for this purpose and they can be easily overpainted. After all the preparation work has been completed, have a good clear-up in the room so that when you begin painting you do not stir up dust and have to work around numerous bits and pieces scattered overthe floor space. Re-lay dust sheets and set up your access equipment before even opening the first can of paint.

Make sure your brushes or rollers are clean and ready for use.

Tools and equipment for painting and decorating

Tools and equipment for painting and decorating

Few specialised tools are needed for wall and ceiling paintwork. If you are content to work with only a brush you will require two sizes: one larger one for the bulk of the work, and a smaller brush for working into corners. It is worth decanting quantities of paint into a paint kettle which is easier to carry around than large heavy cans.

Rollers make the job of painting large areas of wall or ceiling much quicker and also help to achieve a better finish. But you will still need a small brush for working into corners and for dealing with coving, cornices etc. To prepare a new fibre roller for painting, soak it in soapy water for 2 to 3 hours to get rid of any loose bits of fibre, then roll it out on the wall to dry it off.

One point to remember: if you intend using silk vinyl emulsion paint, it’s best not to use a roller as this tends to show up as a stippled effect on the silk surface. Large paint pads will also enable you to cover big expanses of wall or ceiling very quickly. You can use a brush or a small paint pad for work in corners. Apart from these paint application tools you’ll need a variety of other items for preparing the surfaces so they’re ready for the paint. The walls must be cleaned, so you’ll need washing-down equipment: sponges, cloths, detergent, and a bucket or two of water.

You’ll need filler for cracks and a filling knife about 75mm (3in) wide. When any filler is dry it will need to be sanded down, so have some glasspaper – sandpaper ready for wrapping round a cork sanding block. A scraper will also be needed if old wallpaper has to be stripped from the walls. Finally, because of the height of the walls and ceiling, you’ll need access equipment, such as a stepladder, to enable you to reach them safely and comfortably.

Choosing paints

Vinyl emulsion paints are the most commonly used types of paint for painting walls and ceilings. They are easy to apply and come in a wide range of colours. You will usually have a choice of three finishes: matt, silk, or gloss. There are also textured paints which are increasing in popularity, particularly for ceiling use.

These are vinyl emulsion paints with added ‘body’ so they can be applied more thickly and then given a decorative textured finish. Oil-based eggshell paints can be used where a more durable surface is needed or where you want to use the same colour on both walls and woodwork.

Resin-based gloss paint is used occasionally also on walls and ceilings, particularly in humid rooms like kitchens and bathrooms. You should choose paint carefully. The fact that one make is half the price of another may indicate that it has only half the covering power and you would therefore need to apply two coats of the cheaper paint. Also, if you’re using white paint, you may find that one brand is noticeably ‘whiter’ than another.

PAINTING WALLS AND CEILINGS

The quickest and cheapest way to transform a room is to paint the walls and ceiling. But, for a successful result, you have to prepare the surfaces properly and use the correct painting techniques.

Paint is the most popular material used to protect and decorate walls and ceilings in the home. Whereas many people hesitate before hanging wallpaper or sticking more permanent wall and ceiling coverings in place, few would worry about wielding a paint brush for the first time. One of the chief advantages of painting a room is that it doesn’t take much time; large areas can be given two or even three coats of emulsion paint in a day.

The paints now available are hardwearing and totally unlike earlier distemper and water paints. They are easy to apply by brush, roller or pad and can be safely washed at frequent intervals to keep them looking fresh. Any drawbacks are usually caused by faults in the wall or ceiling surface, rather than by the paints. A standard paint alone cannot cover up defects in the same way that some other wallcoverings can, so a surface which is to be painted usually needs more careful preparation than one which is to be papered. The majority of walls and ceilings are plastered and this type of surface, when in sound condition, is ideal as a base for emulsion and other paints. But it is not the only surface finish you are likely to come across.

Previous occupiers of the house may well have covered the walls with a decorative paper and even painted on top of that. At the very worst there may be several layers of paper and paint, making it very difficult to achieve a smooth paint surface. In this situation it is invariably better to strip the surface completely down to the plaster and to start again from scratch. This does not mean that no paper should be overpainted. Certain types such as plain white relief wallcoverings and woodchips are intended to be so treated, and actually look ‘softer’ after one or two redecorations. In short, most wall or ceiling surfaces you are likely to encounter will be paintable. All you have to do is select the right paint for the job and get the surface into as good a condition as possible.

CLEANING BRUSHES

To ensure the long life of brushes:

• remove excess paint from the bristles with the back of a knife

• wash out solvent-based paint in white spirit followed by soapy, then clean water – the soap restores flexibility and softens the brush

• wash out non-drip paint in a hot water/ washing-up liquid solution then rinse in clean cold water

• hang up brushes, bristles down, to dry (drill a hole in the handle to take a nail)

• at the end of a job a build-up of paint can be difficult to remove; soak the brush in a proprietary brush cleaner

• if leaving brushes overnight before continuing a paint job, suspend them in a jam-jar containing white spirit (drill a hole near the ferrule to take a nail) but remove all traces of spirit next day

TIP: STORING BRUSHES
During a short break wrap brushes in plastic cling-film to keep air off and the paint in the brush wet.