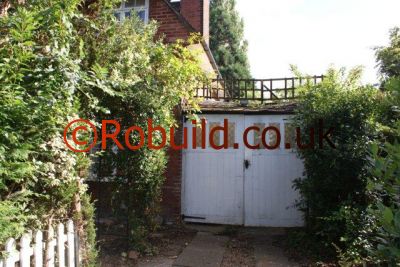
Garage doors are larger, heavier, more exposed, and because they open outwards, easier to damage than any other exterior or interior doors around the house. Garage doors have their own peculiar problems, many of which needs to be addressed in order to protect your home, and preserve its appearance. Garage doors fall into two distinct categories:
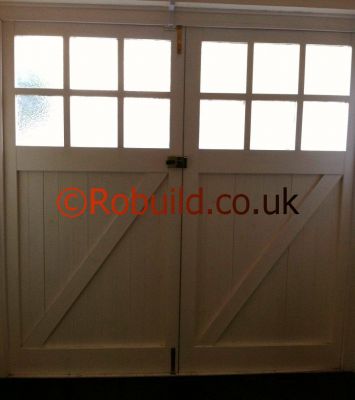
The traditional ledged and boarded or framed, side-hung wooden doors;
And a wide range of metal or wooden doors which slide, fold, or can be lifted into position by a series of guides or tracks.
Wooden side-hung doors are still by far the most common, even though they are more likely to need repair or replacement than metal one.
Side-hung doors
Side-hung garage doors are attractive and can easily be made to match your house, but they must be carefully maintained if they are to remain serviceable. Garage openings are usually about 2.1m wide by 2m high and the sheer weight of the doors can cause serious joint sag—making them difficult to open and close, and generally unsightly. Slight warping and twisting can often be cured with the doors in situ by forcing them against the twist. Do this with cramps, against a heavy object or a fixed board to provide the necessary leverage.
With more serious cases, remove the doors and cramp them against the twist on a flat surface. This alone may cure the problem, especially if you soak the timber first to make it more pliable. But if you still have no luck, fit some form of bracing while the doors are cramped.
In the worst cases, you must draw the door frame square with sash cramps and reinforce the existing mortise and tenon joints with adhesive or extra screws. For a more professional job, it is better to dismantle the offending frame completely and refurbish the joints. When you come to reassemble it , drill, glue and insert strengthening dowels to supplement the existing tenons. Whenever you remove a door, lay it flat and take out any glazed panels before starting work.
The carpenter must also remove any old bolts which no longer support the door effectively, or which impede your efforts to straighten it, and this can be a troublesome process— especially if the bolts are rusted. If you cannot loosen coachbolts with penetrating oil, try cutting a slot in the bolt head with a hacksaw so that you can use a large screwdriver. If this fails, drill into the head of the bolt with a twist-drill as near the size of the bolt shank as possible. Flatten the bolt head with a rough file so that the drill bit does not slip and damage the wood, then slowly drill through the head until it drops away.
When you have squared up the door so that its diagonal dimensions are identical, drill out any splintered or rotten wood from the old bolt holes and fill them with a hard-setting epoxy or resin filler. When this has set, redrill the holes so that you can screw new bolts into the door. Bracing In most cases the repairs described above will be enough to keep the doors intact. But because garage doors are much heavier than other doors, it is well worthwhile fitting additional strutting to prevent problems from recurring.
One way of doing this is to attach a metal bracing bar diagonally across the back of the door. Use a mild steel bar about 6mm thick and between 25 and 50mm wide, and run this from the top end of the stile on the hinge side to the bottom end of the stile on the shutting side. Make sure that the bar does not extend beyond the edges of the door, then secure it with a number of 8mm coach bolts at intervals along its length.
Some ironmongers and steel stockists will supply a bar cut and drilled to your specifications, although it may be less trouble to buy a plain bar and make the holes yourself. In this case use a centre punch to locate the position of the bolt holes. Drill the pilot holes with a 2.5-3mm twist drill, then drill the final bolt holes. If you are using a power drill, use it on a low speed setting and lubricate the bit with oil as you drill As an alternative you can use a bracing (or straining) wire to support the door. Like the steel brace, this runs from the top corner of the hinge stile to the bottom corner of the opposite stile.
A screw-tightening device (similar to the bottle screws used to tighten the mast stays on sailing craft) lies diagonally on the door; when tightened, this lifts the bottom of the closing stile and keeps it clear of the floor when the door is re-hung. To prevent the door warping, cut notches in the corners of the stiles so that you can run the wire down both sides. Use staples to hold the wire in place. You can then re-hang the door and adjust the tensioner until the door hangs properly.
Although you can use ordinary fencing wire and a tensioning device available from a hardware store, a ship’s chandler will stock wire cable and a bottle screw adjuster that will do an equally good job. And bottle screws have the additional advantage that, being designed for a salt-water environment, they tend to resist corrosion more effectively. A less unsightly preventive measure is to fit a wheel castor to the bottom of the shutting stile. This will take the weight of the door when it is opened and closed, at the same time lifting the bottom edge off the ground. Remove the door to fit the castor, and screw the bracket to the rail rather than to the comparatively weak end grain of the stile. If possible, choose a spring-loaded castor that will ride over the unevenness of your drive.
Door rot

One common cause of door sag is wet rot in the wood, and the weight of a garage door tends both to exaggerate and accelerate the effects. Bad cases of rot and door sag entail dismantling the affected door and replacing rotten sections in their entirety. Early signs of rot are blistering and bubbling in the paintwork. Determine to what extent it has taken hold by sticking the blade of a penknife into the suspect areas until you reach sound timber. The most commonly affected areas are the bottom rail, the ends of the stiles, and the edges of glazed panels.
In the latter case the cause is normally rainwater running down the glass and behind the beading or rebated edge of the panel. Having cut out and patched the rotted section, bed the glass in an ample amount of putty smoothed level
with the beaded edge to prevent the problem recurring. Efficient puttying is particularly important in cases where the glass is patterned or reinforced with wire mesh because water can seep through the joints with the beading. If the rot extends beyond more than one of the joints of the stile, you will have to replace the stile completely. Start by removing the door and placing it on a flat surface or two trestles.
Drill out any dowels or mortise wedges in the joints, using a wooden block to protect the edges of the timber. Then knock the stile outwards from the rails with a hammer so that the tenons on the rails separate from their mortises. Use a softwood block to prevent the hammer blows from damaging the stile itself. Work your way slowly from joint to joint until the stile is released, then measure up the tenons on the rails and cut corresponding mortises in the new stile.
Clean down the surfaces of all the joints in the new stile and knot and prime them before applying the adhesive and sash cramps. Use a waterproof adhesive —urea or resorcinol formaldehyde. Alternatively, you can saw through the stile immediately adjacent to the joints and chisel away the rotten wood from around the joint area before replacing it. If only one joint on the stile has rotted, you can cut out the rotted section and replace it with a new joint. To do this, cut through the stile immediately above the rotted section and chisel or prise off the damaged wood, being careful to leave the tenon on the adjoining rail undamaged.
Cut a new section 75mm longer than the piece you have removed, and finish the end of the replacement piece. Cut a joint in the stile above the damaged section to correspond with the replacement section. This creates a strong and durable scarf joint which can be secured with screws and dowels. Cut mortises in the other end of the replacement piece to accept the tenons in the stile. Again, knot and prime all the surfaces of the new wood, including the joints, and glue and cramp the new wood into position before fastening the scarf joint with screws.
For additional strength secure the mortise and tenon joint between stile and rail with a dowel and insert wedges against the tenons. Plane and smooth all the edges, then prime and paint them. Often the tenons on the lower rail suffer from rot. If both ends are damaged replace the entire rail, but if only one end is damaged you can replace it in the manner described above, or construct a ‘false tenon’ that is jointed into the rail and held with glued dowels.
Tongued-and-grooved boards on traditional ledged and boarded doors often shrink, leaving exposed gaps between them. This is not only unsightly but also allows water to enter and rot the timber. The effect can be most damaging where the panels shrink away from the stiles to form a crack in the paintwork—allowing water to enter and rot the stiles. The most frequent cause is insufficient seasoning and, in acute cases, the best thing to do is to replace the boarding, cramping the new panels tightly together as you do so.
Treat minor cases by scraping off the cracked paintwork down to clean timber with a shave hook and then forcing a flexible epoxy filler into the gaps. These fillers are elastic enough to take up considerable movement in the boards, but they will not adhere properly unless the timber is completely free of paint. Once the filler has gone ‘off’, rub down any rough edges and repaint the door. Repairing a rotten frame Frame damage generally occurs at the bases of the uprights, which are exposed and more likely to absorb water from the ground. Determine the extent of the damage as above by probing the timber with a penknife.
Cut out the damaged section well past the rot and chisel a lapped joint at the base of the timber which remains. Then cut a replacement piece of timber to match the frame and form a lapped joint at the top to mate with the one you have just cut. As door frames can be bought in standard sizes, to match most existing frames, you should have no trouble finding a compatible piece of timber.
Drill screw holes in the replacement section, both to secure the lapped joint and to allow for the timber to be screwed or bolted to the adjoining masonry. Then locate it in position and mark the positions of the holes in the masonry with a hammer and a long masonry nail or drill bit. Remove the replacement section, drill out the holes in the wall with a masonry bit, and insert wallplugs to take No. 12 woodscrews.
Alternatively use expanding wall bolts. Then prime the back of the replacement section and glue a piece of bituminous felt to the foot to prevent the rot from recurring. Before gluing and screwing the new section to the original frame, check that it aligns correctly and i f necessary insert blocks of wood behind it to take up any unevenness in the wall. Finally, screw or bolt the new section to the wall, screw and glue the lapped joint, and knot, prime and paint the timber before replacing the door. Seal the entire frame with a non-hardening mastic at the point where it meets the masonry: this will help prevent moisture attacking the joint from behind.
Alternatives to side-hinged doors
Not all wooden doors are side-hinged: there are designs on the market for folding, sliding, and up-and-over doors made in timber, and they all suffer from problems similar to those described above. Many others, however, are manufactured in galvanized steel, aluminium, or glass fibre. All of them, including the wooden doors, run in guides or a variety of lifting mechanisms so that they open into an unobtrusive position. Their most frequent problem, therefore, apart from those problems shared with wooden doors, is that the tracking or lifting systems may fall out of adjustment as the door frames start to rot, or if the garage itself starts to settle with old age. Procedures for repairing them will obviously vary from one design to another, but most manufacturers supply full fitting and constructional details which include maintenance and adjustment instructions. You can refer to these if you encounter any of the problems with the doors, frames, or tracks mentioned above.


