House Extensions, Kitchen Extensions, Loft Conversions, Garage Conversions Builders in London

House Extensions, Kitchen Extensions, Loft Conversions, Garage Conversions Builders in London

Brick walls or breeze blocks ?

When building a house extension, kitchen extension, sometimes using breeze blocks instead of bricks, is a cheaper and faster option.

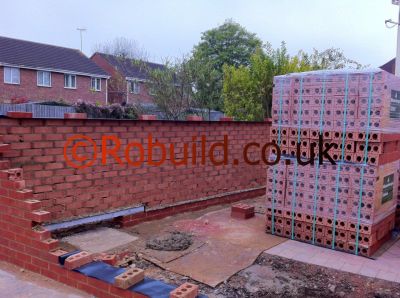
brick wall bricks

In London, bricks are always the best choice of material, but if the original property is rendered, it might make more sense using breeze blocks and rendered the new walls to match existing property.

rendering house extension loft conversion

Possible conversions

If a Loft Conversion or House Extension is not an option, there are several possible conversions which may not be immediately apparent. A garage which is built into or onto a house would lend itself to being a laundry, providing there is sufficient space elsewhere to build a separate garage.

A very large kitchen may become safer, more efficient and better looking if part of it is divided off to make a laundry. Older buildings often have a network of single-storey outbuildings, including redundant fuel stores and sculleries. These are usually suitable for conversion into a laundry, or alternatively you could demolish them and build a new extension in their place.

When planning an extension, remember to leave adequate external access from the front to the back of the house. This should be at least 915mm (3ft) wide to leave enough room for refuse collection. Avoid placing windows which open outwards onto such narrow accesses, as these can cause serious accidents.

House Extensions, Kitchen Extensions, Loft Conversions, Garage Conversions in North and Northwest London

House Extensions, Kitchen Extensions, Loft Conversions, Garage Conversions builders in North, Central and Northwest London

builders

North London

N1, n2, n3, n4, n5, n6, n7, n8, n9, n10, n11, n12, n13, n14, n15, n16, n17, n18, n19, n20, n21, n22): East Barnet, Archway, Finsbury, Alexandra Palace, Fortis Green, Barnet, Kentish Town, Canonbury, Crouch End, East Finchley, Enfield Park, Cockfosters, Enfield, Finsbury Park, Friern Barnet, Epping Forest, Hampstead Garden Suburb, Finchley Central, Islington, Barnsbury, Highbury, Highgate, Hornsey, Lower Edmonton, Tufnell Park, Manor House, New Southgate, Holloway, North Finchley, Hendon, Palmers Green, Pinner Green, Pinner, Ponders End, Muswell Hill, Potters Bar, Woodside Park, Seven Sisters, Winchmore Hill, Southgate, Totteridge, Upper Edmonton, Whetstone, Tottenham, Woodford Green, New Barnet, Stoke Newington.

Northwest London

Nw1, nw2, nw3, nw4, nw5, nw6, nw7, nw8, nw9, nw10, nw11, nw12, nw13, nw14, nw15: Neasden, Plumbers Brent Cross, West Hampstead, Wembley, Camden Town, Northolt, Hampstead,Kilburn, Havering, Golders Green, Harrow, Temple Fortune, Cricklewood, Kingsbury, Plumbers St John’s Wood, Greenhill, Harlesden, Colindale, Maida Vale, Mill Hill, Regent’s Park, Hampstead Heath, Harrow on the hill, Willesden, Sudbury, Swiss Cottage.

West London

W1, w2, w3, w4, w5, w6, w7, w8, w9, w10, w11, w12, w13, w14: Isleworth, Acton, Eastcote, Bayswater, Charlton, Brook Green, Chiswick, Ealing, Uxbridge, Greenford, Hanger Lane, Hanwell, Hammersmith, Holland Park, Kensington, Elsham, Notting Hill, East Molesley, Ladbroke Grove, Marylebone, Mayfair, North Kensington, Warwick Avenue, Osterley, Paddington, Perivale, Shepherd’s Bush, Strand,Addlestone, West Brompton, Kensal Green, Queens Park, West Ealing

Central London
Wc1, wc2, ec1, ec2, ec3, ec4: Barbican, Belgravia, Monument, Clerkenwell, Shoreditch, Gray’s Inn, West End, Bloomsbury, Soho, Holborn, Moorgate, ower Hill, St Paul’s Cray, St. Paul’s, Covent Garden, St Mary’s Cray

Insulating the loft rafters

Insulating the loft rafters

You need to insulate the rafters only if you’re converting your loft into a habitable room. You can use most of the materials that you use on the loft floor but the easiest to use are the sheet materials, which the roofer can secure across the rafters and the blanket materials, which can be pushed between the rafters and held in place with timber
battens.

Insulate the loft at ceiling level or Insulate the loft at rafter level

Insulating pipework in the loft

If the pipes lie within your loose-fill or under your blanket insulation there’s no need to lag them separately, but if they’re positioned above you’ll need to wrap them with pieces of blanket insulation, ready-made mineral fibre rolls, or proprietary pre-formed pipe insulation. To prevent electric cables overheating you shouldn’t cover them with insulation. Attach them to the side of a joist or, if you’re using blanket material, lay them on top. If your wiring is the old rubber-insulated sort you’d be wise to replace it. Another point to watch now that the loft will be much colder is the greater risk of condensation in the loft space.

This can be a serious problem, which can rot the roof timbers and soak the insulation, making it useless. The way to avoid this is to ensure there’s sufficient ventilation in the loft space by leaving gaps at the eaves equivalent to 10mm all the way round. Don’t fill the gaps with insulation. At the same time, make sure that the gaps around pipes and the loft hatch are well sealed to keep moisture out.

Ventilation in the loft and new buildings

Ventilation in the loft and new buildings

Ventilation is the answer. This can be done by opening windows, installing extractor fans, venting exhaust air from clothes driers to the outside air and the use of balanced flue gas heaters. Water vapour moves about. It doesn’t only condense on cold surfaces in the room where it is produced; it can penetrate all parts of the home, and is likely to condense in any colder area it reaches. It also rises by convection to cooler bedrooms and the space under the roof. Warm, moist air gets into the roof space through ceiling cracks, holes used by pipes and electric wiring and gaps around the trap door.

It doesn’t matter how small the gap – it can still get through as it’s a gas. It also passes through porous plaster or plasterboard ceilings unless they incorporate a moisture barrier. Unless there is sufficient ventilation for it to escape to the outside air, it will condense on the roof covering and roof timbers. The severity of the condensation depends on the roof construction, how well the loft is insulated and ventilated, and how easily moist house air can get into it. However, it can very quickly build up in a poorly ventilated loft, saturating the insulation and making it quite useless. In the end it can soak through the ceiling too.

Loft insulation certainly makes a house warmer, but means that the roof structure will be colder. This exaggerated difference in temperature enables the water vapour to pass more easily from the house itself to the roof space. Tiles on loosely laid felt will ‘breathe’ and allow the moisture to disperse, but fully-lined roofs tend to trap moist air. Even worse are flat roofs having a lead, bituminous felt or asphalt covering; these cannot breathe at all.

Vapour inside the walls

The better draught-proofed, and more airtight a house, the more likely it is that moist air will force its way into the structure during the winter, possibly leading to condensation. While ‘superficial’ condensation is a nuisance and can spoil decoration, it is visible, and serves as a warning to the householder to provide better ventilation. But interstitial condensation can cause serious and lasting damage to a building and, unless it is so severe that damp shows through on a ceiling or outside wall, it can go unnoticed for many years.

In older draughty houses, risk of ‘interstitial’ condensation is slight, though superficial condensation will sometimes occur in unheated rooms. Risks increase when fireplaces are blocked up, windows double-glazed, external doors draught-proofed, and lofts and external walls better insulated. Builders of new, well insulated air-tight houses should guard against moist air getting into walls and the loft by using air barriers, called vapour checks, and by ensuring that any air leaking through is easily vented to the outside.

Loft insulation

Loft insulation is yet another way of retaining heat inside the main part of the house and also contains the risk of condensation, but it must be coupled with the provision of proper loft ventilation, or condensation may become a problem in the loft.

Loft ventilation

This is vital to protect the timbers in your roof from rot attack. The better the loft insulation the greater the temperature contrast between the loft and rooms below, and the greater the risk of condensation.

Central heating

Usually installed as the source of heat, central heating will also reduce the risk of condensation as the water vapour is not allowed to cool and the temperature differential between different parts of the house is reduced. But effective central heating is rather expensive to run for long periods these days.

Double glazing

This is a highly effective way of retaining heat as 20% is lost through windows which are single glazed. It also ensures that the inner pane of glass is not cold, which is usually the case with single glazing, and thus eliminates a major source of condensation.

Building your own house or home extensions

The Government’s initiative to encourage people to build their own houses can help with the housing in the long term.
If self-build is to prosper, it is essential that planners prevent large housebuilding firms from being the only ones with access to land on which to build.
If local authorities were to zone 50% of the available building land for selfbuild use only, it would be a helpful start. After a trial run of around 3 years, they could always increase the proportion to 75%.

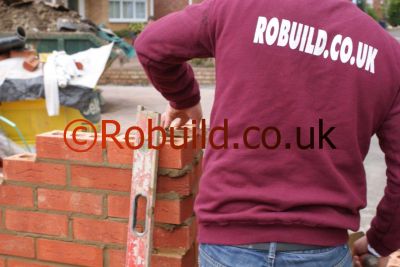
building walls bricks

What you usually have to do

Find and purchase a suitable site
Secure finance for your project
Hire a suitable architect/designer. You could, of course design it yourself, but don’t underestimate how tricky this is
You will need to project manage all the construction work, find good suppliers and negotiate with suitable sub-contractors and check the quality of their work
Usually you will also do a lot of the hard physical labour yourself – so, for example – you might do all the brickwork or roof tiling, plus the plumbing, the landscaping and decorating. So you may need to improve your building skills or attend a few courses.

Sound insulation and Soundproofing

Sometimes newly built house extensions and loft conversions are build with lighter materials than older ones, and the result is less, not more, insulation against unwanted noise. Older houses have a greater amount of protection because of their thick brick walls, but badly fitting doors and windows and uninsulated roofs all enable noise to enter. But the cure for the noise problem is not simply a question of shutting out the outside world. Interior noises, such as vibrating pipes, banging doors and footsteps reverberating throughout the house all contribute towards discomfort. Installing sound insulation in your home can be cheap and simple, or involved and expensive. It depends on the source of the noise (or noises if you are particularly unfortunate) and the extent to which you wish to remove it. Bear in mind, however, that it is practically impossible to stop excessive noise completely, though you can make it acceptable.

Controlling noise

The most effective way of overcoming noise is to eliminate or reduce it at its source. This will obviously be impossible if your problem is traffic or aircraft noise, but many irritating internal noises that are transmitted through the structure of the house can be stopped with little effort. One of the most common forms of unwanted internal sound is that made by parts of the plumbing system, particularly WCs, you may prefer to insulate the roof instead of the floor. This keeps the loft warm. If your loft is used as an attic room, and has floorboards, you will have to do this anyway. The easiest and cheapest way to insulate an attic roof is to use fibreglass matting similar to that used for a loft floor or rolls of acoustic insulation.
acoustic insulation

It has to be held in place by hardboard nailed to the rafters. The same rule as before applies about width: the matting should be slightly wider than the space between the rafters. It should not stick out at the ends, however, or it will get in the way of the hardboard. A simpler, but less efficient way to insulate the roof is to omit the matting and nail up insulation board instead of hardboard. Many types of insulation board are available. The types backed with aluminium foil conserve the most heat, but cost more than the others. storage cisterns refilling. In many cases a satisfactory reduction in noise can be achieved by simply attaching a length of plastic pipe (if one is not already fitted) from the ball valve outlet to near the bottom of the cistern. This will enable incoming water to discharge below the waterline and not splash on to it. Another method to cut down the noise is to fit a ‘silent’ ball valve. Another common source of noise in the plumbing system is vibrating pipes. This can usually be cured by fixing resilient pads, such as felt or rubber, either between the support clips and the wall to which they are fastening the pipe, or by using them as a sleeve between the pipe and the fixing clips. Also check that there is room for the pipes to expand where they pass through ceiling joists or partition walls, and that pipes to central heating radiators do not rub against the floorboards; when you turn on the heat, they will squeak as they expand.
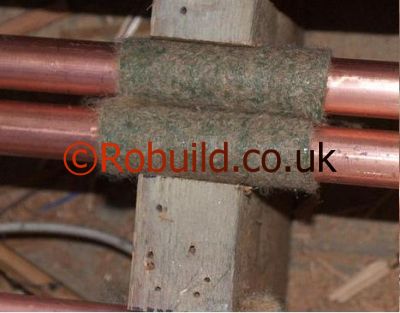
pipes noise
Resilient pads can also be used to help stop noise from large musical sources, such as pianos or large stereo speakers, being carried into other rooms.

Though most of such noise is airborne, and needs different treatment, some of it can be carried by the building structure—sound travels surprisingly well along, or through, some surfaces. This element of the sound can be reduced by standing the piano on resilient pads, or fitting a similar baffle between a speaker and the floor or wall. Noise caused by footsteps and banging doors can also be a source of irritation and can often be limited quite easily. Impact noises from footsteps can be reduced by laying a resilient floor finish such as cork, rubber, foam-backed vinyl sheet or thick-pile carpet on an underlay.

The noise of doors closing can be muted by fitting a self-adhesive strip to the rebate of the door frame, so that the door is cushioned when it is closed. The methods described above can successfully cut down much structure-borne sound, but excessive noise, whether it is internal or external, carried through the structure of the house or airborne, requires more extensive treatment. For really effective sound insulation, the inside of the roof should be lined, and the floor covered with glass fibre, or mineral wool. Sound insulation.

External noise

External noise is in the form of airborne sound, and in most situations attention to the windows and external doors will have the most effect in preventing it entering the house. Most noise enters buildings through the windows. If the noise is not excessive, merely sealing any gaps, however small, between the frame and the wall opening with a mastic filler or suitable cover strip, and fitting draught excluders, may reduce the noise to a satisfactory level. Fitting heavier glass will also have an effect on the insulation, but if the noise problem is severe, then it will often be necessary to fit double windows. The type of double glazing usually fitted for heat insulation is not very effective as a sound barrier, as it normally has only a narrow gap between the two panes of glass. To be really effective, the window should consist of two separate frames of 6mm float glass with a wide air space between. This should preferably be about 203mm-228mm (8in- 9in)—a gap of less than 100mm (4in) will not be effective. The sides of the air space should be lined with sound-absorbent material, such as 13mm (^in) fibre board, which should preferably be mounted on battens with a small air space behind. To prevent condensation occurring on the inside of the outer pane, some silica gel crystals can be placed on the bottom to absorb moisture, it is no use leaving the usual anti-condensation hole in the inside frame, because this will let sound through—and insulation is only as good as its weakest point. For the most efficient sound insulation, a double window should be permanently sealed and ventilation provided by mechanical means or by a window facing a quieter direction. This will not be convenient in many situations, but inner window units can be obtained which slide open. With any system that is not permanently sealed, fit draught excluders to the outer window, and ensure that the joint between the frame and the walls is properly sealed. The other major route through which sound will enter the house is through the external doors. Whatever you do, some sound will inevitably enter this way as it is not possible, of course, to permanently seal the doors. Noise can be minimized, however, by fixing a flexible draught strip to the bottom edge of the door, which will ‘take up’ irregularities in tr floor surface, and by fitting resilient foam strips into the rebate. The joint around the door frame should be sealed as for windows.

If additional soundproofing is required, building a porch which totally encloses the door will provide an effective sound barrier, a large volume of ‘dead’ air—as well as having many other uses.
porch
In some houses, particularly older ones, sound can penetrate through the roof. A covering of glassfibre or mineral wool laid between the joists will provide both sound and heat insulation and so would be a worthwhile investment. Also cover any gaps in the eaves with insulation board or wood battens. As an alternative to lining the ceiling with insulation materials, or in addition to it if the noise problem is excessive, you can fix plasterboard or insulation board to the underside of the rafters if the roof is unlined. (To stop any leaks or dirt from disfiguring the lining, a layer of building paper, well lapped at joints, is a good idea.)

Internal noise

Although most unwanted sound will probably come from outside the house, it is often desirable to install some form of sound insulation to reduce noise within the house itself—as anyone with a houseful of young children will know! Before embarking on major, and perhaps expensive, changes, first consider whether the careful use of sound absorbent materials will be adequate for your needs. When a sound is made in a room, the ear first hears the direct sound, and then that reflected from the walls, floor and ceiling. This reflected sound reinforces the direct sound (it all takes place within a fraction of a second) and is called reverberation. The larger the room and the harder and more reflective its surfaces, the more reverberation will occur.

Adding sound-absorbent material reduces the effect and helps to reduce the intensity of the sound passing through to adjoining rooms. In most cases, the best place to add absorbent material is the ceiling, as carpets, curtains and upholstered furniture all contribute towards sound absorption. The most common type of absorbent material suitable for ceilings is acoustic tiles. Various types are available. They are usually 300mm (12in) or 600mm (24in) square and are made of ordinary wood fibre, mineral fibre, or special lightweight plasters. They are light in weight and most can be attached to the ceiling with a suitable adhesive, although some require pinning as well.

Acoustic tiles come in a variety of patterns, such as regularly spaced holes, random holes, continuous slots and broken slots. The purpose of all forms is to expose the maximum area of absorbent surface to the sound. It is important not to destroy the texture of the surface by filling it in with paint. Most of these tiles are already decorated, but if further decoration is required, two thin coats of emulsion paint Similar materials are also available in the form of boards. These come in standard sizes, like plasterboard, and have to be pinned or screwed through the existing ceiling into the joists. It will help to locate the position of the joists and mark them with pencil lines on the existing ceiling first before offering up the boards. An alternative method is to attach 50mm x 25mm (2in x lin) battens to the ceiling first, and then fix the boards to them. The gap between the acoustic boards and the original ceiling will slightly increase the sound absorption properties. Sound absorbents are, however, limited in their effectiveness, and it may be necessary to take other steps to cut down the level of internal noise.

Insulating walls and ceilings

Generally, walls transmit mostly airborne sound, and floors both airborne and structure-borne sound. The denser a material is, the less readily it will vibrate, so the denser and thicker the wall, the more effective it is as an insulator. In existing houses it is not usually possible to increase the density of a dividing wall significantly, and improvement in sound insulation must be achieved in other ways. The sound insulating properties of a solid partition wall can be considerably increased by lining it with plasterboard or other building board on timber battens or studs. A 25mm (lin) thick layer of resilient quilt—fibreglass or mineral wool—should be sandwiched between the masonry and the battens. When fixing the battens or studs, use as few masonry nails as possible to keep direct contact with the masonry wall to a minimum. It is essential that all gaps in the board surface, and between it and adjoining walls, ceilings and so on, are filled as noise can penetrate through the smallest hole. Timber stud partition walls are poor sound insulators—the board panels act like large speaker diaphragms. The sound transmission can, however, be greatly reduced by forming a double stud partition.
partition wall insulation
In this, two sets of alternating studs, each faced with plasterboard or similar building board, are separated by a resilient quilt which winds in and out of the studs. The nature of sound transmission through floors is more complex, as both structure -borne impact noise and airborne noise occur.

Sound is passed through the floor itself, and the structural floor members transmit noise to the walls on which they bear. If impact noise through a suspended floor is severe, and cannot be satisfactorily reduced by the use of a resilient floor covering, then you may have to install a floating floor. The floor surface is attached to 50mm (2in) square battens which rest on the floor joists, a 25mm (lin) thick continuous layer of quilt, such as acoustic glassfibre or mineral wool, being first laid over the joists. The quilt should be turned up at the edges of the floor to isolate the floor surface from the walls. Once the quilt has been laid, the battens can be placed in position and lightly nailed to the joists. This nailing is purely to hold the battens in position as you lay the floor surface. It is essential that these nails are removed progressively from the battens as you nail the floor covering down, otherwise the effectiveness of the insulation will be reduced. Make sure that the nails you use to fix the floor covering to the battens will not penetrate the quilt or joists.

If you have installed a floating floor, it will be necessary to remove a certain amount of wood from the bottom of any doors because of the raised level. A ramp will also be required to avoid a ‘step’ down to any adjacent floor surface. A suspended floor can be made more resistant to airborne noise by increasing its weight. A common way of doing this is to lay a heavy ‘pugging’, such as a 50mm (2in) thick layer of dry sand, between the joists. First check with your local building inspector, however, that your joists will be adequate to support the additional weight. Sand is very heavy. In many cases, the ceiling lining will not be strong enough to carry the weight of the sand layer, so it will be necessary to attach a suitable platform between the joists first. This can be 13mm (^in) chipboard positioned on supports nailed to the sides of the joists.
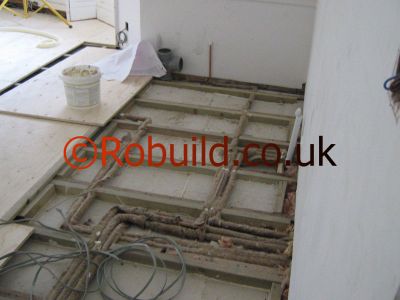
underfloor insulation
This method of insulating suspended floors can, of course, be combined with a floating floor to give insulation against both structure-borne and airborne noise. It is also a good idea, as the floorboards will be up, to check that there are no gaps where the joists pass through a partition wall —another way for noise to be transmitted. Fill in any gaps with mortar.

Sound insulation and Soundproofing builders in London

Laundry room extensions

Laundry room extensions

The advent of automatic washing machines and dryers has meant that domestic laundry activities no longer require constant attention, and can therefore be removed from the rest of the kitchen work. A separate laundry room is safer, quicker, quieter and cleaner than a washing machine operated at the kitchen sink, and makes the whole process more pleasant. The position of the laundry activities depends, to a great extent, on the existing plumbing in your home. There are also other practical considerations to bear in mind when designing a separate laundry room.

Traditionally, ‘washday’ has always monopolised the kitchen as well as most of a housewife’s time. A wet washday has tended to take over the whole house, with rivers of condensation and a general damp smell everywhere. Modern automatic appliances have gone a long way to alleviate this, and there are now single machines which wash, rinse, dry and air clothes at the press of a button. These are fairly rare, however, and obviously expensive. Although the average automatic washing machine is installed in the general kitchen area, several inconveniences remain.

Dirty clothes come close to food, and clean clothes are liable to acquire cooking odours if not dealt with immediately. The kitchen sink remains in constant use, and a general washday atmosphere prevails. Following the development of automatic laundry appliances, the next logical step is to isolate the whole laundry operation from the food area and place it in a separate room.

The size of a laundry A home laundry room does not have to be very large in order to be workable, and variations will depend on your individual requirements. An area 2.5m x 2.5m (8ft x 8ft) is sufficient to fit an automatic washer, separate tumble dryer, sink and adequate working surface for sorting, folding and ironing. For most people, space set aside for a single activity is a luxury, and it may be necessary to incorporate your laundry within a general utility room with washing as the main function.
In such cases the possible sizes will vary considerably. Since the finishes will be hard-wearing and practical, the room could also be used by children for drawing and painting, or by adults—for wine- and beer-making, for instance. If you are thinking of a secondary function for the laundry room, bear this in mind from the start so that adequate storage space can be included.

Positioning a laundry

You may be limited in your choice of position for a laundry. If none of your rooms is suitable for conversion, consider building on an extension. The position of a conversion or extension should be influenced strongly by the existing plumbing in your house. Laundries need hot and cold running water and a waste outlet. Position the laundry as close as possible to the existing water supply and drains, as this will enable a simple connection to be made to the water supply.

It be made to the water supply. It will also reduce, or eliminate, the need for the installation of new drains (underground), which can be very expensive. Ideally the waste pipe (above ground) from your laundry appliances should issue directly into the existing gully (sink at ground level leading to the drain). You may consider that other factors take priority over the cost of extending a drainage system. Access, for instance, is one which is very important and is influenced by the size of your wash and when you do it. A housewife with a large family, living in a house, will probably want easy access from the kitchen and to the garden. A young wife with no children, who is out at work all day, and lives in a flat, may find a room off an upper floor bathroom quite adequate for a laundry.

Possible conversions There are several possible conversions which may not be immediately apparent. A garage which is built into or onto a house would lend itself to being a laundry, providing there is sufficient space elsewhere to build a separate garage. A very large kitchen may become safer, more efficient and better looking if part of it is divided off to make a laundry. Older buildings often have a network of single-storey outbuildings, including redundant fuel stores and sculleries.

These are usually suitable for conversion into a laundry, or alternatively you could demolish them and build a new extension in their place. When planning an extension, remember to leave adequate external access from the front to the back of the house. This should be at least 915mm (3ft) wide to leave enough room for refuse collection. Avoid placing windows which open outwards onto such narrow accesses, as these can cause serious accidents. Laundry appliances Appliances vary considerably in size, and the price range for each type is wide. Your local dealer will be able to supply you with detailed information on the types available, and help you to find the right appliances to suit your heeds.

Washing machines

There are four main types of washing machine: 1. The single washing unit for rapidly washed small loads. Hand or powered wringers are available and often fit on top of the washing machine. This type doesn’t warrant being the centre piece of a laundry, but may well serve as a second machine in a communal room. 2. The twin tub, which incorporates a separate washing machine and spin dryer in a single cabinet. The clothes are handled between the washing and the drying operations, and controls have to be adjusted at certain stages. Twin tubs cannot be plumbed in, but are easily stored and moved. 3. Semi-automatic machines have an integral washing, rinsing and spin drying tub. The washing does not have to be handled between operations, but controls have to be adjusted at various intervals during the complete programme. Semi-automatic machines can be plumbed in or left mobile. 4. Fully automatic machines wash, rinse, and spin dry without the clothes being handled. Some more expensive types automatically tumble dry as well. Once a programme is set, the complete cycle works without any further attention. Automatic machines are usually plumbed in, but this is not essential.

Dryers

There are three main categories of dryer, or drying aid: 1. Spin dryers are available as separate machines, independent of automatic and twin tub machines. They do the job of a wringer—extract water from clothes. Spin dryers also rinse clothes, but there is no heat involved. 2. Tumble dryers are usually available as a unit separate from automatic washing machines. They take the place of the washing line, and some can be adjusted to air clothes as well. Tumble dryers are usually fitted with a vent which exhausts damp air to the outside. 3. Drying cabinets are available in many sizes, and some are small enough to fit under work benches. They consist of a heated and ventilated cabinet with hanging rails fixed inside, and the heat can be controlled to dry or just air clothes.

Ironers

Two main types of ironing machines are available: flat bed or rotary. They are useful for large quantities of simple ironing, but a hand iron is still necessary for complicated garments. When choosing which appliance to buy, you should consider the available space, the amount of washing you handle, available time, and the amount of money you can spend. Automatic machines require fresh hot water for every load, but with twin tubs careful selection of loads enables the same water to be used several times. Thus a second load can be washing while the first is spin drying, and large quantities of washing are dealt with more quickly and economically than with an automatic machine.

A well-equipped laundry should have a deep sink for some soaking prior to machine washing, and for hand washing. Provide hanging rails over the sink for drip-dry clothes, and also a draining board if the sink is not large enough to catch all the drips. A working surface approximately 1.83m x 610mm (6 ft x 2 ft) is necessary for sorting, folding and temporary stacking of clothes. The top should be strong enough to take an ironing machine if required, and should be 864mm (2ft lOin) high for ironing in a standing position. A retractable lower board can be incorporated for seated ironing. Storage should include a cupboard out of children’s reach for bleaches, dyes, detergents, washing powders etc. A tall cupboard is also required if you use a portable ironing board. This should be fitted with a fire proof lined, ventilated compartment for immediate storage of a hot iron. Provision of storage for dirty clothes, clean linen and an airing cupboard will depend on the layout of the rest of your home. If you are generally short of such space, large cupboards in the laundry could be very useful.

Electrical requirements

When planning electrical outlets, you should consider lighting, appliances, heating and ventilation. Provide a socket outlet for each appliance, not forgetting the iron, and extra outlets for future modifications. Provide ceiling lighting points so that you are never working in your own shadow. Pullcord switches are preferable where hands are likely to be wet. Under-floor heating is ideal for a laundry, in which case wiring has to be installed when the floor is being constructed. An electrical extractor fan placed high in an external wall is an asset.

Water Supply

Place the washing machine and the sink as close to the existing water supply as possible. The water can be supplied hot or cold, depending on the appliance and the general water system in your home. If the water arrives hot you save time, especially with an automatic machine which empties after every cycle. On the other hand, extracting water from your household system will rob your central heating or bathroom of hot water. Appliance manufacturers usually state whether hot or cold water should be used. To obtain water from your main supply, form a junction at a convenient height in the existing pipe. Insert a stop-tap in the extension pipe so that the machine can be moved without having to cut off the water supply to the whole house.

Appliances are fitted with a flexible hose for easy connecting and tolerance when finally positioning the machine. You should try to conceal pipes from general view wherever possible. Machines should be filled at the water pressure recommended by the manufacturers. Consult your water board for local pressures, and they will advise you on the kind of regulating valve you will need, if any, A water softener may also be needed in some areas. Waste outlets In Britain the Building Regulations impose certain restrictions on waste and drain pipes. Drains must have a sufficient slope to enable the water to run away quickly. Changes in the direction of a drain have to be fitted with an inspection chamber, and connections to existing drains are best made at such points. Waste pipes in houses built in Britain since 1966 have to be inside, and this also applies to additional pipes. Additions to houses built before 1966 can be fixed outside along with the original pipes.
Each waste pipe requires an ‘S’ bend water sealed trap to prevent drain odours from reaching the appliances. However, pipes from different sources (e.g. a sink and washing machine) can meet inside the building so that you only have to penetrate the wall in one place. Building materials Building materials used for a laundry extension should be chosen for their thermal qualities as well as structural stability and weather resistance. That means they should be good at keeping the warmth in and the cold out. This will assist the drying and airing process and provide a comfortable, economically run environment. It will also reduce condensation, which occurs when warm, damp air meets a cold surface.

Bricks and building blocks have good thermal qualities. Blocks, larger and cheaper to lay than bricks, may require additional exterior cladding for the sake of appearance. Windows should be large enough for adequate daylight, but too much glass will increase condensation problems, in which case double glazing may be necessary. Have as many openable windows as possible to aid ventilation. Where flat roofs are used there should be a 152mm (6in) gap between the outer cladding and the ceiling. This will increase the thermal capacity of the roof, especially if the gap is filled with fibreglass insulation. Beware of the wide range of prefabricated structures which are available. Initially they seem economical, but often they include large areas of glass and corrugated pvc roofing, the thermal qualities of which are minimal. The walls of prefabricated units often require extra cladding to insulate them sufficiently.

Flooring for laundry rooms

Durability and water resistance are the most important considerations when choosing flooring for a laundry room. If the wrong type is chosen, or it is badly laid, it will spoil the whole laundry and be dangerous. A solid concrete construction is preferable, and this must include a damp-proof membrane which will prevent damp from rising to affect adhesives and reduce the thermal qualities of the laundry. If under-floor heating is installed, use mosaic or quarry tiles on the surface. These will not be affected by the heat which builds up during off-peak periods, whereas plastic floors will soften and dent if they become too warm. Plastic tiles and sheeting generally provide a good economical floor finish, although some types tend to become slippery when wet. When covering a timber floor in a conversion with plastic, lay a sheet of hardboard over the floorboards. This will eliminate irregularities in the floorboards which show through the surface after some time.

Finishes and colours

A unified and clinical appearance is achieved if the same water-proof material is used on horizontal and vertical surfaces. Linoleum provides an adequate surface for laundries, and this is sometimes available in wall qualities which are thinner than the regular grades. Plastic laminate provides a more versatile surface for work-tops, but is more expensive than linoleum or plastic sheeting. Washable vinyl wallpaper is available in a wide range of designs. Do not attempt to use the normal absorbent papers in a laundry. Where painted walls are preferred, these should be gloss or satin finish. Matt finishes are more susceptible to steam and moisture. Colours must always remain a personal choice, but cool blues and greens help to give the laundry a clean appearance. If in doubt you cannot go far wrong with white everywhere. Ceramic tiles are expensive but help to give a permanent solid appearance which goes well with the designs of most automatic laundry appliances. If you bear these points in mind when planning a new laundry room, you should be able to produce a practical and attractive addition to your home. As with any major alteration, however, it is important to work out in detail what you want before embarking on the job itself.