Builders in London

Builders in London

Looking for a builder in London ?

The business card of a Builder and Decorator based in North London, Holloway Road.

business card builder London

On the business card of the Building Company established in 1840, reads:

New Work, Alterations & Repairs

SHOP & OFFICE FITTING, PLUMBING AND ZINC WORK, SANITARY WORK, SMITH’S WORK, STOVES ROOFS, DRAINS, RANGES, HOT WATER FITTING, ELECTRICAL INSTALLATIONS
DILAPIDATION SURVEYED

The Phone Number is: NORTH 3769

Building an ensuite bathroom

The cost of building an ensuite bathroom can vary. In London, the minimum cost for creating a decent en suite bathroom is around 10k, depending on where the ensuite bathroom is located, size, plumbing and waste location, type of shower, electrics, tiling, windows, ventilation and quality. Contact us to request a free quote.
All new building works must comply with the Building Regulations. New wiring is often required, together with a fuse protected by RCD device. Electrical ventilation in bathrooms is also required. The cost of adding an ensuite can be determined by the type of property also.

Location of the new ensuite bathroom

The minimum space required for a bathroom is around 1.8 meters by 90 cm. Shower cubical, wash basin, WC, toilet.

location ensuite bathroom
Marking the location of the new ensuite bathroom, using masking tape of the floor.

The location of the new ensuite bathroom is normally in a corner of the room, using two existing walls, but it can also be affected by the location of the drains and waste plumbing. By using a macerator, an electrically powered macerator fitted with a pump – can send the waste down a flexible pipe to a sewage outlet, giving more freedom when choosing the location of the bathroom, by ignoring the layout of the joist works. However, our bathroom builders will always try to use a conventional and traditional waste and drains system, as marcerators and pumps, can often break down , depending on how often is used. We normally use marcerators made by Saniflo.
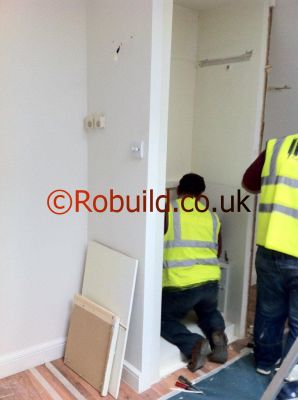
removing cupboard space new bathroom
Removing an old cupboard to make space for the new ensuite bathroom

Waste, soil pipes and drains

Traditional soil pipes and drains, always works best, however, sometimes the floor joist works, can be a problem and compromising is the only solution in order to avoid expensive and extensive building works.

new walls , floor joists, ensuite bathroom
Building new walls. Existing joist work running in the opposite direction of the waste/sewage outlet.

In some cases, the soil pipes can be run under the floor joist works.
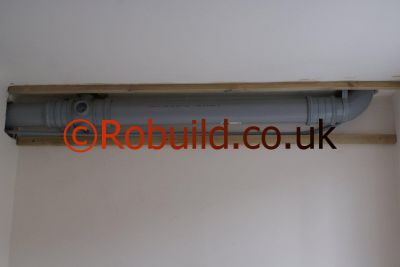
soil pipe ensuite bathroom waste
The soil/waste pipe underneath the new ensuite bathroom.
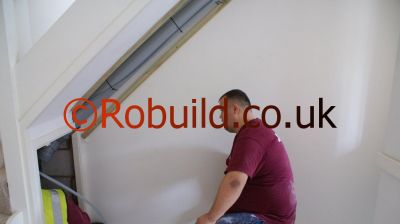
soil waste pipes from bathroom
The new soil/waste pipe connected to the main soil pipe

It is very important that the soil pipes are boxed in, not only for aesthetics, but also to avoid hearing the water and waste travelling through the soil pipe. Insulation, plasterboard and plastering normally will suffice. Lights can be used inside the boxed pipe to use the box as a feature in the room below.

pipe boxed in plasterboard
The soil pipe boxed in, using plasterboard. New lights as a feature are installed.
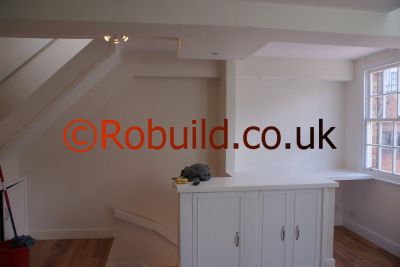
boxed in soil pipe after plastering painting
The box after plastering and painting/decorating

Walls and doors

The walls can be built using timber, as small as 47mm by 47mm, in order to use the minimum of space.The frame is then drylined with plasterboard,the cavity filled with acoustic insulation for sound proofing.Interior of the walls can be dry lined using water proof plasterboard, plywood or similar materials, where the tiling can be applied directly and no plastering/skimming is required.

ensuite bathroom walls
The ensuite bathroom walls

Constructing the studwork for the ensuite bathroom is normally done to complement the bedroom or room, matching the walls, skirting boards, coving, doors and other features.

new ensuite bathroom
The ensuite bathroom walls and door, after plastering, painting & decorating

The ensuite bathroom doors can be bi-folding doors, as they take less space and when are fully open.

bi-fold bathroom door
Bi-folding ensuite bathroom door

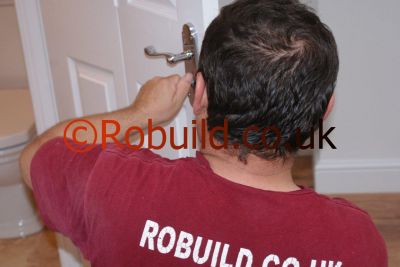
installing bathroom door lock
Installing bathroom door lock

Showers, wash basins and WC/toilets

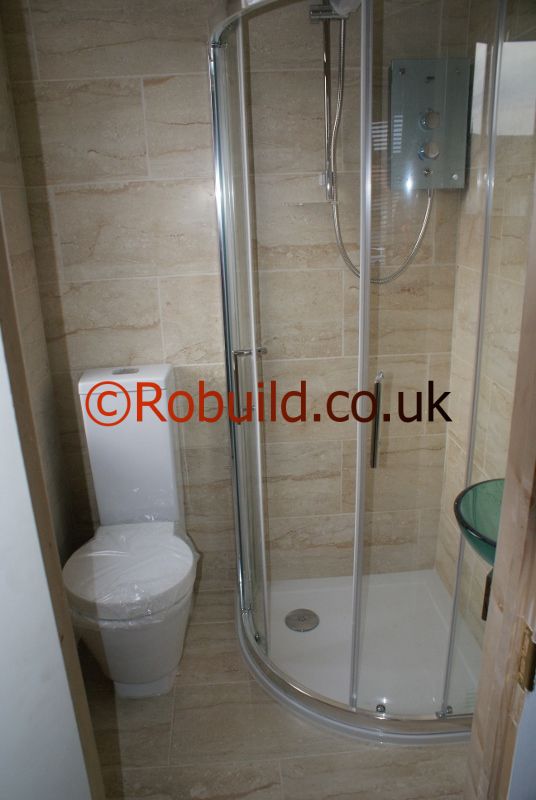
The minimum recommended showers tray size is 700mm by 700mm. The hot water can be provided by an electric shower or connected directly to the main boiler (recommended). However, if the water pressure is not high enough, a water pump might be needed. An electric shower must have its own fuse and electric cable.

ensuite bathroom shower tray and  shower door
Ensuite bathroom shower tray and bifolding shower door

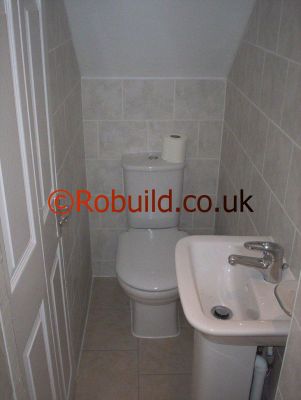
The wash basin should be a small size, due to the lack of space.A standard WC/toilet can be used.
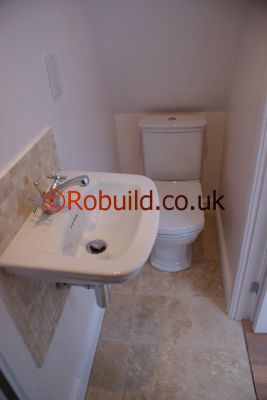
wash basin and WC/toilet in ensuite bathroom
Wash basin and WC/toilet in ensuite bathroom

ensuite bathroom washbasin
Ensuite bathroom

Ventilation for ensuite bathrooms

Ventilation is required by the Building Regulation.An extractor fan can be installed either inside the walls, or through the ceiling.
ventilation ensuite bathroom
Ventilation ensuite bathroom

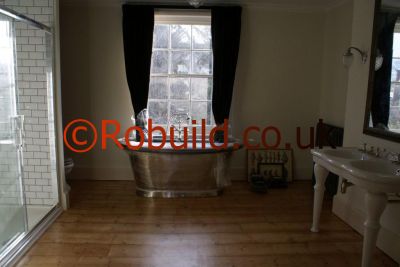
If space is not a problem, bigger and better designed ensuite bathrooms can be built. You can read more about adding a second or ensuite bathrooms.
designer ensuite bathroom
Designer ensuite bathroom

ensuite bathroom loft conversion
Ensuite bathroom in a loft conversion

ensuite bathroom bedroom
Ensuite bathroom with wetfloor, underfloor heating, in a new built house extension

Picture gallery of ensuite bathrooms
Building The Shard, London

The Architect for the building, called The Shard – is Renzo Piano, an Italian architect who did not want to be a builder like his father. Offices, restaurants and residential flats are designed to a high quality in a prime location in Central London.
the shard building, london
The tallest building in Europe, and is also the second-tallest free-standing structure in the United Kingdom, after the 330-metre (1,083 ft) concrete tower at the Emley Moor transmitting station.

The name Shard means Shard of Glass, because it reassembles a broken piece of glass.

http://youtu.be/u5A8p7SGg-0

You can watch how The Shard was built here : http://www.channel4.com/programmes/the-tallest-tower-building-the-shard/4od#3362233

London’s new cable car

A £44 million cable car system built and spanning the Thames in London, will carry passengers almost 300ft above the river between Greenwich, by the O2 Arena in south London, and the Royal Docks, by the ExCeL exhibition centre to the north.

What proportion of Britain is built on?

In England, “78.6% of urban areas is designated as natural rather than built”. Since urban only covers a tenth of the country, this means that the proportion of England’s landscape which is built on is…
Paved garden of a terraced house Scotland and the North-East embrace paving

… 2.27%.

Yes. According to the most detailed analysis ever conducted, almost 98% of England is, in their word, natural.

Elsewhere in the UK, the figure rises to more than 99%. It is clear that only a small fraction of Britain has been concreted over.

There will be quibbles. What about the gardens people have paved? The NEA looked at that, noting how in London an estimated 3,200 hectares of front gardens have been covered in concrete, bricks or gravel.

Paving levels are highest, it was found, in the North-East of England and Scotland, where 47% and 31% of front gardens are more than three-quarters paved. The detail in their analysis is impressive.

Quite simply, the figures suggest Britain’s mental picture of its landscape is far removed from the reality.

Doesn’t surprise me. If you fly into London in the height of summer, you get a very strong impression that you’re flying into a city of trees.

But most of our rural landscape is not ‘natural’. It’s the result of several thousand years of farming.

uk build on

Fixings, screws, wall plugs

Breeze block plugs
One thing ordinary plugs are not good at is gripping in soft or crumbling masonry, notably breeze block and aerated concrete block. Here a special plug is required. It consists of a central core surrounded by tough, flexible fins arranged in a sort of spiral. To use it, drill a hole a little larger than the central core, and hammer the plug in. The fins compress, then force themselves against the sides of the hole to hold the plug even if the masonry does give way.

Wooden pegging
The solution to the problem of fixing into mortar joints – take a piece of wood, preferably hardwood, roughly 19mm in diameter, taper one end, and then drive it into a 12mm (Jin) hole with a mallet. You can then screw into it in the same way as any other piece of timber.

Masonry nails
Masonry nails are used like any other nail. They are just specially hardened, and designed to penetrate and hold in masonry. They come in sizes to suit most jobs – choose a length that will penetrate the wall by about 19mm (Jin) – and, in spite of their tendency to shatter if you don’t hit them squarely, they do offer a fast way to get a fixing. However, the result is not neat, so reserve them for rough constructional jobs, where looks are not important.

Rawlbolts
The thing to use if you need a really heavy-duty fixing – for example, fixing a lean-to roof to the side of a house. Rawlbolts work in much the same way as a standard plug, but are made from metal, and come ready-fitted with a bolt. Various sizes are available, and you can choose between a number of types of head, including a threaded stud to take a nut, a hook, an eye, and a normal hexagonal bolt head.

Plugging compound
For a relatively light fixing in crumbling walls, use a plugging compound; a fibrous material that you mix with water and pack into the hole using the tool provided. Once the hole is full, make a starting hole with the pointed end of the tool, and carefully drive in the screw. As the compound dries, it “cements” the screw in place.

Fixings in hollow walls
Here, getting the screw to grip is even more of a problem than with a solid wall. After all, the screw has nothing to bite on but air. There are a number of ingenious solutions, but virtually all have a snag; remove the screw, and the fixing device is lost inside the cavity.

Petal anchors
Made from plastic, these are twisted onto the end of the screw and pushed through the hole into the cavity beyond. As the screw is tightened, the anchor’s petals open out against the back of the plasterboard, or whatever, thus preventing both anchor and screw from pulling out.

Spring toggles
These use the same principle as gravity toggles. The difference is that two sprung metal wings are used to do the bridging job.

Expanding plugs
Designs vary, but all work in the same sort of way. You push them into the hole, insert a screw – some have a built-in machine screw – and tighten up. The plug bulges out inside the cavity until it is too large to come back through the hole.

Gravity toggles
The toggle is essentially a small metal hinged device fitted to the end of a machine screw (supplied). When pushed through the hole, it flops down inside the cavity, bridges the hole, and so allows the screw to be tightened. This bridging action is ideal for lath and plaster walls.

Screwing into the framework
The only way to make a really strong fixing in hollow walls is to screw directly into the wall’s internal timber framework. This consists of upright “studs” spaced about 400mm apart, and horizontal “noggins” put in mainly where there is a horizontal join between plasterboard sheets. The former offer the strongest support for a fixing. To locate them, tap the wall until it sounds reasonably solid, then drill a series of tiny test holes until you strike wood. If the studs aren’t where you need them, span two with a stout piece of timber screwed in place on the surface, and make the fixing into that.