Minimising flood damage

Minimising flood damage from water leaks

Often the first sign of a leaking pipe will be a spreading stain on a wall or ceiling or a puddle on the floor. To prevent further damage, shut off the water supply immediately, before trying to trace the leak and repair it. You can sometimes anticipate water damage and keep it to a minimum. Where leaking pipes are concealed above the ceiling and a water stain is visible, place a waterproof sheet on the floor and position a catch basin under the wet area.

If water is leaking from a ceiling light fitting, shut off the electricity and drain the fixture by removing its cover. Poke a hole through the ceiling or remove a section of it to let any remaining water drain out. Stand out of the way! During a plumbing freeze-up, take precautions against leaks until you can be certain the pipes have suffered no damage. Since the leaks will be frozen until,the pipes thaw, waterproof the suspect area with plastic dustsheets like those used by painters. If you spot a crack, clamp a patch on it.

And be ready with a few extra bowls and buckets in case undetected leaks reveal themselves. If you arrive on the scene too late to avert a flood, you can still construct a makeshift dam from sandbags or rolledup rugs that will prevent the flood from spreading to other rooms. For a bad flood, you may need to use a submersible pump, usually available from tool-hire firms. If the situation is desperate, call a plumber or a plumbing company, which will always help in an emergency.

Emergency Pipe Repairs – Leaks

When you discover a leak in a supply pipe, the first thing to do, of course, is shut off the water supply to the damaged section so you can proceed to plug the hole. An application of epoxy glue or plastic tape is the quickest emergency procedure. Various “bandages” or plugs are even better. But before trying any remedy, make sure the pipe surface is dry enough for adhesives or sleeves to hold. In the case of a leaking supply pipe that is not frozen, completely drain and dry the affected section if possible-an electric hair drier does a quick job. Damaged pipes that are frozen should be left unthawed and undrained until patching is completed. Waste pipes and traps, unlike supply pipes, are not under pressure and normally contain no water (apart from the trap seal) when not in use.

Larger Leaks
A hose patch.
An effective temporary patch can be made by splitting a section of rubber hose lengthwise so that it will fit round the pipe. Strong, flexible wire, such as that used for hanging pictures, will serve to secure the hose-make a series of loops along the patch, spaced about 25mm apart, and twist each loop tight with a pair of pliers.

Tiny Leaks
Plugging o hole with o pencil.
A good emergency plug for a small leak in a supply pipe is a pencil point jammed into the hole and broken off; the soft graphite point will conform to the shape of the opening and seal the leak.

Securing the plug. Dry the surface of the pipe if after the leak has been plugged, then roll heavy tape over the damaged area to hold the plug in place. Wrap the tape several centimetres to the left and the right of the leak.

Securing hose with jubilee clips.

To fix a hose patch with uniform pressure, use jubilee clips as on a motor car hose. These clips can be adjusted to fit virtually any diameter of water pipe. It is best to install at least three clips over the patch.

Epoxy Adhesive
Coating and bandaging o split.
Epoxy glue makes a useful emergency repair for a cracked pipe. First drain and dry the damaged pipe. Mix the glue-available in kit form from plumbers’ merchants according to the instructions and spread it generously over and around the crack. Bandage the pipe tightly with nylon or fibreglass tape and apply a second layer of adhesive. Leave the patch to dry.

Binding threaded pipes.
If a leak appears at a threaded joint, drain the pipe, dry the damaged area and apply epoxy cement over the leaking joint. Allow the epoxy to harden completely, according to the manufacturer’s instructions, before restoring water pressure. Epoxy also can be used on plastic joints.

Fixing o lead caulked joint.
If water seeps from a lead-caulked spigot and socket joint, use a hammer and chisel to tamp down the lead inside the socket of the pipe. Since the lead is soft enough to be reshaped over the weak spot, this simple procedure often is sufficient to reseal the joint. Check first, however, that the leak is not due to a crack in the socket. If it is, the pipe will probably need replacing, since tamping down the lead might simply widen the crack and worsen the leak.

Water supply & drainage system

water supply drains london system

The diagrams for typical household pipe systems for the two principal forms of water supply and drainage found in the United Kingdom and London. Both supply systems may be found with either one of the drainage systems. (Pipes for central heating, are not shown.) The details of the piping will vary from house to house according to the location of appliances, but the main features are constant. Track the layout of the pipes in your own home before you attempt any repairs or alterations.

The supply system may be either direct or indirect.

In the direct type, the mains water is conducted through the vertical pipe known as the rising main straight to the cold taps and appliances throughout the house; in the indirect system, the rising main fills a cold water storage cistern located above the hot water cylinder-usually in the roof space-and water is then drawn from the cistern to supply the needs of the household. In this scheme, the law requires that one tap (usually in the kitchen) should always be supplied direct from the mains, so that the occupants can drink water that has not been exposed to airborne bacteria while stored in the cistern.

A second mains tap is permitted but not required; all others must be drawn from the cistern. The service pipe by which the water supply enters the house from the public water main is controlled by a stoptap designed to act also as a non-return valve. This is a precaution against the accident of back-siphonage, whereby an unexpected drop in mains pressure might, in unusual circumstances, allow contaminated water from an appliance within the house to be siphoned back into the mains, where it could pollute the supply. If the stoptap is outside the boundary of the property, it belongs to the water authority; if inside, it is the householder’s responsibility. Just inside the house is usually another stoptap, with which the owner can interrupt the flow into the household system, for instance before dealing with a leak.
It is useful to have stoptaps and valves at other points in the system as well, so that you can isolate and drain different sections of piping when you want to work on them. The drainage system may be either the single-stack type , in which W.C.s and all other appliances empty into the same soil and waste stack, or double-stack, where the soil stack for sewage is separate from the waste stack for water from baths, basins and sinks. All soil stacks, whether separate or combined, have a vent above roof level, to keep air flowing through the system. So that the sewers will not be overburdened by sudden storms, surface water-rain-sometimes flows through gutters and a trapped gully into a separate drain.

The direct system.
In a direct supply system, the cold water storage cistern feeds only the hot water cylinder, while all the cold taps, W.C. cisterns and other appliances are supplied under mains pressure. The double-stack drainage system, common in older houses, has a soil stack carrying sewage and a separate waste stack for to other household wastes, both positioned against the external wall of the house. They are usually constructed of cast iron, but many have been replaced by PVC at some time when they needed repair. The waste stack can be an open hopper head, but it could also be a sealed pipe, vented at roof level, like the soil stack.

The indirect system.
In a typical indirect supply system, only the kitchen cold tap and a garden tap are connected direct to the mains. The remaining taps and appliances, and the hot water cylinder, are fed from the cold water storage cistern. The single combined soil and waste stack, normally built of PVC piping, is located inside the house. The water from the kitchen sink is shown discharging into its own trapped gully; however, it might equally well feed into the main stack like the rest of the appliances in the house.

Spanners and wrenches for plumbing

Tools for plumbing
plumbers tools

1. Socket set.
Some of the accessories used with the socket set are the tee bar wrench (2), the rachet handle (3) and the extension bar (4). Sockets are available in the following thread styles:- American Fine (AF), British Standard Whitworth (BSW), Iso metric (M) and British Association (BA). Sockets for the last thread style are very small. These tools are used for loosening nuts and, providing you use the right size socket, the tool will not slip. There is, therefore, less chance of damaging the head of the nut than with a spanner. You can also achieve greater torque, or circular force, with these tools than with a spanner. Other accessories for the socket set are speed braces and the universal joint. These allow the sockets to be used in awkward positions. A torque wrench (not shown) can be calibrated to allow nuts or bolts to be tightened to a specific pressure. Socket sets are fairly expensive to buy but, as with most of the tools shown here, they can usually be hired.

2. Tee bar wrench.
3. Rachet handle.
4. Extension bar.

Pipe wrenches.
These types of pipe wrench are available in lengths ranging from 150mm to 1000mm and will cope with pipe sizes ranging from 13mm to 150mm diameter. These wrenches are mainly used for work on iron pipes – they can easily damage softer metals like copper and brass. The head is sprung loaded and this, together with the toothed jaws, enables a strong grip to be exerted on round pipe sections as opposed to hexagonal nut sections.

7. Adiustable wrench or spanner.
This is a very useful tool, particularly for copper plumbing. They are available in a range of lengths from l00mm (4in) to 500mm (20in) with jaw opening of between 13mm to 163mm. Do not use this wrench on fine engineering nuts or bolts of the type used, for example, for automobile assembly. The jaws are too large for such nuts which can easily be damaged – and this could result in the loosening of these nuts and bolts and the creation of a potentially dangerous situation.

8. Chain wrench.
This is an easily adjustable wrench for shifting heavily rusted or encrusted iron pipe joints. It is lighter to use though less effective than the heavy duty pipe wrench. Available in handle lengths of between 300mm and 450mm.

9. Universal gripping and clamping tool.
This tool has a variety of trade names including Mole and Grip-Lok. Available in a wide variety of shapes and sizes. An attachment is available which allows the tool to be used as a mini bench vice.

10. Slip joint pliers.
This tool has a thin section to allow the nose to slip into tight places. It has two jaw opening positions and a shear type wire cutter.

11. Needle nosed side cutting pliers.
These are used for fine wire work. Radio pliers are the same except that they have insulated handles.

12. Electrician’s or combination square nosed pliers.
These are heavy duty pliers with a square nose and serated hole – both of which can be used for holding small diameter tubing and nuts and bolts. Usually this tool has two types of wire cutter, a shear cutter and a side cutter. The handles are insulated but make sure when you buy this tool that the handles are guaranteed to withstand any voltage with which the pliers are likely to come into contact.

13. Round nosed pliers.
These pliers do not have a great deal of domestic application but are useful for coiling or twisting wire.

14. Water pump pliers.
These are adjustable pliers with up to six different jaw positions. They are general purpose pliers useful in plumbing.

15. Scotch gas pliers.
These are general purpose pliers, used where a light but firm grip is needed.

16. Open ended spanners and wrenches.
These are available in every nut and thread size encountered.

17. Ring spanners.
It is preferable to use these spanners wherever possible as they are far less likely to slip than open ended spanners. You can also obtain greater torque with these spanners.

18. Combination spanners.
These tools have an open spanner at one end and a ring spanner at the other. For a complete set you will obviously need twice as many spanners than for a full set of ring or open ended spanners.

19. Allen keys or hollow head wrenches.
These are used with hexagonal hollow headed screws.

Heating

Central heating is expensive, but insulating the first real step towards cheaper warmth can be comparatively cheap. Most of the heat escapes through the roof, so (if it has not already been tackled) this is the place to start. Short of foam injection of cavity walls (usually possible in newish houses, and very expensive at that)wall insulation and wall fabrics give more warmth than paint or paper. An alternative to double-glazing which, cost wise, is the highest in terms of value-for-money) is either to put old shutters back into working order or to have thick curtains lined and interlined, or two rows of curtaining. Whichever you choose, remember that a sound principle of insulation whether from heat, cold, or or noise is to trap a layer of air between two layers of material. ‘Material’ may mean anything from tweed to glass depending on the limits of your budget and your personal preferences.

insulation loft conversion

Fittings for plastic pipes

Joints and fittings for plastic pipes

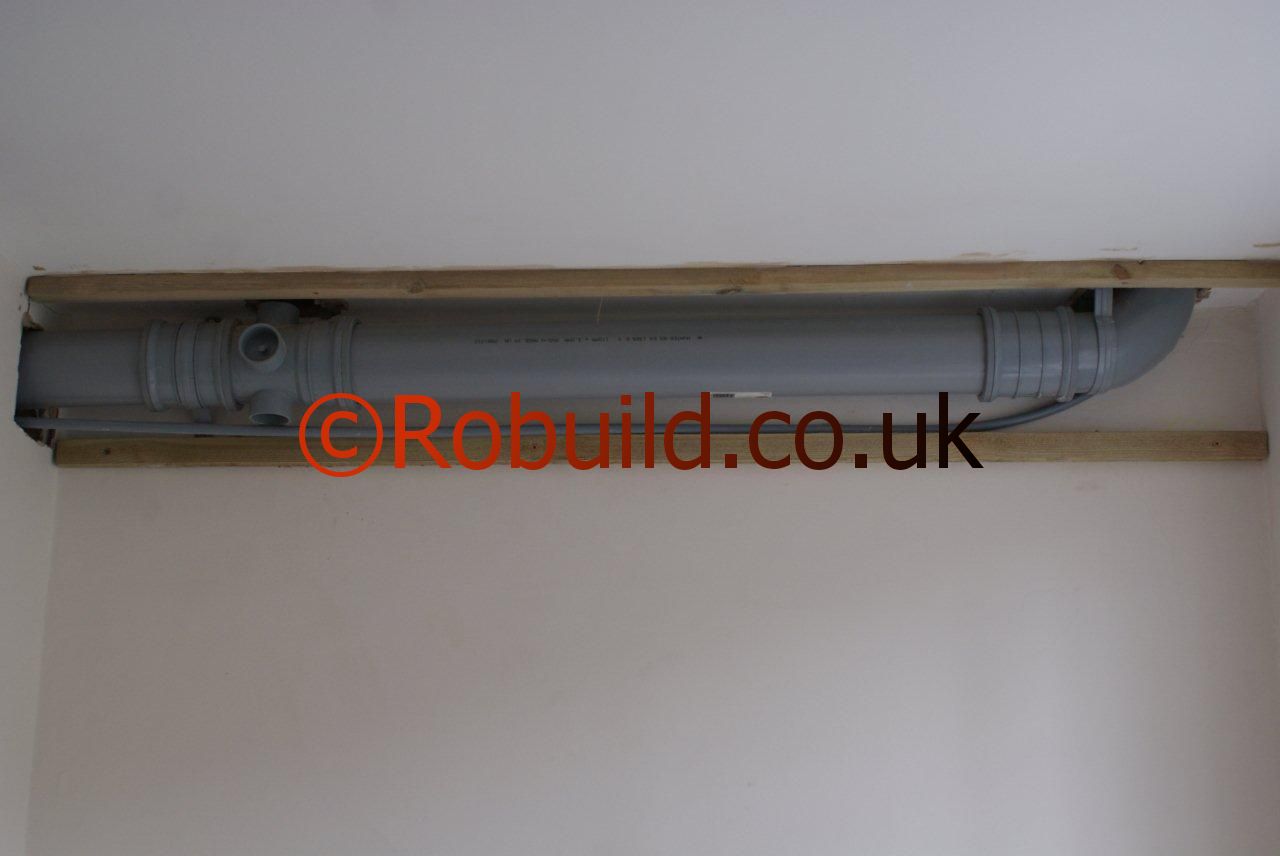
Plastic pipes are mostly used for drainage plumbing. WCs,wash basins, sinks, baths, showers, washing machines, etc

With compression fittings for plastic pipework a special sleeve is inserted inside the pipe end to prevent it becoming distorted where the nut on the fitting is tightened. If you have difficulty inserting the sleeve, carefully apply heat to the end of the pipe. This will soften it sufficiently to allow the sleeve to be slipped in. To assemble the joint, start by placing the nut and then the compression ring on each pipe end. Insert the sleeve and then push one pipe end into the body of the fitting and tighten the nut by hand. Finally use a spanner on the nut but be careful to avoid overtightening (a couple of turns should be sufficient). Then repeat the procedure for the other pipe end to complete the joint.

Solvent welded joints are easy to make and exceptionally strong. A chemical is coated over both surfaces of the joint which welds the plastic surfaces together and, provided the instructions are followed carefully, there is little that can go wrong.

plastic pipe drain bathroom
Socketed pipes or a special separate fitting, are used with this method. First ensure that the surfaces to be welded are completely clean and grease free. Manufacturers usually supply a special cleaner for this. Then coat the two surfaces thoroughly with the special solvent cement. Note that you should always use the solvent recommended by the manufacturers as some solvents are not suitable for particular plastics. When both surfaces have been coated all that remains is to insert the spigot end of the pipe into the socket of the other or into the special fitting as far as it will go (a ‘stop’ is provided to prevent you pushing it too far). Then give the pipes or pipe and fitting a twist to distribute the solvent evenly. Wipe off any excess solvent squeezed out of, the joint and leave the joint for between 12 and 24 hours (according to the manufacturer’s recommendations) before testing.

The advantage that rubber ring-sealed joints have over other methods is that allowance is made within each joint for thermal expansion. With this joint an ‘O’ or ‘D’ shaped rubber ring is first inserted into a groove in the socket end of one pipe (or into a separate fitting). A special lubricant – soap can be used if the manufacturer does not supply one-is smeared over the spigot end of the pipe and the pipe is then pushed firmly into the socket or fitting as far as it will go. It is particularly important to ensure that the rubber ring does not become displaced during fitting, so the two pipes must be perfectly in line during this operation. Note that the end of the spigot should be chamfered to about 15 degrees for easy insertion.

This chamfer is normally included in the spigot end during manufacture, but if you have to cut the pipe use a file to chamfer the cut end. When you have pushed the pipe right up to the stop, withdraw the pipe a certain distance to allow for an expansion gap. This gap varies according to the material used. Some manufacturers put a mark on the pipe near the end and others give instructions as to how far to withdraw the pipe.

Installation details

The manufacturer’s instructions regarding the installation of their pipework should be closely studied and followed exactly. The main factor to take into account is thermal movement. If your pipes are jointed with the ring seal method you have no problems as allowance is made, as described above, for expansion in every joint. You must still, however, be careful that no tight restrictions are placed on the pipes themselves. Pipe clips (spaced at manufacturer’s recommended intervals) must not be so tight as to restrict the expansion of the pipe. You must also leave suitable gaps wherever pipes pass through walls.

The solvent welding method of jointing, however, prevents any movement in the joints and allowance has to be made elsewhere in the system. This is done by incorporating special expansion couplings at specified distances apart. Providing you take particular care to read all instructions thoroughly the actual physical work involved in installing a plastic pipework system is quite straightforward and easy, and you will have a system that should be maintenance free and exceptionally long lasting.

South Kensington

Boilers, Central Heating, Drains,Plumbing

We have a very professional team of Gas Engineers and Plumbers,fully qualified and Gas Safe Registered plumbing team.
New boiler installation, boiler repairs,combi boilers, central heating,radiators, underfloor heating,showers, bathrooms,kitchens, gas work,drains.
We cover South Kensington & Chelsea.

central heating boiler

Capillary fittings

More work is involved when making joints with this type of fitting, but they have the advantage of being cheaper and less bulky than compression fittings. There are two types: one has a ring or reservoir of solder incorporated during the manufacturing process and simply needs the application of heat to seal the joint ; the other type, known as ‘end feed’, has to have molten solder introduced at the fitting mouth.

capillary fittings plumbing pipes

Before you start to make the joint, make sure that the surrounding area will not catch fire when you use the blow torch. Use asbestos mats (if you do not have them, spare pieces of ceramic tile will do) to cover any adjacent material liable to catch fire. To make a capillary joint, alter cutting and preparing the pipe, thoroughly clean the inside of the fitting and the surfaces of the pipes, otherwise the solder will not adhere. Use a rag to remove any grease or dirt and then burnish them to a bright finish with either fine wire wool or fine glasspaper.

A suitable flux recommended by the fitting manufacturer should then be smeared over the outside of the pipes and the inside of the fitting. Take care that no areas are left bare. Now insert the ends of the pipes into the fitting, ensuring that they reach the integral stop, and make a scratch mark on the pipes next to the fitting to indicate any unwanted movement. Either the fitting or the pipes should then be twisted to help ‘bed in’ and distribute the flux evenly. Wipe off any excess left outside the joint. Heat should now be evenly applied to the whole fitting area with the blow torch.

With pre-soldering fittings it is only necessary to continue heating until a ring of solder appears around the circumference of the fitting mouth. While not strictly necessary, an added precaution against leaking is to run a piece of cored solder around the mouth of the still-hot joint. End-feed fittings should be heated until they are sufficiently hot to melt the solder wire, which is introduced around the mouth of the fitting. Once the solder starts to melt, slowly take it round the fitting mouth until the fitting overflows and will accept no more. Leave a ring of solder around the edge of the fitting as before.

Once the joint has been completed, using either fitting, leave it for at least two minutes to cool and harden. Finally wipe off any flux left on the exterior of the joint. If you are using stainless-steel pipe, special precautions must be taken to make a satisfactory joint. Ordinary flux used for copper is not satisfactory; an ‘aggressive’ flux is necessary to remove the oxide which forms more quickly on stainless steel than on other metals. Several types of flux, in liquid and paste form, are suitable, most of which contain an acid base. As these are highly corrosive, they should be handled with care, and any excess left on the external surface of the pipes and fittings ,must be removed.

The pipes should also be flushed out as soon as possible to remove any traces of flux from the inside of the pipe bore. The other difference concerns the application of heat. This should be directed on the fitting only, and not on the pipes. This is because the thermal conductivity of stainless steel is lower than copper and any heat applied to the pipe will not be effective.

Compression fittings

Compression fittings are the most common type and the easiest to use. Two types are available :’manipulative’ and ‘non-manipulative’. The first is seldom used nowadays for domestic purposes. A special tool is required to ‘bell out’, or force open, the ends of the pipes, which are then compressed against the fitting body, when the nuts are tightened, to make the joint.

Non-manipulative fittings rely on the compression of a soft metal ring, known as a cone, olive or ferrule, against the external wall of the pipe to create the joint between pipe and fitting. No ‘working’ or distortion of the pipe itself is required, and so the work involved is much easier. To make a joint with this fitting, the pipe ends must first be cleaned up, as previously described, with the files. Place the nuts on to the pipes, and then the cones. The cones have two chamfered faces, and if one of these is longer than the other, the long face must be placed towards the pipe end. Each pipe is then inserted into the fitting as far as it will go. A ‘stop’ moulded into the fitting will determine the depth of entry.

You must ensure that the pipes do not ‘creep’ out of the fitting while the joint is being made. Once they have been pushed in, scratch them next to the fitting with a nail or other sharp object. This will show up any movement. Before sliding home the cones, it is wise lo srnear a little non-toxic jointing compound on the cone. Manufacturers do not stipulate this, but it helps to ensure a watertight join. Once the cones are inserted into the fitting, the nuts should be engaged on the threads and tightened as far as possible by hand. Two or three turns with an adjustable spanner on each nut are generally sufficient to complete the union. Use the second spanner to hold the body of the fitting while you tighten each nut. Do not overtighten or either the threads may strip or the olive may be forced into the pipe, making a bad joint. Although the procedure described above is basically the same for all makes of nonmanipulative fittings, it is wise to read any instructions supplied by the manufacturer before starting work.

Connectors and fittings

An extensive range of fittings is available for joining pipes together and for connecting them to taps, cisterns and so on. Straight connectors, bends and tee junctions are most commonly used for joining pipes. In addition to these there are ‘tap’ connectors designed for fitting to male iron threads (taps and ball valves), ‘tank’ connectors which have two flanged surfaces for attaching to the side of a water storage cistern, and various adaptors for changing from iron or lead pipe to copper or stainless steel.

Fittings are also available which are designed to permit a reduction in pipe bore. Other, not so common ones, include drain-off cocks, stop ends, blanking off discs, swept tees, and obtuse bends. This is not a complete list of available fittings. Manufacturers issue catalogues of their fitting range and it is well worth acquiring a copy for reference purposes. For joining copper or stainless-steel pipe, two types of fitting can be used-compression and capillary