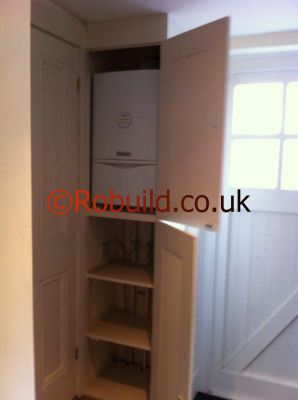
Plumbing means pipes, which can be unsightly if left exposed. Boxing them in will tidy up the look of the home. Whichever method you choose to conceal pipes, the first task is to strip the wall around the pipes so a supporting frame can be securely fixed. Make sure the pipes are in good condition and that the joints are well made. Check compression joints for tightness and, if there is any corrosion, remake the joints. Before boxing in make sure the pipes are fixed securely to the wall with pipe clips.

Boiler boxed in – cupboard
Where pipes come through the floor from a room below, seal the gap between the pipes and the floor with a shaped piece of 12 or l8mm chipboard to reduce the risk of fire spreading. Pipes on an outside wall should be insulated with a glass fibre blanket or with shaped foam secured with tape.
Making the box
Using plugs and screws fix 25 x 19mm timber battens vertically to the wall on each side of the pipes; check with a plumb line to ensure accurate positioning. Where the pipes are on an open wall, glue and screw or pin 12mm thick plywood or chipboard to the sides of the battens (the width of the timber side pieces depends on the depth required for the box). Where the pipes are in a corner you will need only one side piece and, if the pipes protrude less than 50mm from the wall, you may not need side pieces at all. In this case use 25mm battens, wide enough to clear the pipes, as side pieces.
Front panel
Cover the pipes with 3 or 5mm hardboard or plywood; if you want a more solid panel, use 12mm chipboard. Don’t glue the front panels in place because you must have access to the pipes in case of leaks. Fix hardboard or plywood with panel or hardboard pins and secure chipboard with countersunk screws. You will achieve a better finish if you cut your front panel slightly oversize and trim it back with a plane once it is fixed in position. Use a cellulose filler to fill any cracks and countersunk screw heads, except where these provide access. Give the box a coat of primer before decorating as required. When decorating, make sure you do not cover the join or your decorations will be spoiled when you need to remove the box.
Stopcocks and draincocks
Where there are stopcocks or draincocks in the pipe runs you must cut holes in the front panel to allow the handles to protrude, unless you fit access covers in the boxes. Alternatively construct a box which can be easily removed. Make up a hardboard box of the required size, using 25mm square battens at the front corners to give it form. On the inside face of the front panel glue 19mm wide battens at approximately 1m intervals and secure them with panel pins hammered through from the outside. Screw Terry clips of the required size, according to the pipe dimensions, to the battens; these will snap over the pipes and secure the panel.
Disappearing pipes
Where pipes disappear into a wall, the bottom or top (as applicable) of the box can be finished at an angle. Cut the side pieces and/or battens at 45 degrees, pin a small piece of hardboard or plywood to the sloping part and plane across the front panel until it forms a neat joint.
Alcove pipes
When you wish to conceal pipes in an alcove it is often best to cover the entire wall area with a full width panel; this robs you of little space and does not affect the look of the wall line. Fix timber battens on each side of the pipes, as previously explained. Plug and screw a piece of batten on each side of the alcove level with the front of the battens on each side of the pipes. Use 9mm ($in) chipboard, fixed with countersunk screws, to conceal the pipes and to provide easy access and nail 9.5mm plasterboard either side of the chipboard.
You can use the same method, but with a stronger framework, to conceal cisterns and soil and water pipes.
Skirting board pipes
Screw a batten to the floor with its face just in front of the maximum projection of the pipes. Glue and screw a 12mm facing board to the batten, then glue and nail scotia moulding to the top of the facing board. Finally glue and pin a strip of hardboard or plywood between the moulding and the top of the skirting. If you want a round edge finish, use a facing board of the same height as the skirting; glue and pin a length of 12mm board to the top of the facing board and skirting and round the front edge with a plane. Although a certain amount of time, effort and money is involved, you will be surprised how much neater rooms will look when the pipes have been boxed in. You can paint or wallpaper the covering.
